background image

Screen settings 

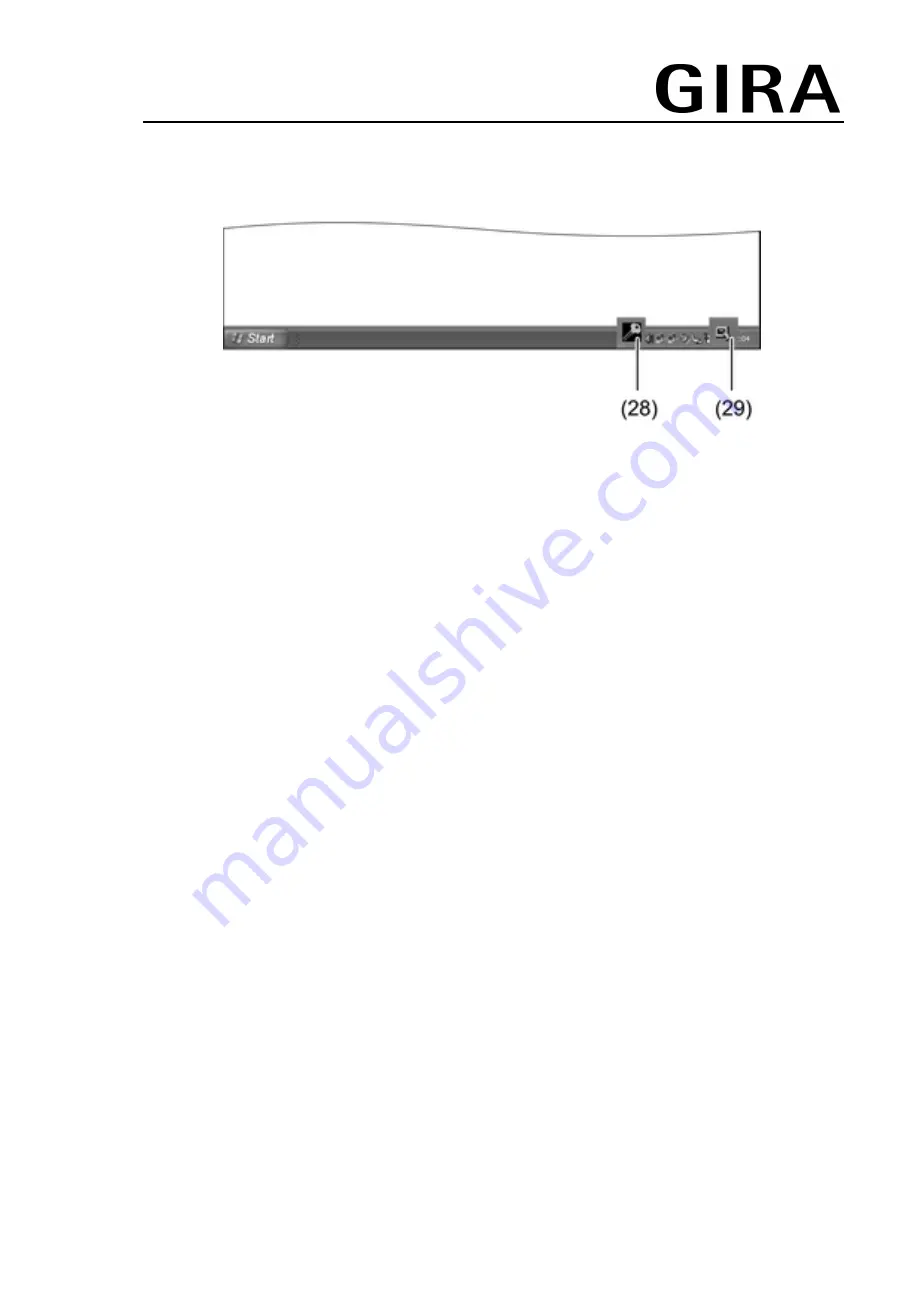
In the information area of the taskbar, it is possible to open service programs for screen 
settings, e.g. for screen brightness and the calibration of the touchscreen. 

Figure 4: Icons for service programs 

Settings for screen brightness, screen alignment or changing write-protection: 

Select the icon (28) with the mouse pointer. 
The menu for the service program opens. 

Select the required items and make the appropriate settings. 

Changing the settings for mouse pointer or the touch screen: 

Select the icon (29) with the mouse pointer. 
The menu for the service program opens. 

Select the required items and make the appropriate settings. 

Installing programs 

Before installing additional programs, take the system requirements of the programs into 
account.  

Deactivating write filters: select the icon (28) with the mouse pointer. 

Select the menu item "Write protection". 
The window for the write filter settings opens. 

Deactivate write protection. 

Press the "Apply" button.  

Press the "Close" button. 

Shut down the panel and restart it. 

Install the program, e.g. from a USB stick. 

Activating write filters: select the icon (28) with the mouse pointer. 

Select the menu item "Write protection". 

Activate write protection. 

Press the "Apply" button.  

Press the "Close" button. 

Shut down the panel and restart it. 

Updating the operating system 

Download the update from the manufacturer's website and save it to the SD card, USB 
stick or similar. 

Insert the storage medium in the panel. 

Start the installation and follow the instructions on the screen. 

82576702 

15.11.2010 

5/10 

Control 9 Client 

Содержание 2078 00

Страница 1: ...sconnect device before working on it At the same time take into account all circuit breakers that supply dangerous voltage to the device Do not operate the device with sharp or pointed objects The tou...

Страница 2: ...oncealed mounting in interior areas flush to the wall in a Control 9 installation housing see Accessories chapter or with adapter frame in installation housing for information terminal Product charact...

Страница 3: ...rds until it engages Switching a device on or off The On off push button 6 can be reached when the Design frame 1 has been removed o Switching on Press the push button 6 The panel switches on after ab...

Страница 4: ...ected to the USB interface File based write filter The device contains a hard drive SSD as a mass storage facility To prevent unauthorised changes to the configuration the drive is protected by a file...

Страница 5: ...programs take the system requirements of the programs into account o Deactivating write filters select the icon 28 with the mouse pointer o Select the menu item Write protection The window for the wr...

Страница 6: ...g and connecting the device Figure 5 Rear side Connections 31 Connection for future expansion 32 Ethernet connection 33 Mains connection 34 Ventilation openings 35 Connection for Audio input and outpu...

Страница 7: ...en live parts are touched The mains voltage and low voltage are located in a shared appliance box If there is an error other connected components may carry mains voltage Electrical shocks can be fatal...

Страница 8: ...adapter plug To do this strip the Ethernet wires do not skin and insert into the cover of the adapter plug Shorten any wires that are jutting out and push the cover onto the adapter plug in the correc...

Страница 9: ...pe A 2 back 1 front Programming interface Connection Mini USB type AB 5 pole Network Type 10 100 MBit s Ethernet Connection RJ45 socket 8 4 pin Dimensions Dimensions WxHxD 283 117 65 mm without design...

Страница 10: ...nstallations Systeme Industriegebiet Mermbach Dahlienstra e 42477 Radevormwald Postfach 12 20 42461 Radevormwald Deutschland Tel 49 0 21 95 602 0 Fax 49 0 21 95 602 399 www gira de info gira de 825767...

Отзывы: