UK
10
You can clean the tank by means of a water jet or with a proper tool made of plastic or wood in case of
more resistant sedimentations.
Reassemble the flanges and their gaskets into their place again on the inspection hatch,
checking their seal. If necessary, use a new gasket.
Please note that the counter-flange with 4 holes needs M12 nuts with a tightening couple of
20 Nxm ± 3 N. Fill the unit once again following the instructions and make sure it is watertight.
c) Anode inspection
The appliance is protected from corrosion by means of a glass lining treatment of the tank and
of the coils.
The appliance is also provided with a magnesium anti corrosion anode, which protects the unit
against eddy currents which may damage it. The life of the anode depends upon the unit
working and the quality of water.
You can inspect the anode (we recommend you do it at last once a year) and you can replace
it.
In order to check and/or replace the anode you must first of all empty the appliance as
described above and then remove the plastic flange cover.
In order to remove the anode you must unscrew the counterflange with 4 holes.
After the inspection and/or replacement you must make sure the appliance is watertight.
The replacement must be made with original parts.
Содержание ISSWT 120
Страница 7: ...IT 6 Fig 3 ...
Страница 13: ...UK 12 Fig 3 ...
Страница 19: ...DE 18 Fig 3 ...
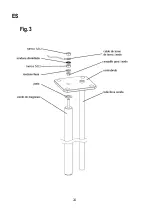
Страница 25: ...ES 24 Fig 3 ...
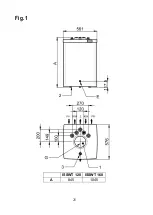
Страница 26: ...25 Fig 1 ISSWT 120 ISSWT 160 A 845 1045 ...
Страница 27: ...26 Fig 2 ...


