6003
4514
4582
4528-S
4530-S
14
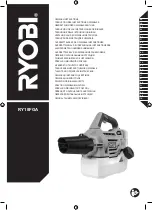
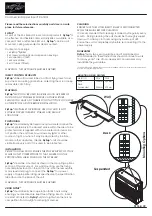
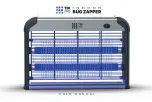
MODEL: Gilbert® 747GT-230 "Sticky Bear"
See Parts List (Page 15) For Part Descriptions
INSTALLATION INSTRUCTIONS
1. THIS UNIT IS DESIGNED FOR INDOOR USE
ONLY.
2. LAMPS SHOULD BE IN A HORIZONTAL POSITION
WHEN UNIT IS PROPERLY INSTALLED.
3. USING A LEVEL AND PENCIL, DRAW A STRAIGHT
33" LINE APPROX. 3' ABOVE FLOOR. COME IN 1/4"
FROM ONE END AND MARK ACROSS THAT LINE.
MEASURE 32" FROM THAT POINT AND MAKE
A SECOND MARK. MOUNT THE TWO SCREWS
(PROVIDED) AT THE CROSSPOINTS, LEAVING
1/2" OF THE SCREW STICKING OUT. SLIDE UNIT
ONTO MOUNTING SCREWS AND CONNECT TO
AC POWER.
NOTE:
IF MOUNTING ON MASONRY, USE A 3/16"
BIT (NOT PROVIDED) AND DRILL OUT THE TWO
CROSS MARKS AND INSERT THE TWO PLASTIC
ANCHORS (PROVIDED) BEFORE MOUNTING THE
TWO SCREWS.
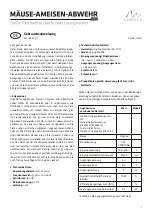
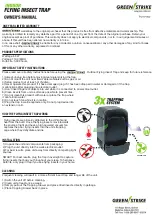
The 747GT-230 Sticky Bear™ features superior effectiveness
for control of flies and other flying insects. The Bear has key
hole slots located on back for wall installation.
Generally
speaking, the lower any trap is placed, the more effective
it is against flies.
The Bear is normally mounted 24" above
floor. Two glueboards are normally placed in the catch tray of
the trap. 2 (optional) glueboards can be wedged into holder
behind top lamp and folded at dotted-line to help retain glue.
Model 747GT-230 Sticky Bear™
PROFESSIONAL GLUEBOARD LIGHT TRAPS
INSTALLATION AND APPLICATION
REMOVE ALL PACKING MATERIALS BEFORE INSTALLATION
Don's idea of flytraps, as only one tool in his bag, to be applied with a sincere desire
to help customers in any way he could, was simple and honest.
Today, Don's son endeavors to carry that philosophy forward,
leading the way to the truly professional use of flytraps