GigaFast
Section 4
–
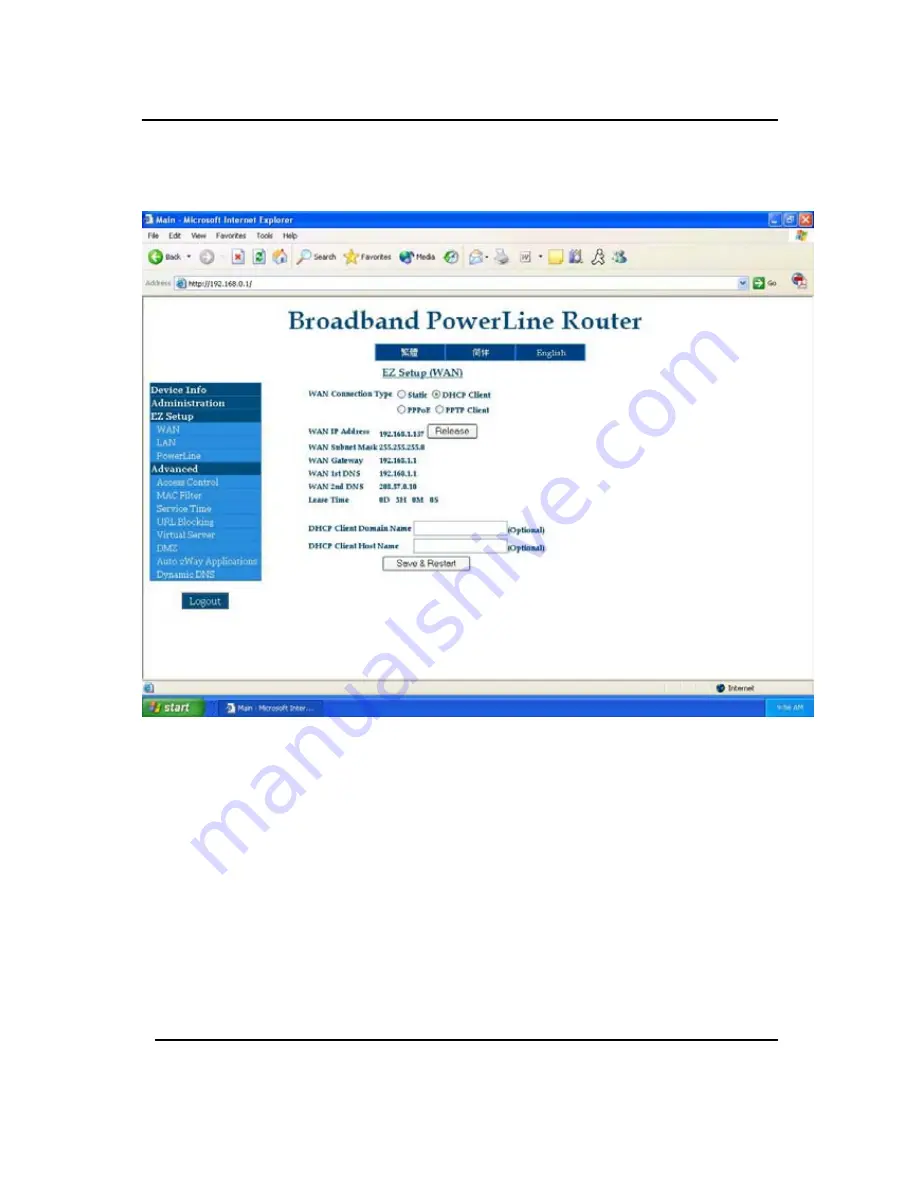
WAN (Wide Area Network)
WAN Connection Type
– This section allows the user to set the
proper type of WAN connection is being used. By default the ‘
DHCP
Client
’ is bubbled. Each type will give you some other options. For
example: After the ‘PPPoE’ is bubbled, it will give you extended
options like: PPPoE Account, PPPoE Password to fill out. Once the
settings are provided, make sure you click on the ‘
Save & Restart
’
button for it to take effect.
*
Note
* the ‘
DHCP Client Domain Name
’ and ‘
Host name
’ is
optional. It is not commonly used so users can avoid this unless the
ISP demands it.
Chapter3
31
Содержание PE904-R
Страница 1: ...GigaFast HomePlug Broadband Internet Router PE904 R User Manual ...
Страница 11: ...GigaFast Back 3 LAN port 1 WAN port RST Rest Hole Restore factory default settings AC power in Chapter 1 11 ...
Страница 39: ...GigaFast Chapter 4 39 ...
Страница 61: ...GigaFast Checking IP Address in Windows 98 SE ME 2000 XP Click Start and click Run Appendix D 61 ...
Страница 63: ...GigaFast Your IP Address will Display along with the Subnet Mask and your Gateway Appendix D 63 ...
Страница 67: ...GigaFast To save the changes you must restart so click YES Appendix D 67 ...
Страница 70: ...GigaFast Click Highlight Internet Protocol TCP IP and click Properties Appendix D 70 ...
Страница 72: ...GigaFast Releasing and Renew IP Address in Windows 98 SE ME Click Start and then click Run Appendix D 72 ...
Страница 74: ...GigaFast Your IP Address should turn to 0 0 0 0 Appendix D 74 ...
Страница 76: ...GigaFast Type Command and click OK Appendix D 76 ...
Страница 85: ...GigaFast Right click on the drive you want to share and click Properties Appendix E 85 ...
Страница 91: ...GigaFast Sharing Printers on Windows 98 SE ME 2000 XP Click Start and click Printers and Faxes Appendix E 91 ...
Страница 92: ...GigaFast Right click on the printer you want to share and click Properties Appendix E 92 ...
Страница 94: ...GigaFast A hand should appear under the printer you want to share Appendix E 94 ...
Страница 97: ...GigaFast The Add Printer Wizard should appear click Next to proceed Appendix E 97 ...
Страница 98: ...GigaFast Select A network printer or a printer attached to another computer and click Next Appendix E 98 ...
Страница 101: ...GigaFast Click Yes to proceed Appendix E 101 ...
Страница 102: ...GigaFast Unless you want this to be your default printer click NO otherwise click YES and click Next Appendix E 102 ...
Страница 103: ...GigaFast Click Finish to finish the network installation Appendix E 103 ...
Страница 105: ...GigaFast Connecting to Internet on Windows 98 SE ME Double Click Internet Explorer Appendix E 105 ...
Страница 107: ...GigaFast Click I connect through a local area network LAN Click Next Appendix E 107 ...
Страница 108: ...GigaFast Click Automatic discovery of proxy server recommended Click next Appendix E 108 ...
Страница 109: ...GigaFast Unless you want to setup your Email you can do this separately later Click NO and click Next Appendix E 109 ...
Страница 110: ...GigaFast Click the box and click Finish Appendix E 110 ...
Страница 112: ...GigaFast Accessing the Internet using Windows 2000 XP Double Click on Internet Explorer Appendix E 112 ...
Страница 113: ...GigaFast The New Connection Wizard might open If this does not happen skip to Step 7 Click Next Appendix E 113 ...
Страница 114: ...GigaFast Click Connect to the Internet and click Next Appendix E 114 ...
Страница 115: ...GigaFast Click Set up my connection manually Appendix E 115 ...
Страница 116: ...GigaFast Click Connect using a broadband connection that is always on Appendix E 116 ...
Страница 117: ...GigaFast Click Finish Appendix E 117 ...


