GigaFast
image)
4.
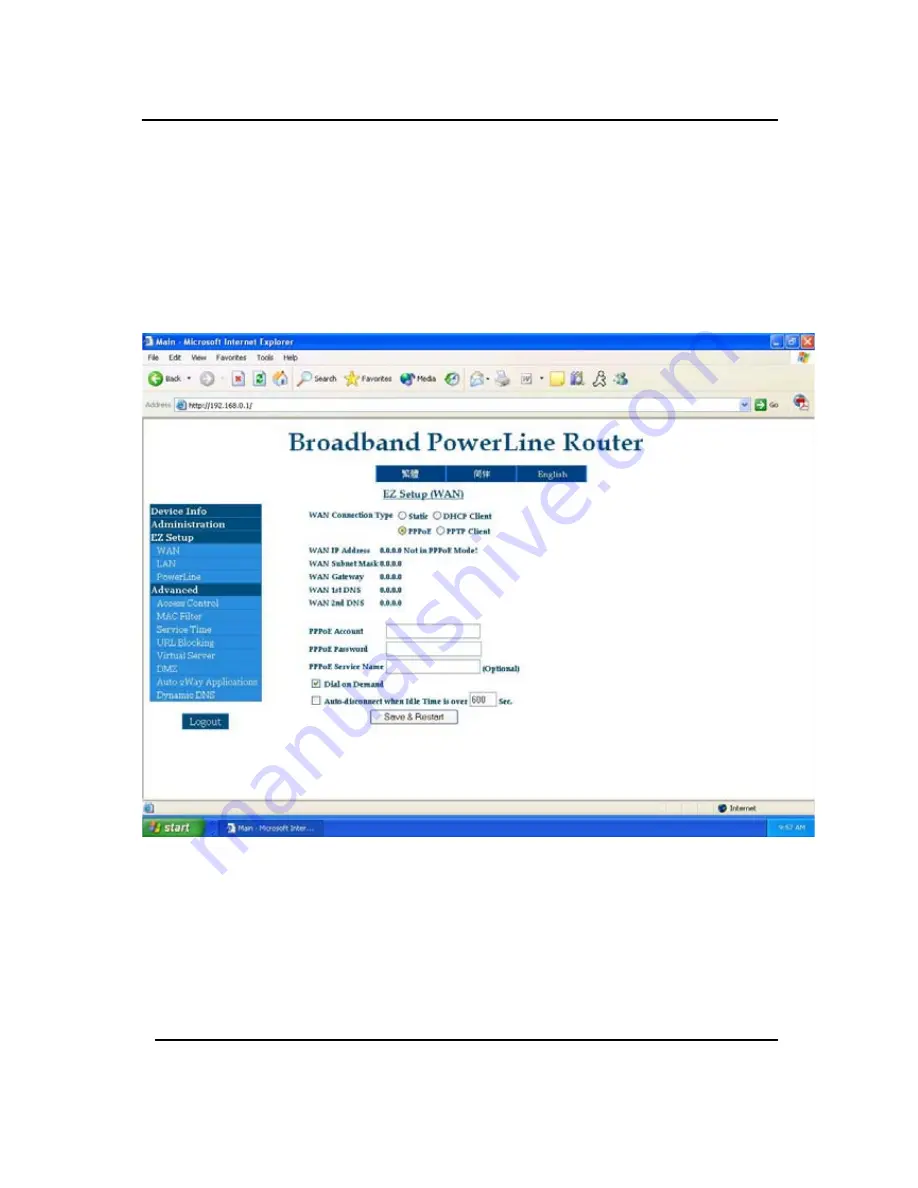
At this point the ‘
WAN IP
’ addresses should show all 0’s.
It is usual and common because the router hasn’t been
setup to have a connection between your ISP and the
PE904-R. Please click on ‘
WAN’
under ‘
EZ
Setup’
and
the page should look like this after:
*Note*
In case if the
WAN IP addresses
are listed, it means the router
is getting a connection from the modem (your ISP). Try to see if you
can go onto the internet by reopening your internet browser and input a
website URL. If you still cannot get online, please see
FAQ
. If you do
not get any numbers and they are all 0.0.0.0 please continue with the
installation.
Chapter2
20
Содержание PE904-R
Страница 1: ...GigaFast HomePlug Broadband Internet Router PE904 R User Manual ...
Страница 11: ...GigaFast Back 3 LAN port 1 WAN port RST Rest Hole Restore factory default settings AC power in Chapter 1 11 ...
Страница 39: ...GigaFast Chapter 4 39 ...
Страница 61: ...GigaFast Checking IP Address in Windows 98 SE ME 2000 XP Click Start and click Run Appendix D 61 ...
Страница 63: ...GigaFast Your IP Address will Display along with the Subnet Mask and your Gateway Appendix D 63 ...
Страница 67: ...GigaFast To save the changes you must restart so click YES Appendix D 67 ...
Страница 70: ...GigaFast Click Highlight Internet Protocol TCP IP and click Properties Appendix D 70 ...
Страница 72: ...GigaFast Releasing and Renew IP Address in Windows 98 SE ME Click Start and then click Run Appendix D 72 ...
Страница 74: ...GigaFast Your IP Address should turn to 0 0 0 0 Appendix D 74 ...
Страница 76: ...GigaFast Type Command and click OK Appendix D 76 ...
Страница 85: ...GigaFast Right click on the drive you want to share and click Properties Appendix E 85 ...
Страница 91: ...GigaFast Sharing Printers on Windows 98 SE ME 2000 XP Click Start and click Printers and Faxes Appendix E 91 ...
Страница 92: ...GigaFast Right click on the printer you want to share and click Properties Appendix E 92 ...
Страница 94: ...GigaFast A hand should appear under the printer you want to share Appendix E 94 ...
Страница 97: ...GigaFast The Add Printer Wizard should appear click Next to proceed Appendix E 97 ...
Страница 98: ...GigaFast Select A network printer or a printer attached to another computer and click Next Appendix E 98 ...
Страница 101: ...GigaFast Click Yes to proceed Appendix E 101 ...
Страница 102: ...GigaFast Unless you want this to be your default printer click NO otherwise click YES and click Next Appendix E 102 ...
Страница 103: ...GigaFast Click Finish to finish the network installation Appendix E 103 ...
Страница 105: ...GigaFast Connecting to Internet on Windows 98 SE ME Double Click Internet Explorer Appendix E 105 ...
Страница 107: ...GigaFast Click I connect through a local area network LAN Click Next Appendix E 107 ...
Страница 108: ...GigaFast Click Automatic discovery of proxy server recommended Click next Appendix E 108 ...
Страница 109: ...GigaFast Unless you want to setup your Email you can do this separately later Click NO and click Next Appendix E 109 ...
Страница 110: ...GigaFast Click the box and click Finish Appendix E 110 ...
Страница 112: ...GigaFast Accessing the Internet using Windows 2000 XP Double Click on Internet Explorer Appendix E 112 ...
Страница 113: ...GigaFast The New Connection Wizard might open If this does not happen skip to Step 7 Click Next Appendix E 113 ...
Страница 114: ...GigaFast Click Connect to the Internet and click Next Appendix E 114 ...
Страница 115: ...GigaFast Click Set up my connection manually Appendix E 115 ...
Страница 116: ...GigaFast Click Connect using a broadband connection that is always on Appendix E 116 ...
Страница 117: ...GigaFast Click Finish Appendix E 117 ...


