System Hardware Installation
- 32 -
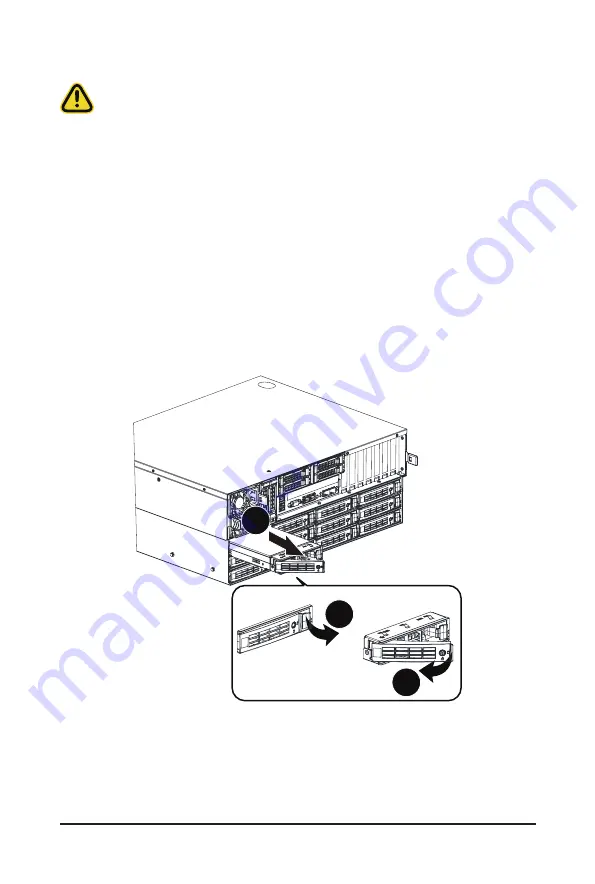
3-6 Removing and Installing the Hard Disk Drive
Read the following guidelines before you begin to install the hard disk drive:
• Take note of the drive tray orientation before sliding it out.
• The tray will not fit back into the bay if it is inserted incorrectly.
• Make sure that the HDD is connected to the HDD connector on the backplane.
Follow these instructions to install a hard disk drive:
1. Press the release button.
2. Extend the locking lever.
3. Pull the locking lever in the direction of the arrow to remove the HDD tray.
4. Slide the hard disk into the HDD tray.
5. [For 3.5" hard drives]: Install 4 screws to both sides of the hard drive tray to secure the hard drive to
the HDD tray.
[For 2.5" hard drives]: Install 4 screws to the bottom side of the hard drive tray to secure the hard
drive to the HDD tray.
6. Reinsert the HDD tray into the slot and close the locking lever.
3.5" Hard Drive
3
2
1
Содержание S451-3R1
Страница 1: ...S451 3R1 Intel 4U 42 Bay Dual Processors Storage Server User Manual Rev 1 0...
Страница 15: ...15 Hardware Installation 1 3 System Block Diagram...
Страница 16: ...This page intentionally left blank...
Страница 24: ...This page intentionally left blank...
Страница 33: ...33 System Hardware Installation Pull Pull 4 5 Push Push 6...
Страница 34: ...System Hardware Installation 34 2 5 Hard Drive 1 2 3 5 4 6...
Страница 36: ...System Hardware Installation 36 2 2...
Страница 44: ...44 Motherboard Components This page intentionally left blank...
Страница 64: ...BIOS Setup 64 5 2 11 Intel R I210 Gigabit Network Connection...
Страница 66: ...BIOS Setup 66 5 2 12 VLAN Configuration...
Страница 72: ...BIOS Setup 72 5 3 1 Processor Configuration...


