background image

- 57 -

BIOS Setup

2-6 Peripherals


&

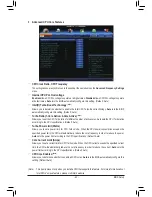
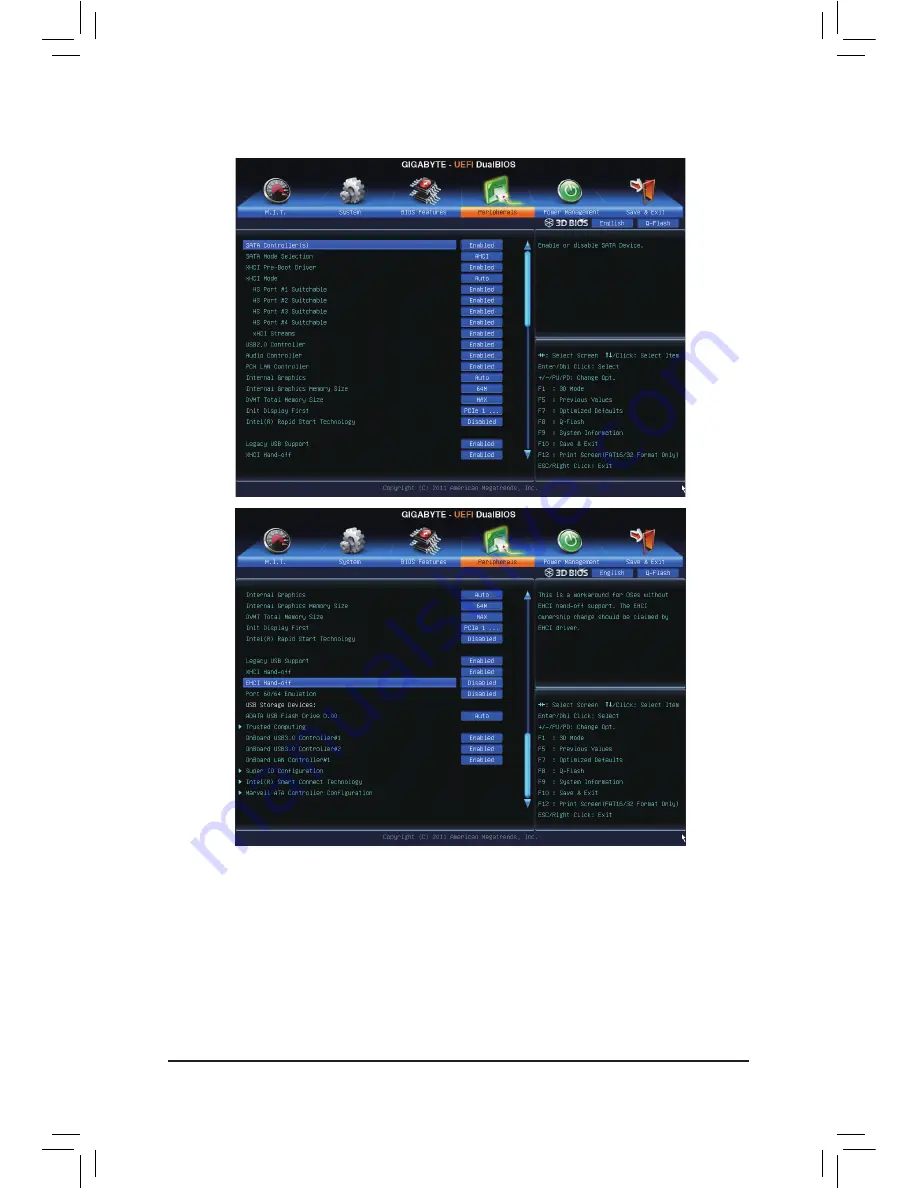
SATA Controller(s) (Intel Z77 Chipset)


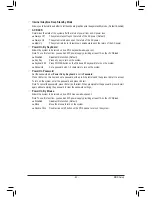
Enables or disables the integrated SATA controllers. (Default: Enabled)


&

SATA Mode Selection (Intel Z77 Chipset)


Enables or disables RAID for the SATA controllers integrated in the Intel Z77/H77 Chipset or configures 

the SATA controllers to AHCI mode.


IDE   


Configures the SATA controller to IDE mode.


RAID   


Enables RAID for the SATA controller.


AHCI   


 Configures the SATA controllers to AHCI mode. Advanced Host Controller Interface 
(AHCI) is an interface specification that allows the storage driver to enable advanced 

Serial ATA features such as Native Command Queuing and hot plug. (Default)

Содержание GA-Z77X-UP7

Страница 1: ...GA Z77X UP7 User s Manual Rev 1001 12ME Z77XUP7 1001R ...

Страница 2: ...Motherboard GA Z77X UP7 Aug 31 2012 Aug 31 2012 Motherboard GA Z77X UP7 ...

Страница 3: ...E s prior written permission Documentation Classifications In order to assist in the use of this product GIGABYTE provides the following types of documentations For quick set up of the product read the Quick Installation Guide included with the product For detailed product information carefully read the User s Manual For product related information check on our website at http www gigabyte com Ide...

Страница 4: ...ation 16 1 4 2 Installing a Memory 17 1 5 Installing an Expansion Card 18 1 6 Setting up AMD CrossFireX NVIDIA SLI Configuration 19 1 7 Installing the eSATA Bracket 20 1 8 Back Panel Connectors 21 1 9 Onboard Buttons Switches and LEDs 24 1 10 Internal Connectors 27 Chapter 2 BIOS Setup 37 2 1 Startup Screen 38 2 2 The Main Menu 39 2 3 M I T 41 2 4 System 53 2 5 BIOS Features 54 2 6 Peripherals 57 ...

Страница 5: ...talling EZ Smart Connect 83 Chapter 5 Appendix 85 5 1 Configuring SATA Hard Drive s 85 5 1 1 Configuring Intel Z77 SATA Controllers 85 5 1 2 Configuring Marvell 88SE9172 SATA Controller 93 5 1 3 Installing the SATA RAID AHCI Driver and Operating System 99 5 2 Configuring Audio Input and Output 108 5 2 1 Configuring 2 4 5 1 7 1 Channel Audio 108 5 2 2 Configuring S PDIF In Out 110 5 2 3 Configuring...

Страница 6: ...nel with 2 USB 3 0 2 0 ports 5 5 One GC WB300D including two antennas one USB 2 0 cable driver disk and user s manual Optional Items 2 port USB 2 0 bracket Part No 12CR1 1UB030 6 R eSATA bracket Part No 12CF1 3SATPW 4 R 3 5 Front Panel with 2 USB 3 0 2 0 ports Part No 12CR1 FPX582 0 R S PDIF In cable Part No 12CR1 1SPDIN 1 R HDMI to DVI adapter Part No 12CT2 HDMI01 1 R COM port cable Part No 12CF1...

Страница 7: ... O COMA F_USB1 KB_USB3 SYS_FAN2 VIA VL800 PCIEX8_2 SYS_FAN6 SATA3 MSATA ATX4P CODEC SB Debug LED Note SYS_FAN1 1 0 CMOS_SW VCORE CPUVTT VAXG CPUPLL VDIMM DDRVTT PCHIO MBIOS_LED BBIOS_LED SYS_FAN3 SATA2 3 2 SYS_FAN4 Marvell 88SE9172 F_USB30_1 Intel GbE LAN SPDIF_IN IMC DP_HDMI_SPDIF ATX_12V_2X4_1 DVI USB30_LAN1 PEX8747 LN2 _ RATIO_UP RATIO_DW _ FREQ_UP FREQ_DW PW_SW Gear Marvell 88SE9172 Etron EJ16...

Страница 8: ...2 0 1 SATA 3Gb s 1 mSATA or Switch Etron EJ168 x1 LAN RJ45 Intel GbE LAN x1 2 USB 3 0 2 0 LPC Bus 2 SATA 6Gb s x1 Marvell 88SE9172 Center Subwoofer Speaker Out Line Out MIC Line In S PDIF Out Rear Speaker Out S PDIF In PCIe CLK 100 MHz PCI Express Bus 1 PCI Express x16 2 PCI Express x8 PEX8747 x16 x16 Switch 1 PCI Express x16 x16 Switch 2 PCI Express x8 x16 x1 x1 LAN RJ45 Atheros GbE LAN 2 SATA 6G...

Страница 9: ...e an ESD wrist strap keep your hands dry and first touch a metal object to eliminate static electricity Prior to installing the motherboard please have it on top of an antistatic pad or within an electrostatic shielding container Before unplugging the power supply cable from the motherboard make sure the power supply has been turned off Before turning on the power make sure the power supply voltag...

Страница 10: ...by adapter 1 x HDMI port supporting a maximum resolution of 1920x1200 1 x DisplayPort supporting a maximum resolution of 2560x1600 Audio Realtek ALC898 codec High Definition Audio 2 4 5 1 7 1 channel Support for S PDIF In Support for S PDIF Out LAN 1 x Atheros GbE LAN chip 10 100 1000 Mbit LAN1 1 x Intel GbE LAN chip 10 100 1000 Mbit LAN2 Expansion Slots 3 x PCI Express x16 slots running at x16 PC...

Страница 11: ...available through the internal USB headers VIA VL800 chip Up to 4 USB 3 0 2 0 ports on the back panel Due to a Windows 7 limitation please connect your USB device s to the Intel controlled USB port s located below the PS 2 keyboard mouse port before the VIA USB 3 0 controller driver is installed Etron EJ168 chip Up to 2 USB 3 0 2 0 ports available through the internal USB header Internal Connector...

Страница 12: ...ystem fan speed control function is supported will depend on the CPU system cooler you install BIOS 2 x 64 Mbit flash Use of licensed AMI EFI BIOS Support for DualBIOS PnP 1 0a DMI 2 0 SM BIOS 2 6 ACPI 2 0a Unique Features Support for BIOS Support for Q Flash Support for Xpress Install Support for Xpress Recovery2 Support for EasyTune Available functions in EasyTune may differ by motherboard model...

Страница 13: ...U specifications It is not recommended that the system bus frequency be set beyond hardware specifications since it does not meet the standard requirements for the peripherals If you wish to set the frequency beyond the standard specifications please do so according to your hardware specifications including the CPU graphics card memory hard drive etc 1 3 1 Installing the CPU A Locate the alignment...

Страница 14: ...n the CPU notches with the socket alignment keys and gently insert the CPU into position Step 5 Push the CPU socket lever back into its locked position Step 4 Once the CPU is properly inserted use one hand to hold the socket lever and use the other to lightly replace the load plate When replacing the load plate make sure the front end of the load plate is under the shoulder screw NOTE Hold the CPU...

Страница 15: ...fore installing the cooler note the direction of the arrow sign on the male push pin Turning the push pin along the direction of arrow is to remove the cooler on the contrary is to install Step 3 Place the cooler atop the CPU aligning the four push pins through the pin holes on the motherboard Push down on the push pins diagonally Step 4 You should hear a click when pushing down each push pin Chec...

Страница 16: ...y is installed the BIOS will automatically detect the specifications and capacity of the memory Enabling Dual Channel memory mode will double the original memory bandwidth The four DDR3 memory sockets are divided into two channels and each channel has two memory sockets as following Channel A DDR3_2 DDR3_4 Channel B DDR3_1 DDR3_3 Dual Channel Memory Configurations Table DDR3_4 DDR3_2 DDR3_3 DDR3_1...

Страница 17: ...dule has a notch so it can only fit in one direction Follow the steps below to correctly install your memory modules in the memory sockets Step 1 Note the orientation of the memory module Spread the retaining clips at both ends of the memory socket Place the memory module on the socket As indicated in the picture on the left place your fingers on the top edge of the memory push down on the memory ...

Страница 18: ...it is fully seated in the slot 3 Make sure the metal contacts on the card are completely inserted into the slot 4 Secure the card s metal bracket to the chassis back panel with a screw 5 After installing all expansion cards replace the chassis cover s 6 Turn on your computer If necessary go to BIOS Setup to make any required BIOS changes for your expansion card s 7 Install the driver provided with...

Страница 19: ...ce is enabled A System Requirements The 2 Way CrossFireX SLI technologies currently support Windows 7 and XP operating systems The 3 Way 4 Way CrossFireX SLI technologies currently support Windows 7 operating system A CrossFireX SLI supported motherboard with two three four PCI Express x16 slots and correct driver Two three four CrossFireX SLI ready graphics cards of identical brand and chip and c...

Страница 20: ...o install the eSATA bracket The eSATA bracket includes one eSATA bracket two SATA signal cables and one SATA power cable Step 2 Connect the SATA cable from the bracket to the SATA port on your motherboard Step 4 Plug one end of the SATA signal cable into the external SATA connector on the bracket Then attach the SATA power cable to the power connector on the bracket Step 1 Locate one free slot and...

Страница 21: ...nitor that supports DVI D connection to this port Optical S PDIF Out Connector This connector provides digital audio out to an external audio system that supports digital optical audio Before using this feature ensure that your audio system provides an optical digital audio in connector HDMI Port HDMI High Definition Multimedia Interface is an all digital audio video interface capable of transmitt...

Страница 22: ...ce as the default playback device Refer to the HDMI settings information on the previous page for the configuration dialog box Dual Display Configurations for the Onboard Graphics This motherboard provides four video output ports D Sub DVI D HDMI and DisplayPort Dual monitor confgurations are supported in operating system environment only but not during the BIOS Setup or POST process RJ 45 LAN Por...

Страница 23: ...kers in a 5 1 7 1 channel audio configuration Rear Speaker Out Jack Black This jack can be used to connect front speakers in a 4 5 1 7 1 channel audio configuration Side Speaker Out Jack Gray Use this audio jack to connect side speakers in a 7 1 channel audio configuration Line In Jack Blue The line out jack Use this audio jack for line in devices such as an optical drive walkman etc Line Out Jack...

Страница 24: ...8A OC M_SATA Voltage measurement points G1 Sniper 3 BIOS Switcher SW4 3 Single BIOS 1 Dual BIOS SB F_USB30 F_AUDIO H DB_PORT F_PANEL NH TPM w housing Voltage measurement module X58A OC PCIe power connector SATA X58A OC DIP 1 2 3 DIP 1 2 3 DIP 1 2 3 DIP 1 2 3 1 1 1 1 BIOS Switcher X58A OC PWM Switch X58A OC M_SATA Voltage measurement points G1 Sniper 3 BIOS Switcher SW4 F_USB30 F_AUDIO H DB_PORT F_...

Страница 25: ...fore clearing the CMOS values After system restart go to BIOS Setup to load factory defaults select Load Optimized Defaults or manually configure the BIOS settings refer to Chapter 2 BIOS Setup for BIOS configurations Gear Button Changes BCLK stepping to 0 1 MHz CPU BCLK Down Button FREQ_DW Lowers the CPU base clock CPU BCLK Up Button FREQ_UP Raises the CPU base clock CPU Ratio Down Button RATIO_D...

Страница 26: ...B TPM w housing Voltage measurement module X58A OC PCIe power connector SATA X58A OC DIP 1 2 3 DIP 1 2 3 DIP 1 2 3 DIP 1 2 3 1 1 1 1 BIOS Switcher X58A OC PWM Switch X58A OC M_SATA Voltage measurement points G1 Sniper 3 BIOS Switcher SW4 Pin 1 F_USB30 F_AUDIO H DB_PORT F_PANEL NH F_PANEL H61M D2 ACPI_CPT GA IVB SMB_CPT GA IVB CLR_CMOS CI DIS_ME GP15_CPT GA IVB XDP_CPU XDP_PCH GA IVB TPM w housing ...

Страница 27: ...from the power outlet to prevent damage to the devices After installing the device and before turning on the computer make sure the device cable has been securely attached to the connector on the motherboard 1 ATX_12V_2X4 ATX_12V_2X4_1 2 ATX 3 ATX4P 4 CPU_FAN 5 SYS_FAN1 2 3 4 5 6 6 SATA3 0 1 7 SATA2 2 3 4 5 8 GSATA3 6 7 8 9 9 MSATA 10 F_PANEL 11 F_AUDIO 12 SPDIF_IN 13 SPDIF_O 14 F_USB1 F_USB2 15 F...

Страница 28: ... not start To meet expansion requirements it is recommended that a power supply that can withstand high power consumption be used 500W or greater If a power supply is used that does not provide the required power the result can lead to an unstable or unbootable system 13 1 24 12 ATX ATX_12V_2X4 ATX_12V_2X4_1 5 8 1 4 ATX_12V_2X4 ATX_12V_2X4_1 Pin No Definition 1 GND Only for 2x4 pin 12V 2 GND Only ...

Страница 29: ... system fan be installed inside the chassis CPU_FAN SYS_FAN3 SYS_FAN4 Pin No Definition 1 GND 2 12V Speed Control 3 Sense 4 Speed Control CPU_FAN SYS_FAN3 SYS_FAN2 1 1 1 3 ATX4P PCIe Power Connector The power connector provide auxiliary power to the onboard PCI Express x16 slots When two or more graphics cards are installed we recommend that you connect the SATApower cable from the power supply to...

Страница 30: ...ion requires at least three hard drives The total number of hard drives does not have to be an even number A RAID 10 configuration requires four hard drives 6 SATA3 0 1 SATA 6Gb s Connectors Controlled by Intel Z77 Chipset The SATA connectors conform to SATA 6Gb s standard and are compatible with SATA 3Gb s and SATA 1 5Gb s standard Each SATAconnector supports a single SATAdevice The SATA3 0 1 con...

Страница 31: ...IP 1 2 3 DIP 1 2 3 DIP 1 2 3 1 1 1 1 BIOS Switcher X58A OC PWM Switch X58A OC M_SATA PWM Switch SW1 X79 UD7 DIP 1 2 3 4 5 BIOS Switcher SW4 MSATA 8 GSATA3 6 7 8 9 SATA 6Gb s Connectors Controlled by Marvell 88SE9172 Chip The SATA connectors conform to SATA 6Gb s standard and are compatible with SATA 3Gb s and SATA 1 5Gb s standard Each SATA connector supports a single SATA device The Marvell 88SE9...

Страница 32: ...atus by issuing a beep code One single short beep will be heard if no problem is detected at system startup HD Hard Drive Activity LED Blue Connects to the hard drive activity LED on the chassis front panel The LED is on when the hard drive is reading or writing data RES Reset Switch Green Connects to the reset switch on the chassis front panel Press the reset switch to restart the computer if the...

Страница 33: ...o Some chassis provide a front panel audio module that has separated connectors on each wire instead of a single plug For information about connecting the front panel audio module that has different wire assignments please contact the chassis manufacturer For HD Front Panel Audio For AC 97 Front Panel Audio Pin No Definition 1 MIC2_L 2 GND 3 MIC2_R 4 ACZ_DET 5 LINE2_R 6 GND 7 FAUDIO_JD 8 No Pin 9 ...

Страница 34: ...ital audio cable carefully read the manual for your expansion card Pin No Definition 1 SPDIFO 2 GND 14 F_USB1 F_USB2 USB 2 0 1 1 Headers The headers conform to USB 2 0 1 1 specification Each USB header can provide two USB ports via an optional USB bracket For purchasing the optional USB bracket please contact the local dealer Pin No Definition 1 Power 5V 2 Power 5V 3 USB DX 4 USB DY 5 USB DX 6 USB...

Страница 35: ...the optional 3 5 front panel that provides two USB 3 0 2 0 ports please contact the local dealer F_USB30 F_AUDIO H DB_PORT F_PANEL NH TPM w housing Voltage measurement module X58A OC PCIe power connector SATA X58A OC DIP 1 2 3 DIP 1 2 3 DIP 1 2 3 DIP 1 2 3 1 1 1 1 BIOS Switcher X58A OC PWM Switch X58A OC M_SATA Voltage measurement points G1 Sniper 3 BIOS Switcher SW4 20 1 10 11 Pin No Definition P...

Страница 36: ...Danger of explosion if the battery is replaced with an incorrect model Contact the place of purchase or local dealer if you are not able to replace the battery by yourself or uncertain about the battery model When installing the battery note the orientation of the positive side and the negative side of the battery the positive side should face up Used batteries must be handled in accordance with l...

Страница 37: ...without entering the operating system BIOS is a Windows based utility that searches and downloads the latest version of BIOS from the Internet and updates the BIOS For instructions on using the Q Flash and BIOS utilities refer to Chapter 4 BIOS Update Utilities Chapter 2 BIOS Setup Because BIOS flashing is potentially risky if you do not encounter problems using the current version of BIOS it is r...

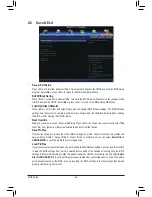
Страница 38: ... Boot Menu allows you to set the first boot device without entering BIOS Setup In Boot Menu use the up arrow key h or the down arrow key i to select the first boot device then press Enter to accept The system will boot from the device immediately Note The setting in Boot Menu is effective for one time only After system restart the device boot order will still be based on BIOS Setup settings END Q ...

Страница 39: ...ration items you can click the function menu icons at the bottom of the screen or press F1 to switch to the main menu of the BIOS Setup program If a mouse is not connected the 3D BIOS screen will automatically switch to the main menu of the BIOS Setup Program B The Main Menu of the BIOS Setup Program On the main menu of the BIOS Setup program press arrow keys to move among the items and press Ente...

Страница 40: ...tings to a profile or load optimized defaults for optimal performance system operations When the system is not stable as usual select the Load Optimized Defaults item to set your system to its defaults The BIOS Setup menus described in this chapter are for reference only and may differ by BIOS version BIOS Setup Program Function Keys f g Move the selection bar to select a setup menu h i Move the s...

Страница 41: ...f these components This page is for advanced users only and we recommend you not to alter the default settings to prevent system instability or other unexpected results Inadequately altering the settings may result in system s failure to boot If this occurs clear the CMOS values and reset the board to default values This section provides information on the BIOS version CPU base clock CPU frequency...

Страница 42: ... Default Auto Important It is highly recommended that the CPU frequency be set in accordance with the CPU specifications Processor Graphics Clock Allows you to set the onboard graphics clock The adjustable range is from 400 MHz to 3200 MHz Default Auto CPU Clock Ratio Allows you to alter the clock ratio for the installed CPU The adjustable range is dependent on the CPU being installed CPU Frequenc...

Страница 43: ...e 4 Core Active Note Allows you to set the CPU Turbo ratios for different number of active cores Auto sets the CPU Turbo ratios according to the CPU specifications Default Auto Turbo Power Limit Watts Allows you to set a power limit for CPU Turbo mode When the CPU power consumption exceeds the specified power limit the CPU will automatically reduce the core frequency in order to reduce the power A...

Страница 44: ...ency and voltage will be reduced when the CPU is overheated Auto lets the BIOS automatically configure this setting Default Auto CPU EIST Function Note 1 Enables or disables Enhanced Intel SpeedStep Technology EIST Depending on CPU loading Intel EIST technology can dynamically and effectively lower the CPU voltage and core frequency to decrease average power consumption and heat production Auto le...

Страница 45: ... be configurable Options are Auto default Quick Expert Profile DDR Voltage When using a non XMP memory module or Extreme Memory Profile X M P is set to Disabled this item will display as 1 50V When Extreme Memory Profile X M P is set to Profile1 or Profile2 this item will display the value based on the SPD data on the XMP memory Profile VTT Voltage The value displayed here is dependent on the CPU ...

Страница 46: ...figurable only when DRAM Timing Selectable is set to Quick or Expert Note Your system may become unstable or fail to boot after you make changes on the memory timings If this occurs please reset the board to default values by loading optimized defaults or clearing the CMOS values Channel A B Timing Settings Advanced Voltage Settings ...

Страница 47: ...erformance Perf Performance Balanced Mid PWR Mid Power and Lite PWR Light Power Auto lets the BIOS automatically configure this setting Default Auto Vcore Voltage Response Allows you to configure the response time for Vcore changes using preset levels Auto Lets BIOS automatically configure this setting Default Standard Fast Selects Standard or Fast which represents different levels of the response...

Страница 48: ...est to lowest Extreme Turbo High Medium Low and Standard Selecting a higher level keeps the CPU Vtt voltage more consistent with what is set in BIOS under heavy load Auto lets the BIOS automatically configure this setting and sets the voltage following Intel s specifications Default Auto Vcore Protection Allows you to set the voltage limit on the Vcore for over voltage protection The adjustable ra...

Страница 49: ...tting Default Auto GFX PWM Thermal Protection Allows you to set the PWM thermal protection threshold for the GFX area Options are 130 0o C and 135 0o C Auto lets the BIOS automatically configure this setting Default Auto DDR CH A B PWM Thermal Protection Allows you to set the PWM thermal protection threshold for the Channel A and Channel B memory area Options are 130 0o C and 135 0o C Auto lets th...

Страница 50: ...nd the Case Open field will show No at next boot Case Open Displays the detection status of the chassis intrusion detection device attached to the motherboard CI header If the system chassis cover is removed this field will show Yes otherwise it will show No To clear the chassis intrusion status record set Reset Case Open Status to Enabled save the settings to the CMOS and then restart your system...

Страница 51: ...stem fan speed control function and adjust the fan speed Normal Allows the CPU system fan to run at different speeds according to the CPU system temperature You can adjust the fan speed with EasyTune based on your system requirements Default Silent Allows the CPU system fan to run at slow speeds Manual Allows you to control the CPU system fan speed under the Slope PWM item Disabled Allows the CPU ...

Страница 52: ...stem fan to run at different speeds according to the system temperature Default Silent Allows the system fan to run at slow speeds Manual Allows you to control the system fan speed under the Slope PWM item Disabled Allows the system fan to run at full speeds Slope PWM Allows you to control the system fan speed This item is configurable only when 2nd System Fan Speed Control is set to Manual Option...

Страница 53: ...time format is hour minute and second For example 1 p m is 13 0 0 Use Enter to switch between the Hour Minute and Second fields and use the Page Up or Page Down key to set the desired value Access Level Displays the current access level depending on the type of password protection used If no password is set the default will display as Administrator The Administrator level allows you to make change...

Страница 54: ...ly hard drive defined as the first priority on the Hard Drive BBS Priorities submenu will be presented here Removable storage devices that support GPT format will be prefixed with UEFI string on the boot device list To boot from an operating system that supports GPT partitioning select the device prefixed with UEFI string Or if you want to install an operating system that supports GPT partitioning...

Страница 55: ...abled Execute Disable Bit Note Enables or disables Intel Execute Disable Bit function This function may enhance protection for the computer reducing exposure to viruses and malicious buffer overflow attacks when working with its supporting software and system Default Enabled Intel Virtualization Technology Note Enables or disables Intel VirtualizationTechnology Virtualization enhanced by Intel Vir...

Страница 56: ...upport is set to Always Storage Boot Option Control Allows you to select whether to enable the UEFI or legacy option ROM for the storage device controller Disabled Disables option ROM Legacy only Enables legacy Option ROM only Default UEFI only Enables UEFI Option ROM only Legacy First Enables legacy option ROM first UEFI First Enables UEFI option ROM first This item is configurable only when CSM ...

Страница 57: ...rs integrated in the Intel Z77 H77 Chipset or configures the SATA controllers to AHCI mode IDE Configures the SATA controller to IDE mode RAID Enables RAID for the SATA controller AHCI Configures the SATA controllers to AHCI mode Advanced Host Controller Interface AHCI is an interface specification that allows the storage driver to enable advanced Serial ATA features such as Native Command Queuing...

Страница 58: ...hen prior to OS boot it should route the ports to xHCI controller Note OS has to provide support for the xHCI controller in this mode If the OS does not provide support all sharable ports won t work Disabled The USB 3 0 ports are routed to the EHCI controller and the xHCI controller is turned off All USB 3 0 devices function as High Speed devices regardless of xHCI software support availability If...

Страница 59: ...tart Technology This item is configurable only when an SSD is installed Default Disabled Legacy USB Support Allows USB keyboard mouse to be used in MS DOS Default Enabled XHCI Hand off Determines whether to enable XHCI Hand off feature for an operating system without XHCI Hand off support Default Enabled EHCI Hand off Determines whether to enable EHCI Hand off feature for an operating system witho...

Страница 60: ...ology ISCT Configuration Enables or disables Intel Smart Connect Technology Default Disabled Marvell ATA Controller Configuration GSATA Controller Marvell 88SE9172 Chip GSATA3 6 and GSATA3 7 connectors Enables or disables RAID for the SATA controllers integrated in the Marvell 88SE9172 chip or configures the SATA controllers to AHCI mode The area below displays the current status of the two SATA p...

Страница 61: ...rrent status of the two SATA ports IDE Mode Disables RAID for the SATA controllers and configures the SATA controllers to IDE mode AHCI Mode Configures the SATA controllers to AHCI mode Advanced Host Controller Interface AHCI is an interface specification that allows the storage driver to enable advanced Serial ATA features such as Native Command Queuing and hot plug Default RAID Mode Enables RAID...

Страница 62: ...his item is set to Enabled the following functions will become unavailable PME event wake up power on by mouse power on by keyboard and wake on LAN High Precision Event Timer Note Enables or disables High Precision EventTimer HPET for Windows 7 operating system Default Enabled Soft Off by PWR BTTN Configures the way to turn off the computer in MS DOS mode using the power button Instant Off Press t...

Страница 63: ... key to turn on the system Keyboard 98 Press POWER button on the Windows 98 keyboard to turn on the system Password Set a password with 1 5 characters to turn on the system Power On Password Set the password when Power On by Keyboard is set to Password Press Enter on this item and set a password with up to 5 characters and then press Enter to accept To turn on the system enter the password and pre...

Страница 64: ...nter on the device you select and select Yes to confirm Your system will restart automatically and boot from that device Save Profiles This function allows you to save the current BIOS settings to a profile You can create up to 8 profiles and save as Setup Profile 1 Setup Profile 8 Press Enter to complete Or you can select Select File in HDD USB FDD to save the profile to your storage device Load ...

Страница 65: ...ignore the popup dialog box es e g the Found New Hardware Wizard displayed when Xpress Install is installing the drivers Failure to do so may affect the driver installation Some device drivers will restart your system automatically during the driver installation After the system restart Xpress Install will continue to install other drivers After Xpress Install installs all of the drivers a dialog ...

Страница 66: ...s page displays all the utilities and applications that GIGABYTE develops and some free software You can click the Install button on the right of an item to install it 3 3 Technical Manuals This page provides the content descriptions for this driver disk ...

Страница 67: ... 4 Contact For the detailed contact information of the GIGABYTE Taiwan headquarter or worldwide branch offices click the URL on this page to link to the GIGABYTE website 3 5 System This page provides the basic system information ...

Страница 68: ...oad Center button to link to the GIGABYTE website The latest version of the BIOS drivers or applications will be displayed 3 7 New Program This page provides a quick link to GIGABYTE s lately developed utilities for users to install You can click the Install button on the right of an item to install it ...

Страница 69: ...ount of data and hard drive access speed may affect the speed at which the data is backed up restored It takes longer to back up a hard drive than to restore it System Requirements At least 512 MB of system memory VESA compatible graphics card Windows XP with SP3 or later Windows 7 Installation and Configuration Turn on your system to boot from the Windows 7 setup disk A Installing Windows 7 and P...

Страница 70: ...ackup file to the unallocated space black stripe along the top Please note that if there is no enough unallocated space Xpress Recovery2 cannot save the backup file Step 1 Select BACKUP to start backing up your hard drive data Step 2 When finished go to Disk Management to check disk allocation B Accessing Xpress Recovery2 BootfromthemotherboarddriverdisktoaccessXpressRecovery2 Whenyouseethefollowi...

Страница 71: ...up to your hard drive in case the system breaks down The RESTORE option will not be present if no backup is created before Select REBOOT to exit Xpress Recovery2 Step 2 After the backup file is removed no backup image file will be present in Disk Management and hard drive space will be freed up Step 1 If you wish to remove the backup file select REMOVE ...

Страница 72: ...edded in the BIOS the Q Flash tool frees you from the hassles of going through complicated BIOS flashing process What is BIOS BIOS allows you to update the system BIOS while in the Windows environment BIOS will download the latest BIOS file from the nearest BIOS server site and update the BIOS 4 2 1 Updating the BIOS with the Q Flash Utility A Before You Begin 1 From GIGABYTE s website download th...

Страница 73: ...Reboot to reboot the system 2 Select USB Flash Drive 3 Select the BIOS update file The Save BIOS to Drive option allows you to save the current BIOS file Q Flash only supports USB flash drive or hard drives using FAT32 16 12 file system If the BIOS update file is saved to a hard drive in RAID AHCI mode or a hard drive attached to an independent SATA controller use the End key during the POST to ac...

Страница 74: ...ts on the Save Exit screen and press Enter to load BIOS defaults System will re detect all peripheral devices after a BIOS update so we recommend that you reload BIOS defaults Step 5 Select Save Exit Setup and press Enter And then select Yes to save settings to CMOS and exit BIOS Setup The procedure is complete after the system restarts ...

Страница 75: ... Internet Update Function Click Update BIOS from GIGABYTE Server select the BIOS server site closest to your location and then download the BIOS file that matches your motherboard model Follow the on screen instructions to complete 2 Update the BIOS without Using the Internet Update Function Click Update BIOS from File then select the location where you save the BIOS update file obtained from the ...

Страница 76: ...Tuner tab allows you to change memory settings and voltages Quick Boost mode provides you with 3 levels of CPU frequency base clock to choose to achieve desired system performance After making changes in Quick Boost mode or clicking Default to restore to default values be sure to restart your system for these changes to take effect Easy mode provides information on CPU memory Advanced mode allows ...

Страница 77: ...on area and right click on this icon to configure the data sharing settings Note This option is available only when data sharing is NOT enabled Figure 1 Data Sharing Disabled Figure 2 Data Sharing Enabled Options Descriptions Option Description Connect Displays the computers with data sharing enabled Enable Incoming Folder Enables data sharing Disable Incoming Folder Disables data sharing Open Inc...

Страница 78: ...hich you can build a RAID 0 RAID 1 or other supported RAID array depending on your needs and hardware components 3 Exits the X H D utility Click Cancel to exit the X H D utility Instructions Note 2 BeforelaunchingX H D makesurethenewlyaddedharddrive has equal or greater capacity than the RAID ready system drive To add a new hard drive into a RAID 0 array that s been created earlier make sure the n...

Страница 79: ...one the Add device as shown on the left will appear Enter a passkey 8 16 digits recommended which will be used for pairing with the cell phone Then enter the same passkey on your cell phone Configuring other Bluetooth settings On the Other Settings tab you can set how much time it takes to scan your Bluetooth cell phone key how many times to rescan the key to make sure it is in range of your compu...

Страница 80: ...tion go to the New Program menu and click Install on the right of the EZ Setup application to install it Note Not supported on the Intel B75 Chipset For detailed configurations please refer to Intel s documentation During the installation process the system will configure the BIOS settings and install required drivers The system may restart automatically a few times Launching EZ Setup Step 1 While...

Страница 81: ... as a cache of the hard disk The maximum cache memory size is 64 GB If you use an SSD larger than 64 GB the space beyond 64 GB can still be used for storing your data Note 3 The operating system must be installed to the SATA disk Note 4 Regardless of the BIOS settings be it IDE or AHCI mode the system will be forced to RAID mode B Installation Step 1 Select EZ Smart Response and click Setup Figure...

Страница 82: ...t will install the Intel Raid Start Technology Manager driver automatically The system will restart again after the driver installation Figure 1 Figure 2 C Disabling EZ Rapid Start To disable EZ Rapid Start select Disable EZ Rapid Start and click Setup The default compressed space is the system memory size plus 2 GB For example if the system memory size is 8 GB the default compressed space is 8 GB...

Страница 83: ...ect EZ Smart Connect and then click Setup Follow the on screen instructions to install the Intel Smart Connect Technology driver Figure 2 Restart your system after the driver installation Note This feature works best with programs designed to work automatically with the Internet to obtain their data such as Microsoft Outlook Microsoft Windows Live Mail and Seesmic Figure 1 Figure 2 C Configuring E...

Страница 84: ...Unique Features 84 ...

Страница 85: ... SATA controller is set to AHCI or RAID mode Note 3 When a RAID set is built across the SATA 6Gb s and SATA 3Gb s channels the system performance of the RAID set may vary depending on the devices being connected 5 1 1 Configuring Intel Z77 SATA Controllers A Installing SATA hard drive s in your computer Attach one end of the SATA signal cable to the rear of the SATA hard drive and the other end to...

Страница 86: ...n B Configuring SATA controller mode in BIOS Setup Make sure to configure the SATA controller mode correctly in system BIOS Setup Step 1 Turn on your computer and press Delete to enter BIOS Setup during the POST Power On Self Test To create RAID set SATA Mode Selection under the Peripherals menu to RAID Figure 1 If you do not want to create RAID set this item to IDE or AHCI Step 2 Save changes and...

Страница 87: ...gure 3 Intel R Rapid Storage Technology Option ROM 11 0 0 1339 Copyright C 2003 11 Intel Corporation All Rights Reserved RAID Volumes None defined Physical Devices ID Device Model Serial Size Type Status Vol ID 0 ST3120026AS 3JT354CP 111 7GB Non RAID Disk 1 ST3120026AS 3JT329JX 111 7GB Non RAID Disk Press CTRL I to enter Configuration Utility Intel R Rapid Storage Technology Option ROM 11 0 0 1339...

Страница 88: ...ze can be set from 4 KB to 128 KB Once you have selected the stripe block size press Enter Figure 4 Figure 5 Intel R Rapid Storage Technology Option ROM 11 0 0 1339 Copyright C 2003 11 Intel Corporation All Rights Reserved RAID0 Stripes data performance hi Change TAB Next ESC Previous Menu ENTER Select HELP Name Volume0 RAID Level RAID0 Stripe Disks Select Disks Strip Size 128KB Capacity 111 7 GB ...

Страница 89: ...s Reserved Press ENTER to create the specified volume hi Change TAB Next ESC Previous Menu ENTER Select HELP Name Volume0 RAID Level RAID0 Stripe Disks Select Disks Strip Size 128 MB Capacity 111 7 GB Sync N A Create Volume CREATE VOLUME MENU WARNING ALL DATA ON SELECTED DISKS WILL BE LOST Are you sure you want to create this volume Y N Intel R Rapid Storage Technology Option ROM 11 0 0 1339 Copyr...

Страница 90: ...tep 1 Select Create RAID Volume in MAIN MENU and press Enter Figure 8 Figure 8 Figure 9 Step 2 After entering the volume name select Recovery under the RAID Level item and press Enter Figure 9 Intel R Rapid Storage Technology Option ROM 11 0 0 1339 Copyright C 2003 11 Intel Corporation All Rights Reserved Recovery Copies data between a master and a recovery disk hi Change TAB Next ESC Previous Men...

Страница 91: ...ructions to complete Intel R Rapid Storage Technology Option ROM 11 0 0 1339 Copyright C 2003 11 Intel Corporation All Rights Reserved Choose the RAID level RAID0 Stripes data performance RAID1 Mirrors data redundancy Recovery Copies data between a master and a recovery disk RAID10 Mirrors data and stripes the mirror RAID5 Stripes data and parity hi Change TAB Next ESC Previous Menu ENTER Select H...

Страница 92: ...llows you to view the status of your accelerated drive volume Figure 13 created using the Intel IRST utility In case you are unable to run the Intel IRST utility due to an application error or operating system issue you will need to remove acceleration or manually enable synchronization Maximized mode only using this option in the RAID ROM utility Steps Select Acceleration Options in MAIN MENU and...

Страница 93: ... controller and RAID mode in BIOS Setup Make sure to configure the SATA controller mode correctly in system BIOS Setup Step 1 Turn on your computer and press Delete to enter BIOS Setup during the POST To create RAID go to Peripherals and set GSATAController on the MarvellATAController Configuration submenu to RAID Mode Figure 2 If you do not want to create RAID set this item to IDE Mode or AHCI Mo...

Страница 94: ...ch says Press Ctrl M to enter BIOS Setup or Space to continue Figure 3 Press Ctrl M to enter the RAID setup utility Marvell 88SE91xx Adapter BIOS Version 1 0 1 0025 PCIe x2 5 0Gbps Mode RAID Virtual Disks No Virtual Disk Physical Disks Adapter 0 Port Disk Name Size Max Speed S0 SATA WDC WD800JD 22LSA0 76 3GB SATA 3Gb s S1 SATA WDC WD800JD 22LSA0 76 3GB SATA 3Gb s Press Ctrl M to enter BIOS Setup o...

Страница 95: ...pears Figure 5 Press Enter on the Create VD item ENTER SPACE Select ESC Back Exit Adapter 0 Adapter Devices RAID Vendor ID Device ID 1B4B 91A2 BIOS Version 1 0 1 0025 PCI Slot 00 IRQ Number 0A Raid Mode RAID0 RAID1 Marvell BIOS Setup c 2009 Marvell Technology Group Ltd ENTER SPACE Select ESC Back Exit Adapter Devices Marvell BIOS Setup c 2009 Marvell Technology Group Ltd RAID Delete VD Wipe out di...

Страница 96: ...to quickly erase old data on the hard drives when creating the array 4 Cache Mode Select write back or write through cache 5 VD Name Enter an array name with 1 10 letters letters cannot be special characters ENTER SPACE Select ESC Back Exit Adapter Devices Marvell BIOS Setup c 2009 Marvell Technology Group Ltd RAID RAID Config Port Disk Name Size Max Speed Status S1 SATA WDC WD800JD 22LSA0 76 3GB ...

Страница 97: ... free disks to create RAID Level RAID0 Max Size MB 152478 Stripe Size 64KB Quick Init NO Cache Mode WriteBack VD Name GBT Disk ID 01 Create VD NEXT ENTER SPACE Select ESC Back Exit Adapter Devices RAID Marvell BIOS Setup c 2009 Marvell Technology Group Ltd Virtual Disks ID Name Size Level Status Stripe CacheMode 0 GBT 152 4GB RAID0 ONLINE 64KB WriteBack Physical Disks Port Disk Name Size Max Speed...

Страница 98: ... install the utility insert the motherboard driver disk then go to Application Software Install Application Software and select Marvell Storage Utility to install Note After the installation you must login the utility with the same account name and password that you use to login the operating system If you did not set the account password before click Login to enter the Marvell Storage Utility dir...

Страница 99: ...bility For the Marvell 88SE9172 Step 1 Boot from the Windows 7 setup disk and perform standard OS installation steps When you arrive at the Where do you want to install Windows screen select Load Driver Step 2 Insert the motherboard driver disk and then browse to the location of the driver The locations of the drivers are as follows RAID driver for Windows 32 bit BootDrv Marvell RAID i386 RAID dri...

Страница 100: ...s in the 64Bit folder For AHCI mode depending on whether you want to install the 32 or 64 bit version copy the files in the AHCI Floppy32 or AHCI Floppy64 folder Method B Steps 1 Use an alternative system and insert the motherboard driver disk 2 From your optical drive folder double click the Menu exe file in the BootDrv folder A Command Prompt window will open similar to that in Figure 1 3 Insert...

Страница 101: ...ling the driver during the Windows setup process Step 1 Restart your system to boot from the Windows XP setup disk and press F6 as soon as you see the message Press F6 if you need to install a 3rd party SCSI or RAID driver Ascreen will then appear asking you to specify an additional SCSI adapter Press S For the Intel Z77 Step 2 Insert the floppy disk containing the SATA RAID AHCI driver and press ...

Страница 102: ...l 91xx SATA RAID Controller 32bit Driver and press Enter When both of the two drivers appear on the confirmation screen press Enter to continue the driver installation Windows Setup You have chosen to configure a SCSI Adapter for use with Windows using a device support disk provided by an adapter manufacturer Select the SCSI Adapter you want from the following list or press ESC to return to the pr...

Страница 103: ...apid Storage Technology Option ROM 11 0 0 1339 Copyright C 2003 11 Intel Corporation All Rights Reserved 3 Reset Disks to Non RAID 4 Exit RAID Volumes None defined Physical Disks ID Drive Model Serial Size Type Status Vol ID 0 ST3120026AS 3JT354CP 111 7GB Member Disk 0 1 WDC WD800JD 22LS WD WMAM9W736333 111 7GB Non RAID Disk hi Select ESC Exit ENTER Select Menu DISK VOLUME INFORMATION MAIN MENU 1 ...

Страница 104: ...launch the Intel Rapid Storage Technology utility from All Programs in the Start menu Step 1 Go to the Manage menu and click Rebuild to another disk in Manage Volume The Status item on the left of the screen displays the rebuild progress Step 2 Select a new drive to rebuild the RAID and click Rebuild Step 3 After the RAID 1 volume rebuilding the Status will display as Normal ...

Страница 105: ...n the MAIN MENU of the Intel RAID Configuration Utility On the RECOVERY VOLUMES OPTIONS menu select Enable Only Recovery Disk to show the recovery drive in the operating system Follow the on screen instructions to complete and exit the RAID Configuration Utility Intel R Rapid Storage Technology Option ROM 11 0 0 1339 Copyright C 2003 11 Intel Corporation All Rights Reserved Choose the RAID level R...

Страница 106: ...utility first Enabling Automatic Rebuild Step 1 When the message Press Ctrl M to enter BIOS Setup or Space to continue appears press Ctrl M to enter the RAID setup utility On the main screen press Enter on the RAID tab and then press Enter on Spare Management Selection Adapter Devices RAID Marvell BIOS Setup c 2009 Marvell Technology Group Ltd RAID Config Port Disk Name Size Max Speed Status NEXT ...

Страница 107: ...eing rebuilt When completed the status will display as Done Step 1 Under Virtual Disk 0 click the Operation tab and select Rebuild Step 2 The screen will display the new hard drive Click on the hard drive to select it and click the Submit button to begin the rebuild Step 3 Make sure you have installed the Marvell RAID driver and Marvell Storage Utility from the motherboard driver disk While in the...

Страница 108: ...is plugged into the default Center Subwoofer speaker out jack you can retask the Center Subwoofer speaker out jack to be Rear speaker out To install a microphone connect your microphone to the Mic in jack and manually configure the jack for microphone functionality Audio signals will be present on both of the front and back panel audio connections simultaneously If you want to mute the back panel ...

Страница 109: ...ovides anAC 97 front panel audio module to activate the AC 97 functionality click the tool icon on the Speaker Configuration tab On the Connector Settings dialog box select the Disable front panel jack detection check box Click OK to complete Click Device advanced settings on the top right corner on the Speaker Configuration tab to open the Device advanced settings dialog box Select the Mute the r...

Страница 110: ...l audio signals to the computer for audio processing 1 Connecting a S PDIF In Cable Connect a S PDIF in cable to the SPDIF_IN header on the motherboard as shown below 2 Configuring S PDIF In On the Digital Input screen click the Default Format tab and then select the sample rate and bit depth Click OK to complete ...

Страница 111: ...PDIF Out On the Digital Output Optical screen Note click the Default Format tab and then select the sample rate and bit depth Click OK to complete B S PDIF Out The S PDIF Out jack can transmit audio signals to an external decoder for decoding to get the best audio quality 1 Connecting a S PDIF Out Cable Connect a S PDIF optical cable to the corresponding S PDIF out connector as shown below and an ...

Страница 112: ...phone functionality Note The microphone functions on the front panel and back panel cannot be used at the same time Step 3 Go to the Microphone screen Do not mute the recording volume or you ll not be able to record the sound To hear the sound being recorded during the recording process do not mute the playback volume It is recommended that you set the volumes at a middle level Step 4 To raise the...

Страница 113: ...ng Devices Step 2 On the Recording tab right click on an empty space and select Show Disabled Devices Enabling Stereo Mix If the HD Audio Manager does not display the recording device you wish to use refer to the steps below The following steps explain how to enable Stereo Mix which may be needed when you want to record sound from your computer Step 3 When the Stereo Mix item appears right click o...

Страница 114: ...e Start Recording button 3 To stop recording audio click the Stop Recording button Be sure to save the recorded audio file upon completion B Playing the Recorded Sound You can play your recording in a digital media player program that supports your audio file format Step 4 Now you can access the HDAudio Manager to configure Stereo Mix and use Sound Recorder to record the sound ...

Страница 115: ...peaker is equipped with an internal amplifier If not try a speaker with power amplifier Q Why cannot I install the onboard HD audio driver successfully For Windows XP only A Step 1 First make sure Service Pack 1 or Service Pack 2 has been installed check in My Computer Properties General System If not please update it from Microsoft s website Then make sure the Microsoft UAA Bus Driver for High De...

Страница 116: ...blem is verified and solved The problem is verified and solved The problem is verified and solved No No No Yes Yes Insert the graphics card Connect the ATX main power cable and the 12V power cable Turn on the power to start the computer Make sure the motherboard does not short circuit with the chassis or other metal objects Check if the CPU cooler is attached to the CPU securely Is the power conne...

Страница 117: ...nnector or cable might fail No The problem is verified and solved The problem is verified and solved The problem is verified and solved No No Yes Yes Yes Reinstall the operating system Reinstall other devices one by one install one device at one time and then boot the system to see if the device works successfully Press Delete to enter BIOS Setup Select Load Optimized Defaults Select Save Exit Set...

Страница 118: ...60 DXE Core is started 61 NVRAM initialization 62 Installation of the PCH runtime services 63 67 CPU DXE initialization is started 68 PCI host bridge initialization is started 69 IOH DXE initialization 6A IOH SMM initialization 6B 6F Reserved 70 PCH DXE initialization 71 PCH SMM initialization 72 PCH devices initialization 73 77 PCH DXE initialization PCH module specific 78 ACPI Core initializatio...

Страница 119: ...ll currently connected USB devices 9E 9F Reserved A0 IDE initialization is started A1 Issue reset during IDE initialization process A2 Detect and install all currently connected IDE devices A3 Activated all currently connected IDE devices A4 SCSI initialization is started A5 Issue reset during SCSI initialization process A6 Detect and install all currently connected SCSI devices A7 Activated all c...

Страница 120: ...due to invaild firmware volume detection F1 Recovery mode will be triggered by user decision F2 Recovery is started F3 Recovery firmware image is found F4 Recovery firmware image is loaded F5 F7 Reserved for future AMI progress codes Recovery Code Description 50 55 Memory initialization error occurs 56 Invalid CPU type or speed 57 CPU mismatch 58 CPU self test failed or possible CPU cache error 59...

Страница 121: ...le Output Devices are found D7 No Console Input Devices are found D8 It is an invaild password D9 DA Can t load Boot Option DB Flash update is failed DC Reset protocol is failed DE DF Reserved E8 S3 resume is failed E9 S3 Resume PPI is not found EA S3 Resume Boot Script is invaild EB S3 OS Wake call is failed EC EF Reserved F8 Recovery PPI is invaild F9 Recovery capsule is not found FA Invalid rec...

Страница 122: ...s the treatment collection recycling and disposal of electric and electronic devices and their components Under the Directive used equipment must be marked collected separately and disposed of properly WEEE Symbol Statement The symbol shown below is on the product or on its packaging which indicates that this product must not be disposed of with other waste Instead the device should be taken to th...

Страница 123: ... 123 Appendix ...

Страница 124: ...Appendix 124 ...

Страница 125: ... 125 Appendix ...

Страница 126: ...Appendix 126 ...

Страница 127: ...port http rma gigabyte us Web address http latam giga byte com Giga Byte SINGAPORE PTE LTD Singapore WEB address http www gigabyte sg Thailand WEB address http th giga byte com Vietnam WEB address http www gigabyte vn NINGBO G B T TECH TRADING CO LTD China WEB address http www gigabyte cn Shanghai TEL 86 21 63410999 FAX 86 21 63410100 Beijing TEL 86 10 62102838 FAX 86 10 62102848 Wuhan TEL 86 27 8...

Страница 128: ...te fr Sweden WEB address http www gigabyte se Italy WEB address http www giga byte it Spain WEB address http www giga byte es Greece WEB address http www gigabyte com gr Czech Republic WEB address http www gigabyte cz Hungary WEB address http www giga byte hu Turkey WEB address http www gigabyte com tr Russia WEB address http www gigabyte ru Poland WEB address http www gigabyte pl Ukraine WEB addr...

Отзывы: