


3
Installation
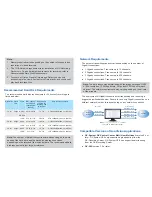
Note:
1. To enable the image updating in Internet Explorer, you must set
your browser to allow ActiveX Controls and perform a one-time
installation of GeoVision’s ActiveX component onto your computer.
2. If the GV-Recording Server is installed behind a firewall or router,
you may need to open these default ports: HTTP port 80, server
connection port (Active connection port) 11000 and passive
connection port 50000, remote playback (Remote ViewLog) port
5552.
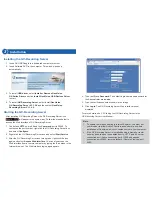
1. Insert GV-USB Dongle to a dedicated computer or server.
2. Insert Software DVD to the computer. This window pops up
automatically.
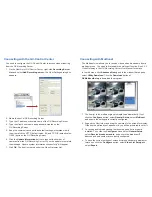
1. The default
HTTP
port is 80 and the
Command
port is 20000. To
customize the port number, right-click the GV-Recording Server icon
and select
Configure
.
2. Right-click the GV-Recording Server icon and select
Start Service
.
3. After the GV-Recording Server icon turns green, right-click the icon
again and select
Access Web Interface
. You can also access the
Web interface from a remote computer by typing the IP address in the
Internet browser. The Web interface login page appears.
3. To install
USB driver
, select
Install or Remove GeoVision
GV-Series Driver
and click
Install GeoVision USB Devices Driver
to start.
4. To install
GV-Recording Server
, select Install
GeoVision
GV-Recording Server V1.1.0.0
and then select
GeoVision
Recording Server V1.1.0.0
.
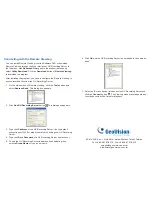
4. Type the
ID
and
Password
. The default login name and password for
the Administrator are
admin
.
5. Type the verification number shown in the image.
6. Click
Login
. The GV-Recording Server Web interface is now
displayed.
Installing the GV-Recording Server
Starting the GV-Recording Server
After installing GV-Recording Server, the GV-Recording Server icon
will appear in the system tray. Follow the steps below to
access the Web interface of GV-Recording Server.
For more details, see
2.2 Starting the GV-Recording Server
in the
GV-Recording Server User Manual
.