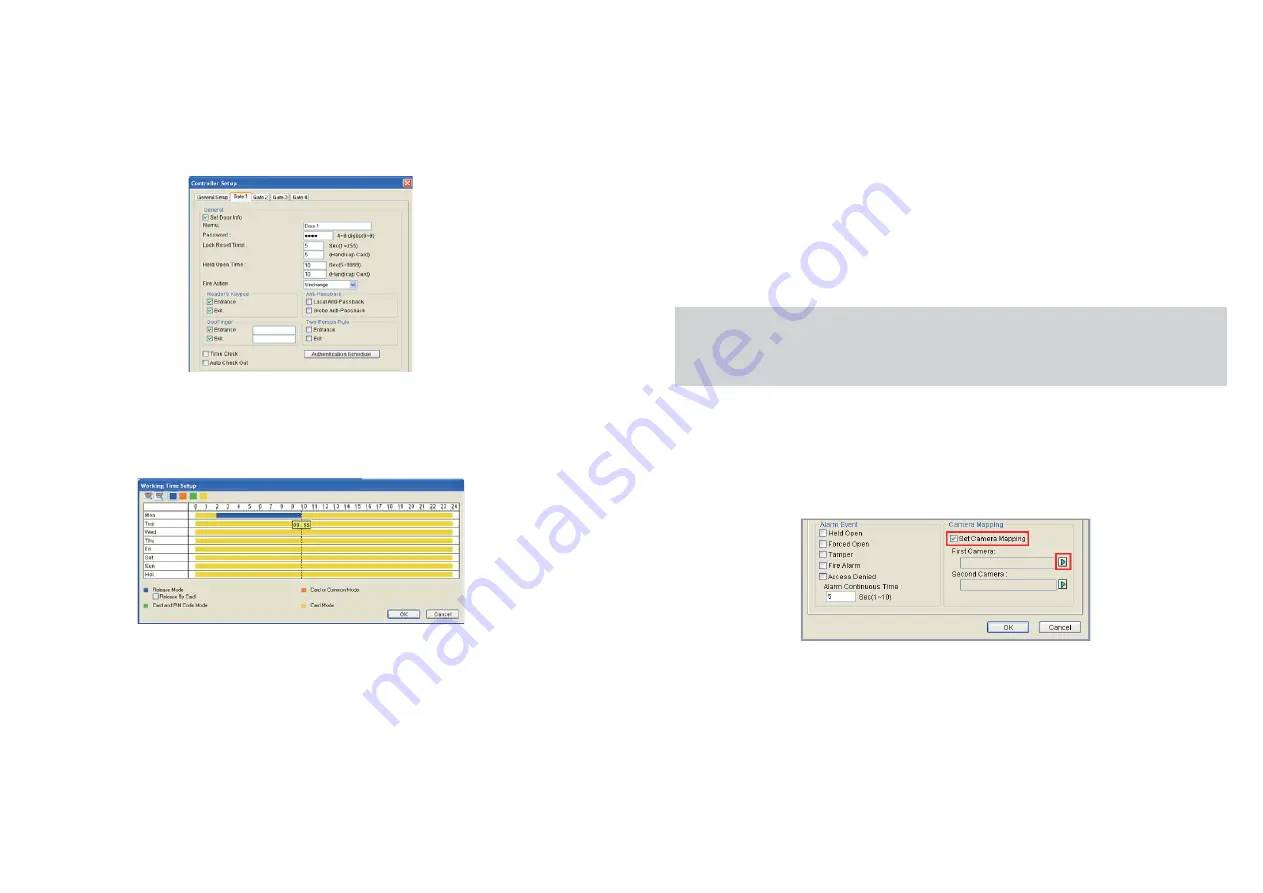
Follow the steps below:
Setting Up Access Control Schedule
Receiving Live View from Camera Reader
1. Click the
Door/Gate
tab in the Controller Setup dialog box.
2. In the General section, enable
Set Door Info
. The default password is
admin
.
3. To apply different access modes according to a schedule, click
Authentication Schedule
.
4. Select an access mode on the toolbar and drag the mouse over the
timelines.
5. Click
OK
.
1. Click the
Door/Gate
tab in the Controller Setup dialog box.
2. In the Camera Mapping section, select
Set Camera Mapping
and
click the first
Arrow
button.
3. To connect the camera reader to the GV-ASManager, use one of
these ways:
●
Card Mode
: Access card required to be granted access. (default
mode)
●
Release Mode
: Keep the door in an unlock status with the reader.
●
Card and PIN Code Mode:
For GV-CR420, a card needs to be
presented and a face needs to be detected before access is
granted.
●
Card or Common Mode:
For GV-CR420, this mode is the same
as the Card Mode.
●
Click
Add,
select the type of the IP device, and enter its IP
address and login information.
●
Click
Search
to detect all GeoVision IP devices on the same LAN.
After adding the camera reader, you must click the
Modify
button
to enter its login ID and password.
●
Release by Card:
The door will unlock only after a card is
presented and will remain unlocked during the time specified
for Release Mode.
Note:
To receive live view and take snapshots of the camera reader
on the GV-ASManager, you must connect the camera reader to the
network first.


