9
3. Configuring Holes, Probes, and Projects
Parameters such as English/metric units, initial level of hole, and gage factors can be adjusted to
meet user’s needs and the specifications of the probe. The software currently supports 2 different
probe types, up to 12 different probe configurations and as many hole configurations as the Field PC
can store in memory. All these can be adjusted using 3 options on the System menu.
3.1 Hole Configuration
Select
System
→
Hole Configuration
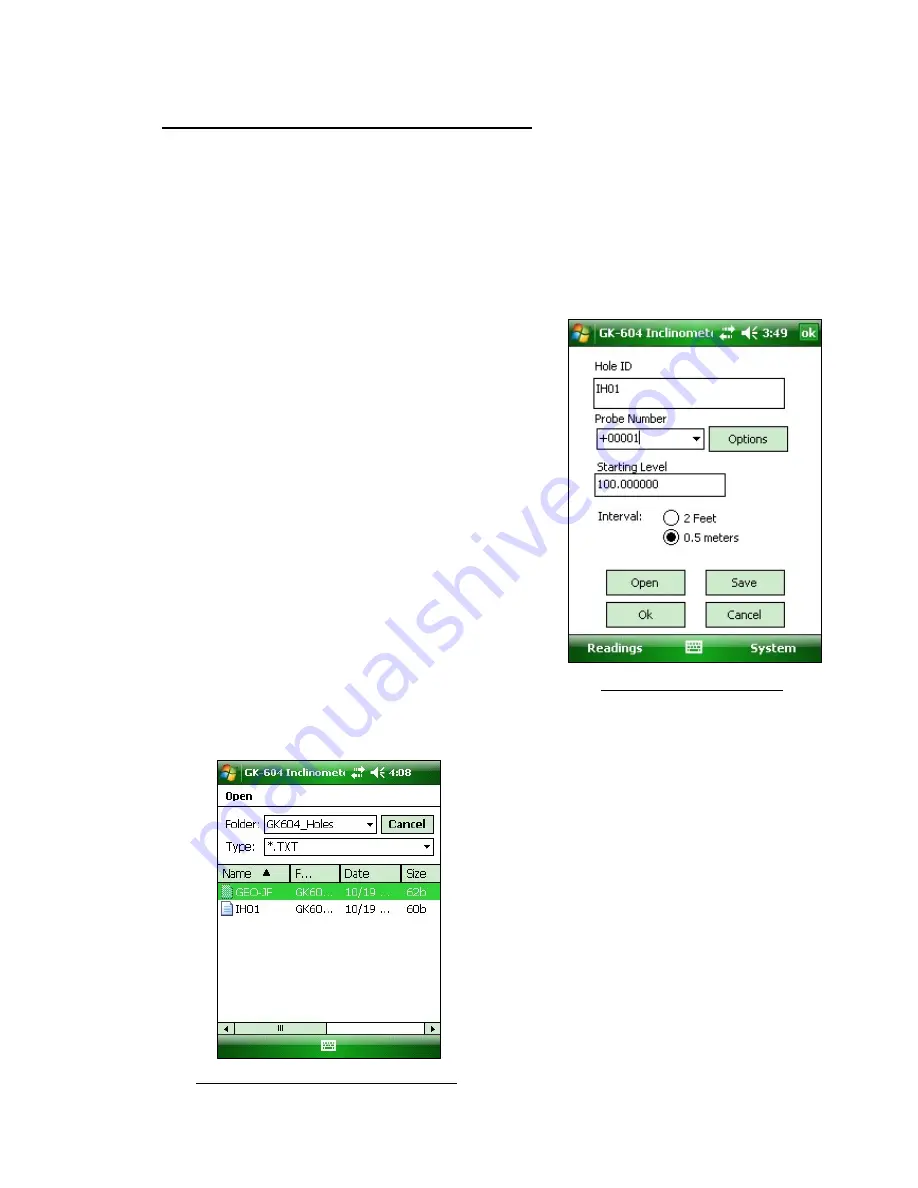
and the screen depicted in figure 11 will be displayed:
- Hole
ID
Tap on the keyboard icon (bottom of the screen)
to bring up the on-screen keyboard. Use it to edit
the Hole ID (name).
9
- Probe
Number
Select the Probe Number (or name) from the drop
down list. This associates a hole with a particular
probe. Pressing “Options” takes you directly to
the Probe Configuration screen (see section 3.2)
- Starting
Level
Using the on-screen keyboard, enter a value for
the initial level of the survey for this hole.
- Interval
Tap the radio button corresponding to the interval
that will be used for the survey
- Save
The configuration should be saved (A file will be
created using the Hole ID name).
Figure
11
‐
Hole
Configuration
- Open
Press “Open” to view and select any previously saved hole configurations (see figure 12).
Figure
12
‐
Hole
Configuration
File
Selection


