6
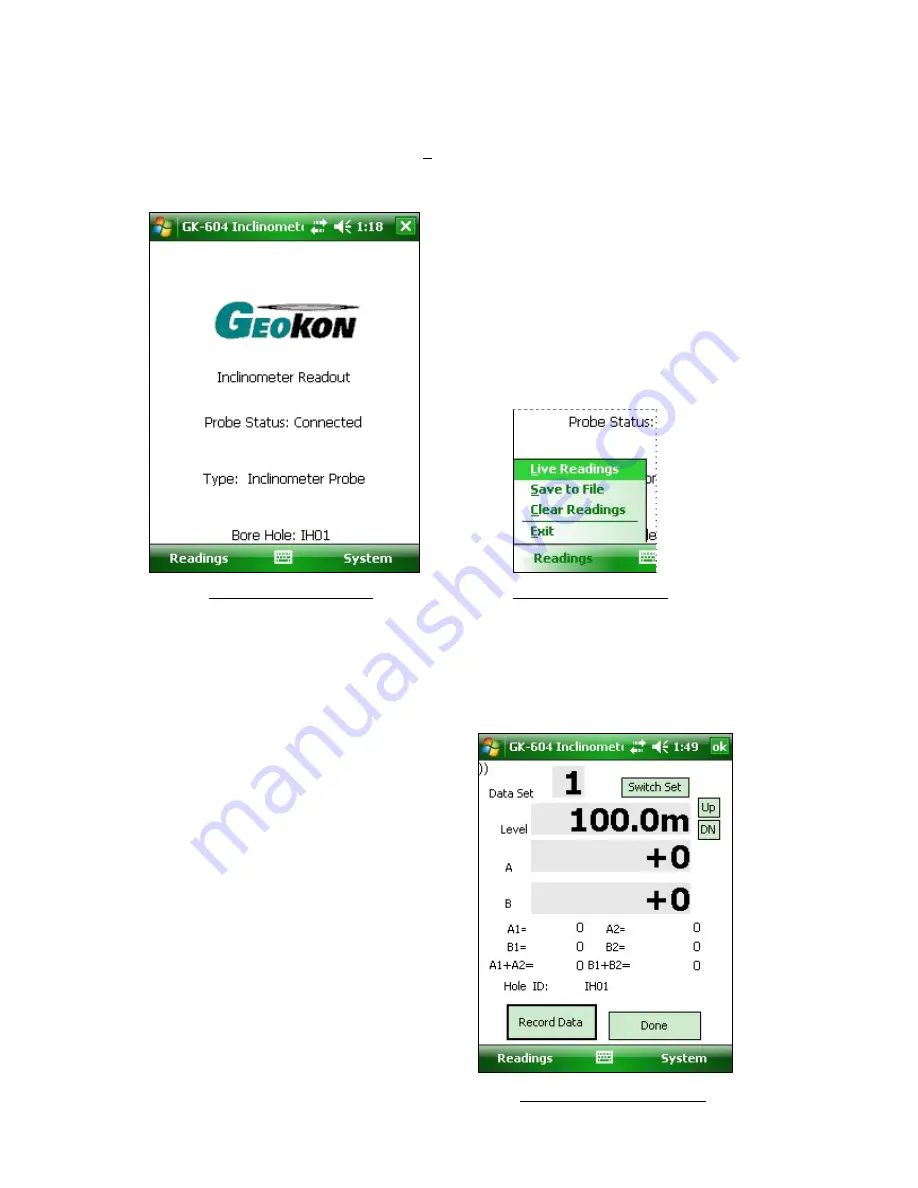
A successful connection is reflected in the Main Screen status as in figure 5. At this point
readings can be taken by clicking “Readings
→
Live Readings” (see figure 6). After an initial
connection, subsequent connections should happen automatically provided the remote is
powered on before launching the GK-604 Inclinometer Readout application.
Figure
5
‐
Probe
Connected
Figure
6
‐
Readings
Menu
The “Live Readings” screen appears as in figure 7:
Readings are continuously updated from the remote. The ‘Data Set’ always starts with ‘Set
1’ but can be switched at any time to ‘Set 2’ (usually after rotating the probe 180 degrees).
At the start of a survey, the ‘level’ is set to the
“Starting Level” configured for a particular hole.
Pressing the “Record” button (with a finger or
tap of the stylus) records that set of A&B values
and automatically changes the ‘level’ (on
screen) by the an amount based on the hole
configuration (see section 3.1). The ‘Record”
option can also be activated by pressing the
“Enter” key on the keypad.
Be sure to move the probe to the new level and
wait for the readings to stabilize before
recording the next reading.
A “beep” sound should be heard, confirming that
the reading has been stored. If no beep is
heard, tap the “volume” control at the top of the
screen and adjust the volume.
At any point you can scroll the ‘level’ using the
Up/Down buttons on the screen and view data
stored and checksums (lower half of the screen).
Figure
7
‐
Live
Readings
Screen


