17
CONNECTING TO A POWER SOURCE
OPERATING INSTRUCTIONS
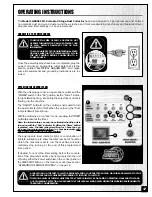
OPERATING THE CONTROL PANEL
With the unit plugged into an appropriate outlet and the
“POWER” switch in the “On” position,
A
, the “Power” indica-
tor light
B
will light up, indicating that electrical current is
flowing into the machine.
The “ON/OFF” button
C
on the control panel is used to turn
the dust collector ON or OFF. When the unit is on, the “Run”
indicator
D
will also light up.
With the unit turned on in “Run” mode, pressing the “TIMER”
button
E
activates the timer.
Note: the timer feature can only be activated when the unit is
turned on with the “Run” indicator lit. When the “Timer” button
is pressed once, the dust collector will run for 1 hour. You can
increase the programmed run time, in 1 hour increments, with
each successive push on the timer button.
The appropriate timer indicator light, or combination of
lights,
F
, will light up to show the total number of hours for
which the machine is set to run. The machine will auto-
matically stop running at the end of this programmed
time period.
If desired, to cancel the timer setting before the comple-
tion of the programmed time period, simply turn the unit
off, using either the Power switch
A
on the control panel or
the START/STOP button on the remote control (see section
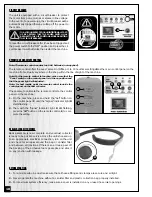
“OPERATING THE REMOTE CONTROL”, on page 18.
A
F
C
ALWAYS TURN ON THE DUST COLLECTOR BEFORE STARTING YOUR DUST PRODUCING MACHINE AND ALWAYS STOP THE
DUST PRODUCING MACHINE BEFORE TURNING OFF THE DUST COLLECTOR.
THE SOUND LEVEL OF THIS MACHINE IS RATED AT APPROXIMATELY 80 DB DURING OPERATION. MAKE SURE THAT ADE-
QUATE HEARING PROTECTION IS USED AND THAT THE OVERALL SOUND LEVEL WITHIN THE WORKING ENVIRONMENT IS
TAKEN INTO CONSIDERATION.
D
E
B
This
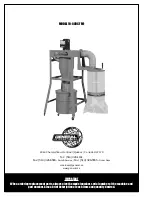
Model 10-800CF M1 Portable 2 Stage Dust Collector
has been designed to capture remove and collect
non-metallic dust and wood dust around the workshop and from woodworking machinery and features 15 pre-
programmed timer settings in 1 hour increments.
TO REDUCE THE RISK OF SHOCK OR FIRE DO NOT
OPERATE THE UNIT WITH A DAMAGED POWER CORD
OR PLUG. REPLACE DAMAGED CORD OR PLUG
IMMEDIATELY.
TO AVOID UNEXPECTED OR UNINTENTIONAL START-
UP, MAKE SURE THAT THE POWER SWITCH
A
IS IN
THE OFF POSITION BEFORE CONNECTING TO A
POWER SOURCE.
Once the assembly steps have been completed, plug the
power cord into an appropriate outlet. Refer back to the
section entitled “ELECTRICAL REQUIRMENTS” and make
sure all requirements and grounding instructions are fol-
lowed.
Содержание 10-800CF M1
Страница 24: ...WIRING DIAGRAM 24...
Страница 25: ...25 Notes...


