4
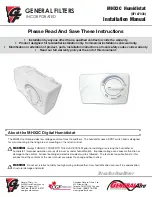
Model MHX3C Humidistat Installation Manual
Limited Warranty
This humidistat is warranted to the consumer against defects in materials and workmanship for a period of one year from the date
of installation. Defective parts will be repaired without charge except for removal, reinstallation and transportation costs. To obtain
repair service under this limited warranty, the consumer must send the defective part to the manufacturer.
There are no express warranties covering this humidistat other than set forth above. The implied warranties of merchantability and
fitness for a particular purpose are limited in duration to one year. The manufacturer assumes no liability in connection with the
installation or use of this product, except as stated in this limited warranty. The manufacturer will in no event be liable for incidental
or consequential damages.
Any questions pertaining to this limited warranty should be addressed to the manufacturer. USA: The manufacturer has elected not
to make available the informal dispute settlement mechanism which is specified in the Magnuson-Moss Warranty Act.
Troubleshooting
Humidifier turns on and off repeatedly:
1. If mounted on wall, verify wire clearance hole in wall is sufficiently insulated to prevent drafts from affecting the humidistat.
2. If mounted on return air duct, verify humidistat is at least 24” upstream of humidifiers air discharge.
Humidifier operates continuously:
1. When the humidity in the home is less than the knob setting on the humidistat the stat will operate the humidifier until the
humidity is higher. Reduce knob setting.
2. Verify function of solenoid valve.
No humidifier operation in “ON” mode:
1. Set the thermostat to operate both furnace burner and blower. Operation may be necessary for system power.
2. Verify terminals "NO" and "C" are used on the humidistat. These are the contacts for humidification.
3. Check voltage at terminals "NO" and "C". There should be no voltage for an Elite Steam or 1137/1000 power humidifier.
Voltage should be 20-30 VAC from most others.
4. Verify humidifier operation by bypassing the humidistat.
Ideal humidity is not achieved:
1. Excess air infiltration. Seal sources of air loss.
2. Technical fault with humidifier. Check water supply, electrical connections and condition of the evaporator pad. Verify metering
orifice at the solenoid valve is not obstructed.
3. Humidifier run time is too short. Switch water supply to hot water if appropriate (use copper tubing).
4. Humidifier is undersized. Switch water supply to hot water if appropriate (use copper tubing). Add additional unit(s) or replace
existing unit with a larger unit.
Using the MHX3C
USA: www.GeneralFilters.com
USA: Toll Free (866) 476-5101
If you do not have on-line access, please mail a postcard with your name, phone number, email address, product
purchased, model number, date of purchase, serial number, and contractor contact information to:
USA:
General Filters, Inc. 43800 Grand River Ave Novi, MI 48375
Canada:
400 Midwest Road Toronto, ON, M1P 3A9 Canada
Canada: www.CGFProducts.com
Canada: Toll Free (888) 216-9184
WARNING: Turn off power before performing maintenance.
CAUTION: Maintenance should be performed only by a qualified contractor.
!
!
To adjust humidity using your MHX3C, simply turn the dial to the left or right. Turning to the left,
towards the number 75, increases humidity output. Turning the dial to the right, or the number 10,
decreases the humidity output.
After each adjustment, wait 2-3 days before adjusting again. This is how long it can take for new
humidity levels to reach all areas of your home.
Ideal humidity is between 40 and 60%. See additional recommended settings to the right.
At Outside
Temperature
Recommended
Setting
-20°F
-29°C
15%
-10°F
-23°C
20%
0°F
-18°F
25%
+10°F -12°C
30%
+20°F
-7°C
35%
+30°F
-1°C
40%
FORM NO. MHX3C _REV B
(8-2018; JPF; InDesign)


