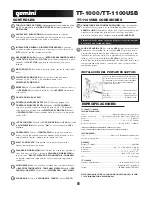
FUNCTIONS:
12
POWER SWITCH:
The
POWER SWITCH
turns the unit
ON
or
OFF
. Make sure the switch is in the ‘
OFF
’ position prior to making
any connections.
START/STOP BUTTONS:
These buttons start and stop the turntable
motor. Both buttons have the same function. If they seem to not be
functioning, check to make sure that the Motor Drive Belt is properly
installed in the
SETUP INSTRUCTIONS.
MOTOR ON/OFF:
This button allows you to start or stop the rotation
of the platter.
SPEED SELECTOR:
Select the desired speed by depressing the 33, 45
or 78 (33 & 45 simultaneously)
SPEED SELECTOR
button.
REVERSE
: Push the
REVERSE
button to play your track in reverse. Push
the
REVERSE
button again to cancel this feature.
45RPM RECORD ADAPTER
PITCH SLIDE CONTROL:
The
TT-1000/TT-1100USB
is equipped with a
PITCH SLIDE CONTROL
. When the
PITCH SLIDE CONTROL
is in the
center position, the speed will be 33, 45, or 78 depending on which
SPEED SELECTOR
button is pushed. When the
PITCH SLIDE CONTROL
is positioned off center, the pitch can vary ± 10%.
TARGET LIGHT:
Plug the
TARGET LIGHT
into the
RCA STYLE JACK
,
located adjacent to the
PLATTER
. Turn the
POWER
switch to the "
ON
"
position, at which point the
TARGET LIGHT
will light up
.
COUNTERWEIGHT:
Attach the
COUNTERWEIGHT
to the back of the
tonearm, with the number scale facing forwards, by turning the weight
counterclockwise.
ANTI-SKATE ADJUSTMENT:
This knob is used to compensate for
inward tracking forces.
HEADSHELL/TONE ARM LIFT:
Using the handle on the
HEADSHELL
to
carefully position the
TONE ARM
over the desired position on the
record. Lower the
TONE ARM
slowly, while letting go of the
TONE
ARM
over the record where you want to play. You may also use the
TONE ARM LIFT
to raise and lower the
TONE ARM
.
ARM CLAMP
: Release the
ARM CLAMP
found on the
ARM REST
When play is over, raise the
TONE ARM
, move it onto the
ARM REST
, and secure it with the
ARM CLAMP.
SLIPMAT:
Put the
SLIPMAT
on the
PLATTER
.
13
14
15
16
17
18
5
TT-1000/TT-1100USB
8
9
10
11
6
7
4
5
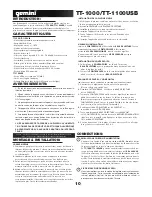
ADDITIONAL TT-1100USB INFO
PHONO/LINE SWITCH:
There is a switch on the back panel, next to
the
RCA
cables, that selects between
PHONO/LINE
. Use
PHONO
level for plugging into a turntable input on a home stereo. Use the
LINE
level for plugging into
CD/AUX/TAPE
inputs.
WARNING: You may damage your receiver if you plug
in a LINE level into a PHONO input.
USB Audio Output
: Use the included
USB
Cable to connect your
turntable to your computer. The
USB
connection will provide audio
from the turntable and stereo input to your computer. You may wish
to install and use the
AUDACITY
software
(PC and Mac)
, which al-
lows you to take advantage of advanced audio editing features,
such as audio normalization, noise removal and automatic track
separation.
White (L+)......................................Left C
Blue (L-)............................................Left Channel -
Red (R+).......................................Right C
Green (R-).....................................Right Channel -
SPECIFICATIONS:
CARTRIDGE INSTALLATION:
Connect the lead wires to the cartridge terminals.
For your convenience, the terminals of most car-
tridges are color-coded. Connect each lead wire to
the terminal of the same color. In case your car-
tridge is not marked the positive leads are the ones
on top negative below, left leads are the left chan-
nel, and right leads are the right channel.
TT-1000/TT-1100USB
TURNTABLE SECTION:
Type..................................................................Belt Drive Manual Turntable
Drive Method....................................................................................Belt Drive
Motor..................................................................................................DC Motor
Speed..........................................................................33 1/3, 45 or 78RPM
Wow and Flutter..................................................Less than 0.25% WRMS*
*THIS RATING REFERS TO THE TURNTABLE ASSEMBLY AND PLATTER ONLY AND
EXCLUDES EFFECTS OF RECORDS, CARTRIDGES OR TONEARMS.
TONEARM SECTION:
Type...............................................Statically Balanced S-shaped Tonearm
Headshell Weight...................................................................................5.6 g
GENERAL:
Output (TT-1000)................................................................................PHONO
Power Supply.........................................AC 115 V~60 Hz/230 V~50 Hz
Power Consumption................................................................................5.5 W
Dimensions.................................................................17.67" x 14.56" x 5.7"
.....................................................................................(449 x 370 x 145 mm)
Weight........................................................................................8.1 lbs. (4 kg)
TT-1100USB
Computer interface..................................................USB 1.1/2.0 compliant
........................................................Windows XP or MAC OSX Compatible
Output...................................................................PHONO/LINE (RCA TYPE)
SPECIFICATIONS AND DESIGN ARE SUBJECT TO CHANGE
WITHOUT NOTICE FOR PURPOSE OF IMPROVEMENT.


