CDX-2400
5
FUNCTIONS:
(CONTINUED)
13
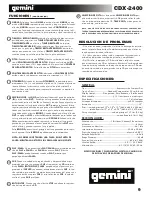
SINGLE:
Pressing the
SINGLE
button engages
SINGLE
mode, in this
mode the
CDX-2400
will play one song and then stop. Pressing the
SINGLE
button again will then activate
CONTINUOUS
mode causing
the unit to play continuously (after the last track, the unit will return to
the first track of the disc and continue to play).
TIME
: The
TIME BUTTON
switches the time display between three
available sources, these three are
TIME ELAPSED
on the track,
TIME
REMAINING
on the disc and and
TIME REMAINING
on the track.
TIME ELAPSED
indicates how much time has currently gone by since the
play button was pressed,
TIME REMAING ON DISC
will count down the
time remaining on the entire disc and
TIME REMAINING ON TRACK
counts down the time that is left before the end of the track.
PITCH:
Pushing the
PITCH
button (the button will light up blue) activates
the
PITCH CONTROL SLIDE
. The pitch or speed of the
CD
will change
plus or minus 12% depending on the position of the
PITCH CONTROL
SLIDER
. Push the
PITCH
button again to deactivate this mode.
PITCH CONTROL SLIDE
: Moving the
PITCH CONTROL SLIDE
up or down will lower or raise the pitch perc or - 12%.
PITCH BEND
: Pushing the
PITCH BEND BUTTONS
will automatically
raise the pitch up to +16% or lower the pitch down to -16% from the
existing pitch setting. Releasing the buttons will return the pitch
to the original pitch setting. You can use this function to match the beat
when mixing from one song to another
LOOP SECTION
: A
LOOP
repeats the section between the entry point
(
IN
) and the exit point (
OUT
). To set a loop while the unit is playing,
start by pressing the
IN BUTTON
(it will light up) and when you reach
the desired end loop point press the
OUT BUTTON
(it will also light up).
The loop will continue playing until you press the
OUT BUTTON
again
allowing the music to continue from that point on, to re-engage the loop
you must press the
RELOOP BUTTON
. When you have released your
loop the
OUT BUTTON
will turn
OFF
and the
IN BUTTON
will remain lit
to indicate that your loop is stored in the
CDX-2400
memory. Pressing
the
IN BUTTON
again while the unit is playing will erase the previously
saved loop while saving your new loop entry point. Press
OUT
to exit the
loop and save a new complete loop.
Press
RELOOP
to return to the beginning of the previously saved loop
from normal play. Press
RELOOP
repeatedly to cause the loop to stutter.
NOTE: THE FIRST LOOP WILL HAVE A PAUSE AT THE EXIT POINT,
WHILE ALL OTHERS WILL BE SEAMLESS.
PLAY/PAUSE
: Each press of the
PLAY/PAUSE BUTTON
causes the operation to change from
PLAY to PAUSE
or from
PAUSE
back to
PLAY
. The
PLAY/PAUSE BUTTON
remains lit when in
PLAY
mode, while it blinks in
PAUSE
mode.
CUE
: While the unit is playing and after the cue point has been
programmed, pressing
CUE
will cause the
CD
player to enter the
PAUSE
mode (
PLAY
/
PAUSE BUTTON
blinks) at the programmed cue
point (the
CUE LED
is lit). Holding down the
CUE
button
changes the function to preview , and allows you to stutter start or play
from the programmed
CUE POINT
Releasing the
CUE
button will return
the
CD
to the preset
CUE
point.
STOP BUTTON
: When pressed the
STOP BUTTON
stops the playback
of the
CD
player.
14
15
16
17
18
19
20
21
22
TRACK SELECTION
: The
TRACK SELECTION
buttons let you select
the track to play.
+10
allows you to scan through the track selection
in increments of 10.
TRACK SKIP
allows you to scan through each
track one at a time.
NOTE : ONCE YOU HAVE SKIPPED TO ANOTHER TRACK, YOU MAY NOT GO BACK
TO YOUR PROGRAMMED CUE POINT. YOU MUST BEGIN YOUR CUE SELECTION
OVER AGAIN, THE CUE WILL BE PRESET TO THE BEGINNING OF THE NEWLEY SE-
LECTED TRACK.
TROUBLESHOOTING:
- If a disc will not play, check to see if the disc was loaded correctly
(label side up). Also check the disc for excessive dirt, scratches, etc.
- If the disc turns but there is no sound, check the cable connections,
if they are ok, check your amplifier or reciever.
-If the CD skips, check the CD for dirt or scratches. Do not assume that
the CD player is defective. Many cd’s are recorded out of spec and
will skip on most or all CD players. Before sending the unit for repair,
try playing a CD that you are sure plays properly.
SPECIFICATIONS:
GENERAL:
Type................................................................................Compact Disc Player
Disc Type...................................Standard Compact discs (12 cm & 8 cm)
Time Display......................Track Elapsed, Track Remain, or Total remain
Variable Pitch.......................................± 12% Slider with Resume Switch
Pitch Bend............................................................................± 16% Maximum
Instant Start....................................................................Within 0.03 seconds
Installation...........................................................................................19" each
Dimensions.........Main unit: 19" x 3.5" x 10" (482.6 x 88.9 x 254 mm)
…..............…Remote unit: 19" x 3.5" x 2.75" (482.6 x 133 x 70 mm)
Weight Per Unit................................................Main unit: 13.7 lbs. (5.2 kg)
…............................................................................Remote unit: 4 lbs.(1.5kg)
AUDIO SECTION:
Quantization.....................................1 Bit Linear/Channel, 3 Beam Laser
Oversampling Rate..............................................................................8 Times
Sampling Frequency..........................................................................44.1 kHz
Frequency Response............................................................20 Hz to 20 kHz
Total Harmonic Distortion...................................................Less Than 0.05%
Signal to Noise Ratio..............................................................................85 dB
Dynamic Range........................................................................................85 dB
Channel Separation.................................................................85 dB (1 KHz)
Output Level...................................................................2.0 +/- 0.2V R.M.S.
Power Supply.......................................................AC 115/230V, 60/50 Hz
SPECIFICATIONS AND DESIGN ARE SUBJECT TO CHANGE WITH-
OUT NOTICE FOR PURPOSE OF IMPROVEMENT.


