


page | 19
Assigning Window Priority
1. Access the Web interface for the 4x1 Multiview Seamless Switcher.
See
Web Interface
, pg. 36, for more information.
2. Go to
Window Setup
, pg. 41, page of the Web interface section.
3. We’ve selected Preset 8 from the
Select Preset
drop-down list. We’ve also
repositioned and resized the windows, as follows:
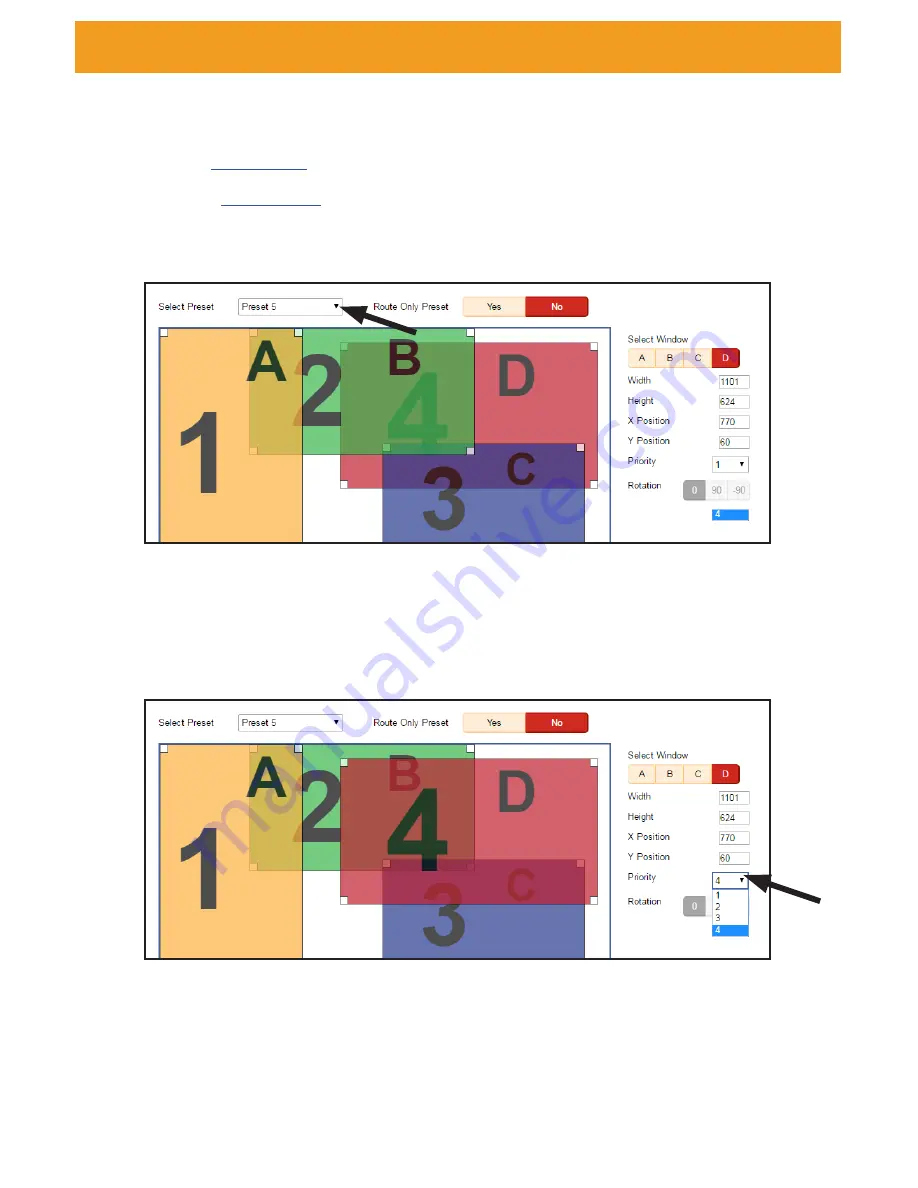
4. Select one of the windows by clicking on it or selecting it from the
Select Window
drop-down list. For this example, we are going to select window D and make it the
top-most window.
5. The current priority of the selected window will appear in the
Priority
drop-down list.
6. Select 1 from the
Priority
drop-down list.
7. Window D will be the top-most window. This window can be positioned anywhere
within the interactive workspace and the window will appear on top of all windows.
8. Choose Preset 8 from the
Save To
drop-down list and click the
Save
button to save
any changes to the preset.
Window Basics
Содержание 4x1 Multiview Seamless Switcher
Страница 10: ......
Страница 11: ...01 Getting Started Multiview Seamless Switcher...
Страница 14: ...page 4 IR Remote Control Unit 4 3 2 8 6 10 12 11 7 5 9 1...
Страница 20: ......
Страница 21: ...Multiview Seamless Switcher 02 Operating the Seamless Switcher...
Страница 60: ...This page left intentionally blank...
Страница 61: ...Multiview Seamless Switcher 03 Advanced Operation...
Страница 86: ...This page left intentionally blank...
Страница 87: ...Multiview Seamless Switcher 04 Appendix...
Страница 91: ...page 81 This page left intentionally blank...


