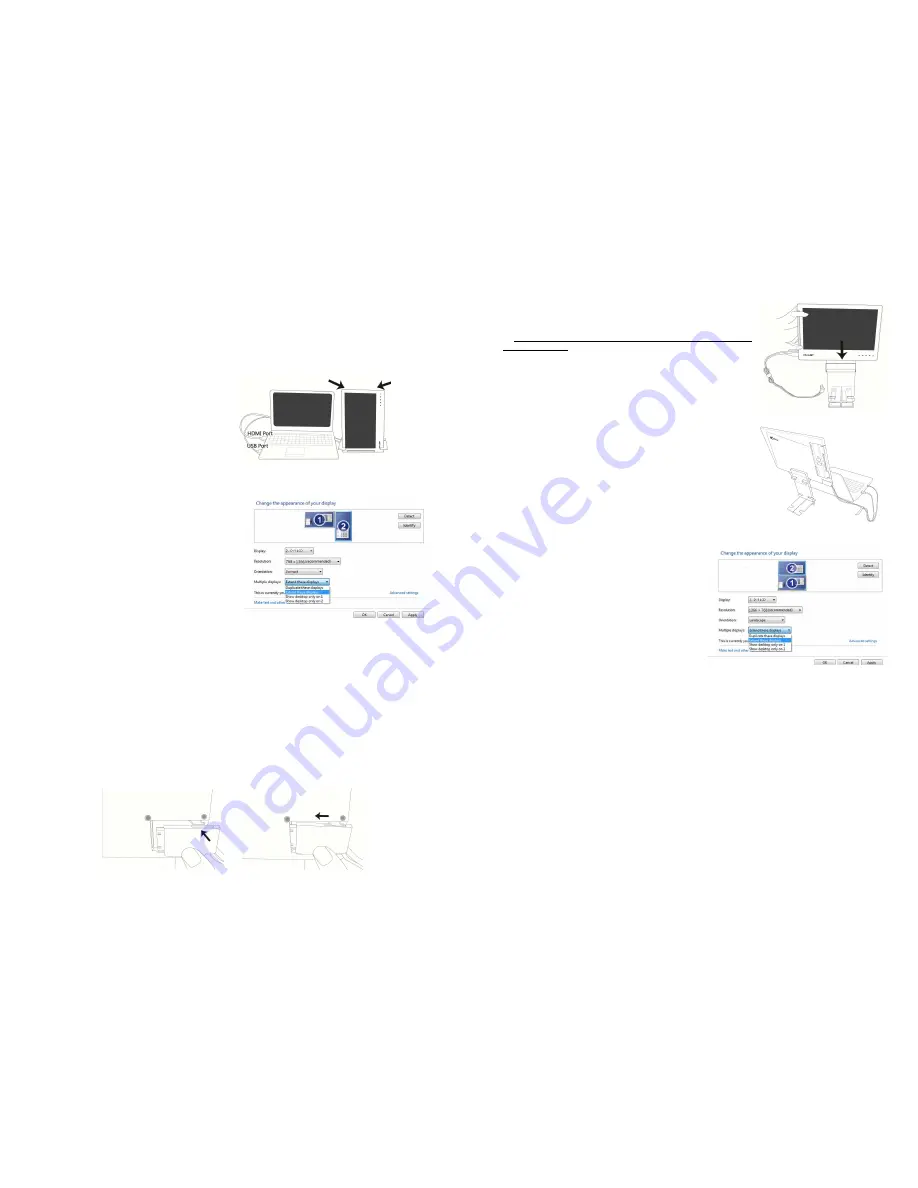
Step3. Connect On-Lap Monitor to the laptop
It is recommended that you place the vercal standing On-Lap Monitor to the right
side of the laptop for a beDer viewing angle. As illustrated, connect the USB power
connector to the laptop's USB port, and then the digital video connector to the lap-
top's HDMI video output port (If Analog video and USB power cable is used, connect
the analog video connector to the laptop's D-sub port). Tidy the redundant cables
with cable clips.
Fig.: Vercal display of On-Lap Monitor
Step4.Make the laptop and monitor extension setting
(Refer to Secon 2 of Chapter 3 for monitor
display se,ng.)
AEer switching on the laptop, go to Win-
dows’ “Control Panel” to make the monitor
extension se,ng.
If you are using Windows 7:
Select “2.DVI LCD” (digital video) or
“2. display device: VGA” (analog video) for
Display
Select “1366x768” for
Resoluon
Select "Portrait (flipped)" for
Orientaon
Select "Extend these displays" for
Mulple
displays
, and drag Display 2 to the right side
of Display 1.
Section 3 Upward Extension Display
Step1. Install the video and USB power cable
If you wish to use the HDMI port on the laptop, please use Digital Video and USB-
Powered Cable. If you wish to use the D-sub (VGA) or mini-Display Port on the lap-
top, please purchase the Analog Video and USB-Powered Cable or mini-Display Port
and USB-Powered Cable.
Connect the Image and Power connector to On-Lap video port, (1) Insert the latch
into the groove of the video power connector. (2) Slide the video power connector
toward the leE for a proper connecon. [Warning: Not inserng the latch into the
groove may result in damage to connector. Please check the video power connector
is properly connected and not protruding out. If protrusion occurs, the connecon
might not be properly connected and monitor will not be able to operate.]
Picture: Insert the latch into the groove of the video power connector.
Fig.: Insert the video power connector to the video power port of On-Lap Monitor
Note: Viewing On-
Lap Monitor from the le1 side
is be2er
,
, ,
,
viewing is poorer from the right side
6
Step2. Install Stand Bricks
As illustrated, place the On-Lap Monitor on Stand Bricks
II. Note: Center the On-Lap Monitor for close fi,ng with
Stand Bricks II.
Fig.: Place On-Lap Monitor on Stand Bricks II.
Step3. Connect On-Lap Monitor to the laptop
Place the laptop in front of the On-Lap Monitor and
align the upper side of the laptop to the lower display
edge of the On-Lap Monitor. Connect the USB power
connector to the laptop's USB port, and then connect
the digital video connector to the laptop's HDMI video
output port (If Analog video and USB power cable is
used, connect the analog video connector to the lap-
top's D-sub port).
Fig.: Upward extension display of On-Lap Monitor
Step4.Make the laptop and monitor extension setting
(Refer to Secon 2 of Chapter 3 for monitor
display se,ng.)
AEer switching on the
laptop, go to Windows’ "Control Panel" to
make the monitor extension se,ng.
If you are using Windows 7:
Select "2.DVI LCD" (digital video) or
"2. display device: VGA" (analog video) for
Display
.
Select "1366x768" for
Resoluon
Select "Landscape" for
Orientaon
Select "Extend these displays" for
Mulple
displays
, and drag Display 2 to the top side
of Display 1.
Section 4 Dual Monitor Display
[Note: Ultrabook or laptop of smaller size than On-Lap may not be suitable for this
usage.]
Step1. Install the Holder Plate to the back cover of the laptop
’
s mon-
itor
Open the shaE’s Hinge Plate of the On-Lap Monitor to 180
°
and place the On-Lap
Monitor on the laptop's back cover. Peel off the other double-sided adhesive tape on
the Holder Plate and aDach the Holder Plate to the laptop, as illustrated. Note:
1) Keep the Holder Plate 2mm from the edge of the laptop.
2) Align the On-Lap Monitor to the front edge of the laptop's back cover.
3) Keep the direcon of the Holder Plate the same as that of the shaE’s Hinge Plate
4) If the Holder Plate cannot securely aDach to the laptop because the laptop’s back
cover has a protruding paDern or is anodized, use more double-sided adhesive
tape as required.
5) Double-sided adhesive tape should be used on a horizontal surface; gently press
on the adhesive tape aEer the Holder Plate is aDached.
Leave for 2 hours before
installing the On-Lap Monitor.
7


