5
CYMBALS AND STAND ASSEMBLY
ITEMS REQUIRED:
1x Pair of Hi-Hat Cymbals
1x Crash Cymbal
1x Hi-Hat Stand
1x Crash Cymbal Stand
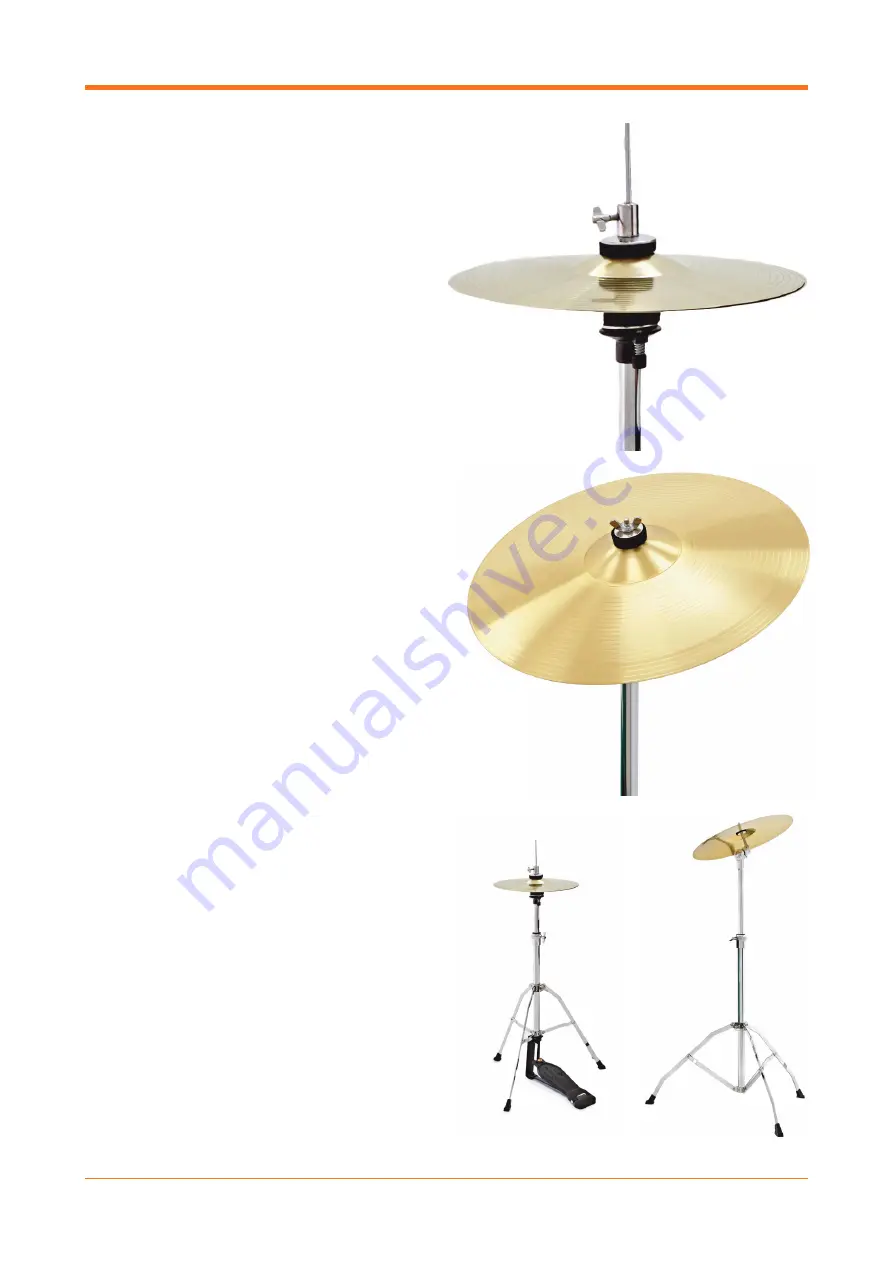
1. Open the legs of the hi-hat stand so it’s sturdy.
Insert the top tube into the bottom half of the
stand, the thin rod should appear out of the top
of the stand. Later, this will be where you adjust
the height of your hi-hat cymbals. Take one of
the hi-hat cymbals (bell side down) and place it
over the rod, the cymbal should curve upwards.
2. Unscrew the nut on the hi-hat clutch removing a
large metal washer and one of the two cymbal
felts. Refit and retighten these around the
second hi-hat cymbal (bell side up), with the
removed felt and washer on the underside and
the remaining felt and clutch on the top side,
forming a sandwich of the cymbal with the felts.
3. Place the second hi-hat cymbal and clutch over
the rod and lower until the top cymbal rests on
the lower. Use your foot to press the hi-hat pedal
down and tighten the clutch leaving a slight gap
between the two cymbals. Taking your foot off
the pedal should result in a gap between the
two cymbals.
4. Moving onto the crash cymbal, open the legs of
the crash cymbal stand so it’s sturdy. Unscrew
the wing nut at the top of the cymbal stand,
removing one of the two felts at the same time.
5. Place the crash cymbal onto the stand, resting
it on the second felt. Place the first felt on top
of the cymbal and retighten the wing nut. Do
not over-tighten the cymbal, it requires space to
move freely when hit. Over-tightening can cause
a cymbal to split. Height and angle of the cymbal
can be adjusted by altering the cymbal joint and
the tiers of the stand.
Содержание JUNIOR 5 PIECE DRUM KIT
Страница 1: ...JUNIOR5PIECE DRUMKIT SETUPGUIDE...
Страница 2: ...JUNIOR 5 PIECE DRUM KIT...


