


12
JB83797AU
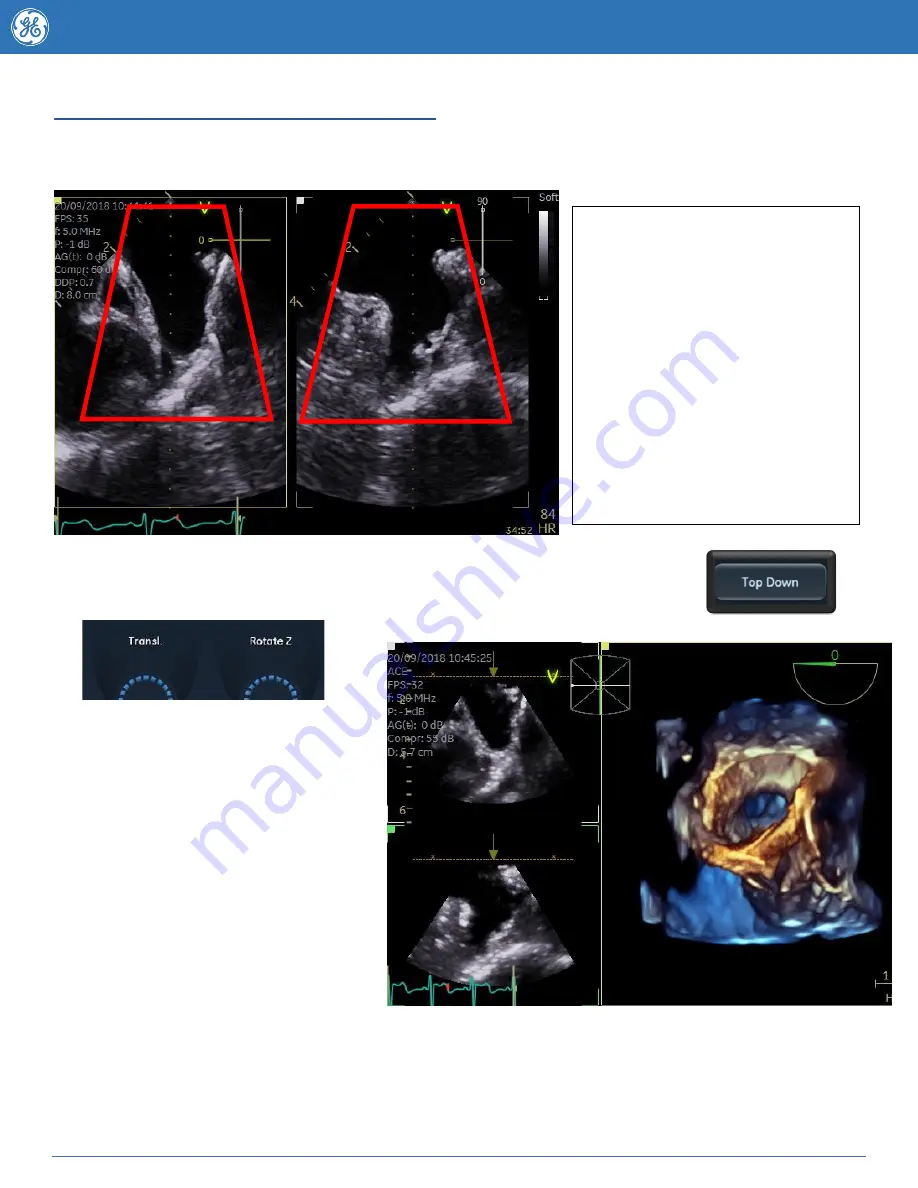
Using the 4D zoom TOP DOWN button
4D zoom Top Down is helpful for any structure you wish to see from the Top
– down, this makes it
especially helpful for 4D left atrial appendage and interatrial septum acquisition.
When you are ready to view your 4D image press the
Top Down
button on the
touchscreen and you will be taken through to the 4D rendered view.
The
Rotate Z
knob can be used the
adjust the angle of the 4D dataset if it’s
a couple of degrees off (represented by
yellow arrow).
The “Yellow” arrow on the 2D reference
planes
represents
the
viewing
direction.
The brown
Translate
line (visible on
the 2D images) can be moved using
the translate knob at the bottom of the
touchscreen
– to optimize the image
move it closer to the region of interest
– you can also use
2 Click Crop
to
crop the image down in a parallel fashion.
Remember a darker 2d image may produce a nicer 4D image
– if it’s difficult to see the structures due
to blurring try turning down the large 2D gain knob
.
Adjust Zoom region of interest -
The trackball will default to Position
adjustment in the Left box (it is
highlighted in yellow). Pressing the
select key changes between position
and
region
of
interest
size
adjustment. Optimise until satisfied.
To
adjust the view in the right box
(Image to the right in above picture)
press your
trackball
button or touch
Ref Plane
on your touchscreen. As
per the Azimuth plane use the Set
button to switch between position
and size adjustment.


