background image

5

Safety Instructions

Operating Instructions

Safety Instructions

Operating Instructions

Care and Cleaning

Troubleshooting T

ips

Consumer Support

ge.com

Use proper pan size—select cookware having flat bottoms large enough to cover the surface unit 
heating element. The use of undersized cookware will expose a portion of the surface unit to direct
contact and may result in ignition of clothing. Proper relationship of cookware to surface unit will also
improve efficiency.

SURFACE COOKING UNITS

Never leave the surface units unattended
at high heat settings. Boilovers cause
smoking and greasy spillovers that may
catch on fire.

Do not use aluminum foil to line the 
drip pans or anywhere in the oven, except
as described in this manual. Misuse could
result in a shock, fire hazard or damage 
to the range.

Be sure the drip pans and the vent duct
are not covered and are in place. Their
absence during cooking could damage
range parts and wiring.

Only certain types of glass, glass ⁄ceramic,
earthenware or other glazed containers 
are suitable for cooktop service; others 
may break because of the sudden change
in temperature. 

To minimize the possibility of burns,
ignition of flammable materials and
spillage, the handle of a container 
should be turned toward the center 
of the range without extending over 
nearby surface units.

Always turn the surface units off before
removing cookware.

Do not immerse or soak the 
removable surface units. Do not put 
them in a dishwasher. Do not self-clean 
the surface units in the oven.

When preparing flaming foods under 
the hood, turn the fan on. 

To avoid the possibility of a burn or
electric shock, always be certain that the
controls for all surface units are at the 

OFF

position and all coils are cool before

attempting to lift or remove a unit.

Clean the cooktop with caution. If a wet
sponge is used to wipe spills on a hot
cooktop, be careful to avoid steam burns.

Keep an eye on foods being fried at high
or medium high heat settings.

Foods for frying should be as dry as
possible. Frost on frozen foods or moisture
on fresh foods can cause hot fat to bubble
up and over the sides of the pan.

Use little fat for effective shallow or deep
fat frying. Filling the pan too full of fat can
cause spillovers when food is added.

If a combination of oils or fats will be used
in frying, stir together before heating, or as
fats melt slowly.

Always heat fat slowly, and watch as it heats.

Use a deep fat thermometer whenever
possible to prevent overheating fat beyond
the smoking point.

Do not leave any items on the cooktop.
The hot air from the vent may ignite
flammable items and will increase pressure
in closed containers, which may cause
them to burst.

Do not leave plastic items on the
cooktop—they may melt if left too close 
to the vent.

Содержание Profile JBP49

Страница 1: ...nd Roasting Features 12 Care and Cleaning Control Knobs 19 Drip Pans 22 Heating Elements 19 Lift Off Oven Door 20 Lift Up Cooktop 23 Light 21 Painted Surfaces 21 Shelves 21 Storage Drawer 21 Surface Units 22 Vent 23 Troubleshooting Tips 24 26 Accessories 30 Consumer Support Consumer Support Back Cover Product Registration 27 28 Warranty 31 Write the model and serial numbers here Model ____________...

Страница 2: ...909 To check if the device is installed and engaged properly remove the kick panel or storage drawer and inspect the rear leveling leg Make sure it fits securely into the slot If you pull the range out from the wall for any reason make sure the device is properly engaged when you push the range back against the wall If it is not there is a possible risk of the range tipping over and causing injury...

Страница 3: ...owing Use this appliance only for its intended purpose as described in this Owner s Manual Be sure your appliance is properly installed and grounded by a qualified installer in accordance with the provided installation instructions Have the installer show you the location of the circuit breaker or fuse Mark it for easy reference Do not attempt to repair or replace any part of your range unless it ...

Страница 4: ...ff Smother a flaming pan on a surface unit by covering the pan completely with a well fitting lid cookie sheet or flat tray Use a multi purpose dry chemical or foam type fire extinguisher Flaming grease outside a pan can be put out by covering it with baking soda or if available by using a multi purpose dry chemical or foam type fire extinguisher Flame in the oven can be smothered completely by cl...

Страница 5: ...hout extending over nearby surface units Always turn the surface units off before removing cookware Do not immerse or soak the removable surface units Do not put them in a dishwasher Do not self clean the surface units in the oven When preparing flaming foods under the hood turn the fan on To avoid the possibility of a burn or electric shock always be certain that the controls for all surface unit...

Страница 6: ... paper products cooking utensils or food in the oven when not in use Do not use aluminum foil to line oven bottoms Improper installation of aluminum foil may result in a risk of electric shock or fire Stand away from the range when opening the oven door Hot air or steam that escapes can cause burns to hands face and or eyes WARNING OVEN Do not use oven cleaners No commercial oven cleaner or oven l...

Страница 7: ...s Cast iron and coated cast iron cookware are slow to absorb heat but generally cook evenly at low to medium heat settings Steel pans may cook unevenly if not combined with other metals For best cooking results pans should be flat on the bottom Match the size of the saucepan to the size of the surface unit The pan should not extend over the edge of the surface unit more than 1 Not over 1 inch Home...

Страница 8: ...wer outage CLEAR OFF Pad Touch to cancel ALL oven operations except the clock and timer COOKING TIME Pad Touch and then touch the number pads to set the amount of time you want your food to cook The oven will shut off when the cooking time has run out DELAY START Pad Use along with COOKING TIME or SELF CLEAN STD LO pads to set the oven to start and stop automatically at a time you set SELF CLEAN S...

Страница 9: ...e lowest position A you will need to use caution when pulling the shelf out We recommend that you pull the shelf out several inches and then using two pot holders pull the shelf out by holding the sides of it The shelf is low and you could be burned if you place your hand in the middle of the shelf and pull all the way out Be very careful not to burn your hand on the door when using the shelf in t...

Страница 10: ...helf positions Safety Instructions Operating Instructions Care and Cleaning Troubleshooting Tips Consumer Support Quantity and Shelf First Side Second Side Food or Thickness Position Time min Time min Comments Ground Beef 1 lb 4 patties D 13 8 Space evenly 1 2 to 3 4 thick 4 lbs 12 patties D 15 11 Beef Steaks Rare 3 4 to 1 thick F 6 4 Steaks less than 3 4 Medium 1 to 11 2 lbs E 8 6 thick are diffi...

Страница 11: ...ours and 59 minutes To Reset the Kitchen Timer If the display is still showing the time remaining you may change it by touching the KITCHEN TIMER ON OFF pad then touch the number pads until the time you want appears in the display If the remaining time is not in the display clock delay start or cooking time are in the display recall the remaining time by touching the KITCHEN TIMER ON OFF pad and t...

Страница 12: ... Touch the BAKE pad Touch the number pads to set the desired oven temperature Touch the COOKING TIME pad NOTE If your recipe requires preheating you may need to add additional time to the length of the cooking time Touch the number pads to set the desired length of cooking time The minimum cooking time you can set is 1 minute The oven temperature that you set and the cooking time that you entered ...

Страница 13: ...e BAKE and BROIL HI LO pads at the same time until the display shows SF Touch the KITCHEN TIMER ON OFF pad The display shows CON BEEP continuous beep Touch the KITCHEN TIMER ON OFF pad again The display shows BEEP This cancels the one beep every 6 seconds Touch the START pad Cook and Hold Your new control has a cook and hold feature that keeps cooked foods warm for up to 3 hours after the cooking ...

Страница 14: ...e you want touch the START pad Touch the CLOCK pad again to change to the 24 hour military time clock The display will show 24 hr If this is the choice you want touch the START pad Touch the CLOCK pad again to black out the clock display The display will show OFF If this is the choice you want touch the START pad NOTE If the clock is in the black out mode you will not be able to use the Delay Star...

Страница 15: ... bAtH appears in the display Touch the START pad and will appear in the display Touch the COOKING TIME pad Touch the number pads to set the desired length of cooking time between 1 minute and 9 hours and 59 minutes The cooking time that you entered will be displayed Touch the START pad Touch the BAKE pad No signal will be given Using the number pads enter the desired temperature No signal or tempe...

Страница 16: ...hese thermometers may vary 20 40 degrees NOTE This adjustment will only affect baking and roasting temperatures it will not affect broiling convection or self cleaning temperatures The adjustment will be retained in memory after a power failure The type of margarine will affect baking performance Most recipes for baking have been developed using high fat products such as butter or margarine 80 fat...

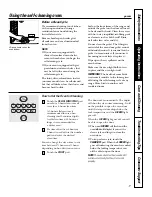
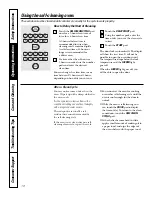
Страница 17: ...an open window or using a ventilation fan or hood during the first self clean cycle Remove broiler pan broiler grid all cookware and any aluminum foil from the oven NOTE If your oven is equipped with shiny silver colored oven shelves remove them before you begin the self cleaning cycle If your oven is equipped with gray porcelain coated oven shelves they may be left in the oven during the self cle...

Страница 18: ...uch the SELF CLEAN STD LO pad once for a 3 hour clean time or twice for a 4 hour clean time A 3 hour self clean time is recommended for use when cleaning small contained spills A self clean time of 4 hours or longer is recommended for a dirtier oven If a time other than 4 hours or 3 hours is needed use the number pads and enter the desired clean time You can change the clean time to any time betwe...

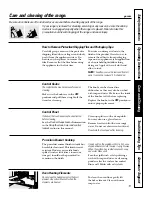
Страница 19: ...n with warm soapy water 19 Control Panel If desired the touch pads may be deactivated before cleaning See the Oven or Range Lockout information in the Using the clock timer and control lockout section in this manual Clean up splatters with a damp cloth You may also use a glass cleaner Remove heavier soil with warm soapy water Do not use abrasives of any kind Reactivate the touch pads after cleanin...

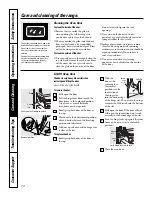
Страница 20: ...ated into the bottom of the slot Fully open the door If the door will not fully open the indentation is not seated correctly in the bottom edge of the slot Push the hinge locks up against the front frame of the oven cavity to the locked position Close the oven door Indentation Bottom edge of slot Hinge arm Cleaning the Oven Door To clean the inside of the door Because the area inside the gasket is...

Страница 21: ...on Do not use commercial oven cleaners cleaning powders steel wool or harsh abrasives on any painted surface 21 Storage Drawer Removal To remove the drawer Pull the drawer out until it stops Lift the front of the drawer until the stops clear the guides Remove the drawer To replace the drawer Place the drawer rails on the guides Push the drawer back until it stops Lift the front of the drawer and p...

Страница 22: ...bend the surface unit plug terminals Do not attempt to clean adjust or in any way repair the plug in receptacle Drip Pans Remove the surface units Then lift out the drip pans For best results clean the drip pans by hand Place them in a covered container or a plastic sealable storage bag with 1 4 cup ammonia to loosen the soil Soak for at least 1 hour Rinse with clean water and wipe with a clean so...

Страница 23: ...that lock into position when the cooktop is lifted up After cleaning under the cooktop with hot mild soapy water and a clean cloth lower the cooktop Be careful not to pinch your fingers To lower the cooktop push the rods back and gently lower the cooktop until it rests in place Be sure all surface units are turned off before raising the cooktop Oven Vent The oven is vented through an opening under...

Страница 24: ...hat matches the size of the surface close to the cooktop unit you are using The oven vent Pans on the right rear surface unit block air flow is blocked from the oven vent and cause the cooktop to get hot Food does not bake Oven controls See the Using the oven section or roast properly improperly set Shelf position is incorrect See the Using the oven section or the shelf is not level Incorrect cook...

Страница 25: ...s See the Using the oven section improperly set Plug on range is not Make sure electrical plug is plugged into a live completely inserted in the properly grounded outlet electrical outlet Oven too hot Allow the oven to cool to below locking temperature Oven will not Oven controls See the Using the self cleaning oven section self clean improperly set Crackling or This is the sound of the This is no...

Страница 26: ...BAKE and BROIL HI LO pads must be touched display to show SF not touched properly at the same time and held for 3 seconds Power outage Power outage or surge Reset the clock If the oven was in use you must reset clock flashes it by touching the CLEAR OFF pad setting the clock and resetting any cooking function Burning or oily This is normal in a To speed the process set a self clean cycle for a odo...

Страница 27: ...otection or you may request your money back on the remaining value of your contract No questions asked It s that simple Protect your refrigerator dishwasher washer and dryer range TV VCR and much more any brand Plus there s no extra charge for emergency service and low monthly financing is available Even icemaker coverage and food spoilage protection is offered You can rest easy knowing that all y...

Страница 28: ...here Complete and mail your Consumer Product Ownership Registration today Have the peace of mind of knowing we can contact you in the unlikely event of a safety modification After mailing the registration below store this document in a safe place It contains information you will need should you require service Our service number is 800 GE CARES 800 432 2737 Read your Owner s Manual carefully It wi...

Страница 29: ...Notes Safety Instructions Operating Instructions Care and Cleaning Troubleshooting Tips Consumer Support 29 ...

Страница 30: ... normal business hours Have your model number ready Tired of discolored shelves Wishing you had extra heavy duty oven shelves NOW AVAILABLE for your range GE s innovative self cleanable porcelain coated oven shelves Heavy Duty Durable Able to be cleaned in a self cleaning oven Visit ge com for more information Surface Elements Drip Pans Oven Shelves Broiler Pan Oven Elements Light Bulbs Knobs Clea...

Страница 31: ...ocated in an area where service by a GE Authorized Servicer is not available you may be responsible for a trip charge or you may be required to bring the product to an Authorized GE Service location for service In Alaska the warranty excludes the cost of shipping or service calls to your home Some states do not allow the exclusion or limitation of incidental or consequential damages This warranty ...

Страница 32: ...vailable while your warranty is still in effect You can purchase it on line anytime or call 800 626 2224 during normal business hours GE Consumer Home Services will still be there after your warranty expires Parts and Accessories ge com Individuals qualified to service their own appliances can have parts or accessories sent directly to their homes VISA MasterCard and Discover cards are accepted Or...

Отзывы: