– 10 –
(
Continued next page
)
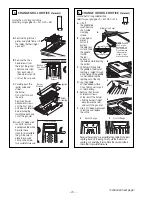
Using the IR Grill
Remove the cover
before lighting the burner. The
cover must be removed when using the IR grill.
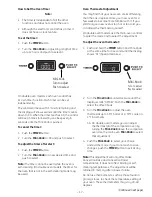
Set the control knob to
PREHEAT
. The longer the grill
is preheated, the darker the grill marks will be on the
food.
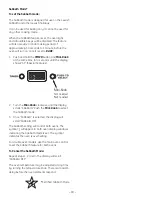
To heat the griddle, push in the control knob and
turn to the desired Temperature setting. The light on
the bezel will glow to indicate the thermostat control
is working.
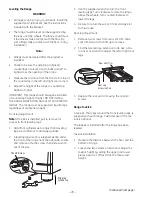
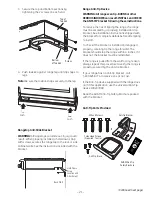
Griddle flue cover
Clamping screws
Leveling screws
It may take up to 15 minutes to fully preheat the
grill.
After preheat, the control knob may be set to any
position between
HI
and
LO
.
Do not leave the grill unattended at any time.
Note:
The grill will take approximately 45 seconds to
ignite. Unlike the surface burners, which use electric
igniters, the grill uses a Glo-Bar for ignition. It takes
approximately 45 seconds for the Glo-Bar to reach
temperature. Gas is only supplied to the grill once
the Glo-Bar reaches temperature.
Using the Griddle
The griddle is thermostatically controlled and can
be set to maintain any temperature from 200ºF to
450ºF.
Note:
Unlike the surface burners, which use electric
igniters, the griddle uses a Glo-Bar for ignition. It
takes approximately 45 seconds for the Glo-Bar
to reach temperature. Gas is only supplied to the
griddle once the Glo-Bar reaches emperature.
The griddle can be leveled. Remove the
fl
ue cover
by lifting it straight up. The two inner screws are
clamping screws for securing the griddle in place.
Loosen these two screws before leveling.
Do not
remove these two screws.
The two outer screws are leveling screws.
Do not
remove these two screws.
They can be turned to
level the griddle or to provide a forward slope to
help grease and oils to drain away from the food
being cooked. After the
fi
rst few uses, you will be
able to judge the slope best suited for the foods
you are cooking and personal preference.
After leveling the griddle, tighten the clamping
screws to secure griddle in place.
Hand tighten
screws; do not over-tighten.
Содержание Monogram ZDP486ND
Страница 53: ...53 Oven Doors exploded view Main Oven Door Companion Oven Door...
Страница 78: ...78 Rangetop Wiring Diagram...


