background image


 Answers

 If my oven clock is not set to the correct time of

day, 

 I still self-clean my oven?


 is not set   the correct time   day you

will not be 

   set a 


 to end at 

specific time.

Q. Can I use commercial oven cleaners on any part

of my self-cleaning 

A. No cleaners or coatings 

 be used 

any part   this oven. If you 

 use them 


not thoroughly rinse the oven 

 water, wiping it

 clean afterwards, the residue 

 scar

the oven surface 

 damage metal parts the next

time the oven is automatically cleaned.

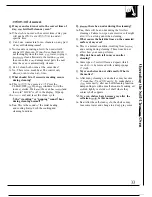
Q. Can I clean both ovens at the same time?

A. No. There is too much heat. The control only

allows   oven to clean at   time.

Q. What should I do if excessive smoking occurs

during cleaning?

A. This is 

 by excessive 

 Press the

CLEAR/OFF 

 Open 

 windows to rid the

room 

 smoke. Wait 

 the oven has 

 and

the word “LOCK” is 

 in the display. Wipe up

the 

 soil and reset the clean cycle.

 the “crackling” or “popping” sound   hear

during cleaning normal?

A. Yes. This is the sound 

 the metal heating

and cooling 

 both the cooking and

cleaning functions.

Q. 

 there be an odor during the cleaning?

A. Yes, there will be an odor during the first few

cleanings. Failure to wipe out excessive soil might
also 

 a strong odor when cleaning.

Q. What causes the hair-like lines on the enameled

surface of my oven?

A. This is a normal condition, resulting from 

and cooling during cleaning. These lines do not
affect how your oven performs.

Q. Why do I have ash left in my oven after

cleaning?

A. Some types 

 soil will leave a deposit which

is ash. It 

 be removed with a damp sponge

 cloth.

Q. My oven shelves do not slide easily. What is

the matter?

A. After many cleanings, oven shelves may become

 clean they 

 not 

 easily. To make shelves


 more easily, after each self-cleaning function

dampen fingers with a small amount of cooking oil

 rub lightly over sides 

 shelf where they

contact shelf supports.

, My oven shelves have become gray after the

self-clean 

 1s this normal?

A. Yes. After the self-clean cycle, the shelves may

lose some luster and change to a deep gray color

33

Содержание JTP56

Страница 1: ...16 24 25 Roasting Roasting Guide 23 26 Roasting with the Probe 24 25 Self Cleaning instructions 30 33 Shelves 9 10 12 15 16 18 30 34 Timed Baking 2O 21 Problem So ver 37 37 38 Thermostat Adjustment Do It Yourself 22 More questions call GE Answer Centerm 800 626 2000 Care and Cleaning 34 36 Broiler Pan and Grid 34 Oven Door 3 5 Oven Shelves 34 Self Cleaning Instructions 30 33 Probe 36 Consumer Serv...

Страница 2: ...gistration Card that came with your oven Before sending in this card please write hese numbers here Model Number Serial Numbel Use these numbers in any correspondence or service calls concerning your oven If you received a damaged oven Immediately contact the dealer or builder that sold you the oven Save time and money Before you request service Check the Problem Solver in the back of this guide I...

Страница 3: ... climb stand or hang on the door They could damage the oven or cause severe personal injury CAUTION ITEMS OF INTEREST TO CHILDREN SHOULD NOT BE STORED IN CABINETS ABOVE AN OVEN CHILDREN LIMBING ON THE OVEN TO REACH EMS COULD BE SERIOUSLY INJURED Teach children not to play with the controls or any other part of the oven Never leave the oven door open when you are not watching the oven Always keep c...

Страница 4: ... the shelves must be handled when hot do not let the pot holder contact the heating elements Pulling out the shelf to the shelf stop is a convenience in lifting heavy foods It is also a precaution against bums from touching the hot surfaces of the door or the oven walls When using cooking or roasting bags in the oven follow the manufacturer s directions Do not use your oven to dry newspapers If ov...

Страница 5: ...ing sections 10 12 16 18 29 1 I 14 16 3 4 27 30 36 13 Bake Element May be lifted gently for wiping the oven floor 14 Lift Off Oven Door with Window 3 4 30 36 4 Model and Serial Number Location 4 27 30 35 9 10 12 16 30 34 5 Oven Vent 4 31 32 6 Automatic Oven Door Latch 15 Oven Shelves with Stop Locks 7 Oven Control Clock and Timer 8 Oven Light Pad Lets you turn interior oven lights on and off 6 8 1...

Страница 6: ...me of day Press the CLOCK pad to start P Q LO ER OVE m Q AUTO SELF CLEAR CLEAN A OFF 10 TIMER ON OFF Press this pad to select the timer function The timer does not control oven operations The timer can time up to 9 hours and 55 minutes To set the timer first press the TIMER ON OFF pad Then press the INCREASE or DECREASE pad to change the time To cancel the timer press and hold the TIMER ON OFF pad...

Страница 7: ...play will change to seconds only and a single beep will sound r Reset the Timer To Cancel the Timer 11 TIMER is displayed press the INCREASE or Press and hold the TIMER ON OFF pad until the DECREASE pad until desired time is reached word TIMER disappears from the display If TIMER is not displayed press the TIMER ON OFF pad first then follow the instructions above to set the timer End of Cycle Tone...

Страница 8: ...d DECREASE pads A While the oven is off and the time of day shows in the display press and hold the lNCREASE and a DECREASE pads and the TIMER ON OFF pad at the same time for about 2 or 3 seconds A number from 1 to 5 will replace 0 00 in the display The slowest is 1 and the fastest is 5 Use the INCREASE or DECREASE pad to change the number then press the CLEAWOFF pad to return to v e the time of d...

Страница 9: ...al and the fan may continue to run even after the oven is turned off Oven Shelves The shelves are designed with stop locks so that when placed correctly on the shelf supports they will stop before coming completely out from the oven and will not tilt when removing food from or placing food on them When placing cookware on a shelf pull the shelf out to the stop position Place the cookware on the s ...

Страница 10: ... out Be sure the shelf is cool before touching it To replace place the shelf on the shelf support with the stop locks curved extension of shelf facing up and toward the rear of the oven Tilt up the front and push the shelf toward the back of the oven until it goes past the bump on the shelf support Then lower the front of the shelf and push it all the way back Bum II Shelf Positions The oven has s...

Страница 11: ...read Regular Bake Foods such as layer cakes have a more level top crust when not baked with convection heat In convection roast heat comes from the top oven element The convection fan circulates the heated air evenly over and around the food Meat and poultry are browned on all sides as if they were cooked on a rotisserie Using the roasting rack provided heated air will be circulated over under and...

Страница 12: ...owest position A How to Set Your Oven for Convection Baking Your double oven has controls for the upper oven The oven will start automatically The word ON and the lower oven Be sure to set the correct and 1 00 will be displayed As the oven heats up control Pads on the left side of the panel are for the display will show the changing temperatures the upper oven Pads on the right side of the panel W...

Страница 13: ... BAKE and COOK TIME will be displayed along with the oven temperature that you set and the cook time that you entered The oven will start automatically The word ON and 1 00 will be displayed The Cook Time will begin to count down As the oven heats up the display will show the changing temperatures When the oven reaches the temperature you set a tone will sound The oven will continue to cook for th...

Страница 14: ...ar in the display The control automatically sets the Stop Time by adding the Cook Time to the time of day In this example the time of day is 2 00 and the Cook Time is 3 hours Adding 3 hours to the time of day equals 5 00 A 6 Change the Stop Time from 5 to 7 00 by pressing the INCREASE pad until 7 00 appears in the display The words DELAY TIMED CONV BAKE and STOP TIME appear in the display At 4 00 ...

Страница 15: ...s for doneness at the minimum see the Convection Cookbook sllggested time Convection Roasting Rack Roasts or poultry should be cooked on the lowest shelf position A on the offset shelf en you are convection roasting you will use the iler pan and grid and the special roasting rack The pan is used to catch grease spills and the grid is used to prevent grease spatters The rack holds the meat This rac...

Страница 16: ...ure of the meat reaches 100 F the changing internal temperature will be shown in the display o7 When the internal temperature of the CLEAR meat reaches the number you have OFF set the probe and the oven turn off and the oven control sign lls To stop the signal press the CLEAWOFF pad Use hot pads to remove the probe from the food Do not use tongs to pull on it lhey might damage it CAUTION To preven...

Страница 17: ...trols for the upper oven and the lower oven Be sure to set the correct control Pads on the left side of the panel are for the upper oven Pads on the right side of the panel are for the lower oven The TIMER ON OFF COOK TIME STOP TIME OVEN LIGHTS INCREASE and DECREASE pads can be used for either oven Your oven tetnperatare is controlled very accurately using an oven control system We recotntnend tha...

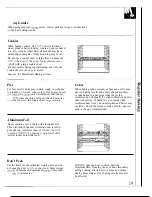
Страница 18: ...ts when baking cakes cookies pastry und breads For most casscro es and roasts preheating is not necessary For ovens without a preheat indicator light or tone preheat 10 minutes After the oven is preheated place the food in the oven us quickly as possible to prevent heat from escaping Baking Pans Use the proper baking pan The type of finish on the pan determines the amount of browning that will occ...

Страница 19: ...ced on an aluminum cookie sheet A cake baked in a pan larger than the recipe king since the shiny foil pan reflects heat away recommends will usually be crisper thinner and drier t the pie crust the cookie sheet helps retain it than it should be If baked in a pan smaller than recommended it may be undercooked and batter may overflow Check the recipe to make sure the pan size used is the one recomm...

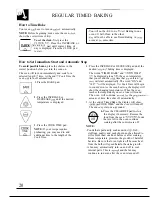
Страница 20: ... will be displayed The Cook Time will begin to count down As the oven heats Lip the display will show the changing temperatures When the oven reaches the temperature you set a tone will sound Press the INCREASE or The oven will continue to cook for the pro rarnrned DECREASE pad until the desired amount of time then shut off automatically temperature is displayed 5 At the end of Timed Bake the disp...

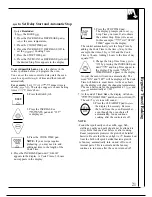
Страница 21: ...control automatically sets the Stop Time by adding the Cook Time to the time of day In this example the time of day is 2 00 and the Cook Time is 3 hours Adding 3 hours to the time of day equals 5 00 A 6 Change the Stop Time from 5 00 to 7 00 by pressing the INCREASE pad until 7 00 and Stop Time appear in the display The words DELAY L J TIMED BAKE appear in the display At 4 00 the oven will turn on...

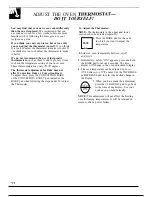
Страница 22: ...o adjust these press the CONVECTION BAKE or the CONVECTION ROAST pad instead of the BAKE pad when following the steps under To Adjust the Thermostat To Adjust the Thermostat NOTE The thermostats in the upper and lower ovens need to be adjusted separately 1 Press the BAKE pad for the oven BAKE in which you want to adjust the temperature A 2 Select an oven temperature between 500 F and 550 F 3 Immed...

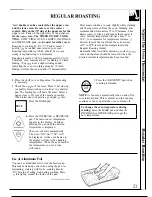
Страница 23: ... oven is working properly Timed Baking will turn the oven on and off automatically 1 Place the shelf in A or B position No preheating is necessary 2 Check the weight of the meat Place it fat side up or poultry breast side up on a trivet in a shallow pan The melting fat will baste the meat Select a o5 Press the CLEAWOFF pad when CLEAR roasting is finished OFF pan as close to e size of the meat as p...

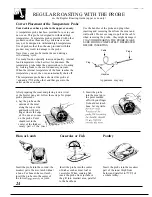
Страница 24: ...Do not use tongs to pull on the cable when removing the probe they might damage it TO AVOID BREAKING THE PROBE MAKE SURE FOOD IS COMPLETELY DEFROSTED BEFORE INSERTING Cable Probe Plug Handles Appearance may vary After preparing the meat and placing it on a trivet or the broiler pan grid follow these steps for proper probe placement 1 Lay the probe on the outside of the meat along the top or side h...

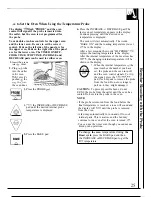
Страница 25: ...N and the roasting temperature yOLI set will be in the display After a few seconds the words LO PROBE will replace the roasting temperature in the display After the internal temperature of the meat reaches 100 F the changing internal temperature will be shown in the display o7 When the internal temperature of the CLEAR meat reaches the number you have OFF set the probe and the oven turn off and th...

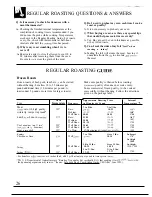
Страница 26: ...utes per pound f or roasts under 5 pounds more time for larger roasts Make sure poultry is thawed before roasting Unthawed poultry often does not cook evenly Some commercial frozen poultry can be cooked successfully without thawing Follow the directions given on the package label Type Meat Tender cuts rib high quality sirloin tip rump or top round Lamb leg or bone in shoulder Veal shoulder leg or ...

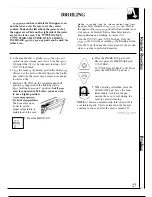
Страница 27: ...If desired the fat may be trimmed leaving a layer abou 1 8 inch thick A 6 0 2 Place the meat on the broiler grid in the broiler pan Always use the grid so the fat drips into the broiler pan otherwise the juices may become hot enough to catch on fire 3 Position a flat shelf on the recommended shelf v e position as suggested in the Broiling Guide Most broiling is done on C position but if your oven ...

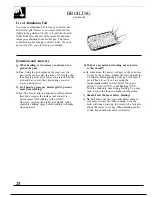
Страница 28: ...ices are protected by the 10 minutes before placing broiler pan with food in grid and stay cooler thus preventing excessive oven Check to see if you are using the s atter and smoking recommended shelf osition Broil for longest Q Do I need to grease my broiler grid to prevent period of time indic ted in the Broiling G ide meat from sticking Turn the food only once during broiling You may A No The b...

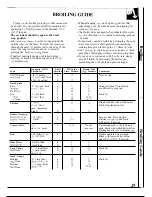
Страница 29: ... positioning the oven shelf one position higher Shelf Position E E Quantity andlor Thickness 1 lb 4 patties 1 2 to 3 4 inch thick 4 Ibs 16 patties 3 4 to 1 inch thick 101 X lbs 1 X inch thick 2 to 2X Ibs E irst Side Second Side Time Minutes Food Time Minute 10 Comments round Beef Well Done 7 9 Space evenly 10 Steaks less than 3 4 inch thick are difficult to cook rare Beef Steaks Rare Medium Well D...

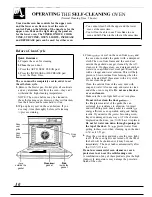
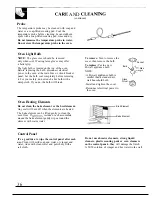
Страница 30: ...de the gasket with a dampened cloth The oven front frame and the oven door outside the gasket do not get cleaned by the self clean cycle On these areas use detergent and hot water or a soap filled steel wool pad Rinse well with a vinegar and water solution This will help prevent a brown residue from forming when the oven is heated Buff these areas with a dry cloth Do not clean the gasket Clean the...

Страница 31: ...cle will automatically begin after CLEAN is displayed and the time for the clean cycle is set The words ON and LOCK will appear in the display when the door automatically locks It will not be possible to open the oven door until the temperature drops below the lock temperatul e and the LOCK light goes off 4 When the LOCK light is off open the door NOTE The word door will be displayed the word LOCK...

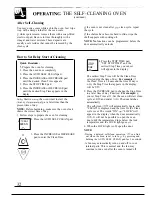
Страница 32: ...prepare the oven for cleaning 2 Press the AUTO SELF CLEAN pad AUTO SELF CLEAN A 3 Press the INCREASE or DECREASE n o pad to enter the Clean Time o 4 Press the STOP TIME pad STOP SET STOP TIME and the TIME earliest Stop Time you can set A will appear in the display The earliest Stop Time will be the Clean Time selected plus the time of day For example If the Clean Time is 3 hours and the time of da...

Страница 33: ...crackling or popping sound I hear during cleaning normal A Yes This is the sound of the metal heating and cooling during both the cooking and cleaning functions Q Should there be an odor during the cleaning A Yes there will be an odor during the first few cleanings Failure to wipe out excessive soil might also cause a strong odor when cleaning Q What causes the hair like lines on the enameled surf...

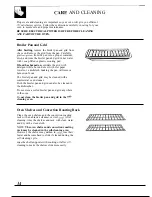
Страница 34: ...hcloth Soaking the pan will remove burned on foods The broiler pan and grid may be cleaned with a commercial oven cleaner Both the broiler pan and grid can also be cleaned in the dishwasher Do not store a soiled broiler pan and grid anywhere in the oven Do not clean the broiler pan and grid in the self cleaning oven Oven Shelves and Convection Roasting Rack Clean the oven shelves and the convectio...

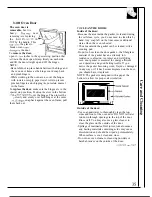
Страница 35: ...d during the self clean cycle you do not need to clean this by hand Any soap left on the liner causes additional stains when the oven is heated The area outside the gasket can be cleaned with a scouring pad Do not rub or clean the door gasket the fiberglass material of the gasket has an extremely low resistance to abrasion An intact and well fitting oven door gasket is essential for energy efficie...

Страница 36: ...ver then remove the bulb To replace Put in a new 40 watt appliance bulb NOTE A 40 watt appliance bulb is smaller than a standard 40 watt household bulb Install and tighten the cover Reconnect electrical power to the oven q e Socket Bulb 3fi Max L J ength Glass Oven Heating Elements Do not clean the bake element or the broil element Broil Element Any soil will burn off when the elements are heated ...

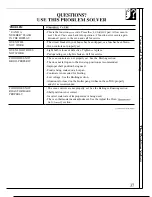
Страница 37: ...fective Tighten or replace Pad operating oven light is broken Call for service The oven controls are not properly set See the Broiling section The door not left open to the broil stop position as recommended Improper shelf position being used Food is being cooked on a hot pan Cookware is not suited for broiling Low voltage See the Broiling section Aluminum foil used on the broiler pan grid has not...

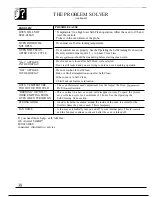
Страница 38: ...osed after Self Clean cycle selected Door is still locked and you are trying to enter an oven cooking operation Oven is too hot for Self Clean Bake or Broil attempted too soon after Self Clean Other oven is in Self Clean Child Lockout feature is turned on Q The oven thermostat needs adjustment See the Adjust the Oven Thermostat Do Zt Yourse section Q This is normal in a new oven and will disappear...

Страница 39: ...e Jout v n r ut t is still in ef fi ct tld OL1 11 rccci e i subst ultiill discount With it nlultiplc c n contr ict you re issured of filtute sctx ice at today s prices Parts andAccessories 80 626 2002 Individuds qualified to service their on appliances User maintenance instructions contained in this booklet l tt i c ucc icd p lt ts or iccessories sent directly to cover procedures intended to be pe...

Страница 40: ...g the product please contact your dealer or our Consumer Affairs office at the address below or call toll free GE Answer Cente 800 626 2000 consumer information service Improper installation If you have an installation problem contact your dealer or installer You are responsible for providing adequate electrical gas exhausting and other connecting facilities as described in the Installation Instru...

Отзывы: