background image

Care and cleaning of the range.

ge.com

Be sure all controls are off and all surfaces are cool before cleaning any part of the range.

How to Remove Protective Shipping Film and Packaging Tape

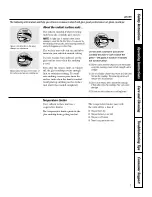
Carefully grasp a corner of the protective
shipping film with your fingers and slowly
peel it from the appliance surface. Do
not use any sharp items to remove the
film. Remove all of the film before using
the appliance for the first time.

To assure no damage is done to the 
finish of the product, the safest way to
remove the adhesive from packaging
tape on new appliances is an application
of a household liquid dishwashing
detergent. Apply with a soft cloth and
allow to soak.

NOTE: 

The adhesive must be removed from all

parts. It cannot be removed if it is baked on.

If your range is removed for cleaning, servicing or any reason, be sure the anti-tip
device is reengaged properly when the range is replaced. Failure to take this
precaution could result in tipping of the range and cause injury.

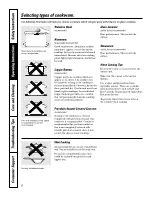
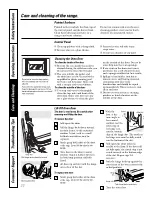
Control Knobs

The control knobs may be removed for easier
cleaning.

Make sure the knobs are in the 

OFF

positions and pull them straight off the
stems for cleaning.

The knobs can be cleaned in a
dishwasher or they may also be washed
with soap and water. Make sure the insides
of the knobs are dry before replacing.

Replace the knobs in the 

OFF

position 

to ensure proper placement.

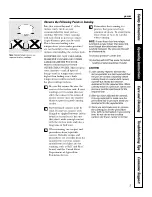
Oven Vent 

The oven vent is located above the left side of 
the door. 

This area could become hot during 
oven use. 

It is normal for steam to come out of 
the vent.

The vent is important for proper air circulation.
Never block this vent.

Safety Instructions

Operating Instructions

Care and Cleaning

Tr

oubleshooting T

ips

Consumer Support

Stainless Steel Surfaces

(on some models)

Do not use a steel wool pad; it will scratch 
the surface.

To clean the stainless steel surface, 
use warm sudsy water or a stainless steel
cleaner or polish. Always wipe the surface
in the direction of the grain. Follow the
cleaner instructions for cleaning the
stainless steel surface.

To inquire about purchasing stainless
steel appliance cleaner or polish, or to
find the location of a dealer nearest you,
please call our toll-free number:

National Parts Center

1.800.626.2002

ge.com

21

Содержание JSP46

Страница 1: ...okware 8 9 Oven 10 20 Sabbath Feature 20 Self Cleaning 16 17 Special Features 18 19 Surface Units 6 7 Thermostat 15 Timed Baking and Roasting 14 Care and Cleaning Broiler Pan and Grid 23 Control Panel...

Страница 2: ...usinesses to warn customers of potential exposure to such substances The fiberglass insulation in self clean ovens gives off a very small amount of carbon monoxide during the cleaning cycle Exposure c...

Страница 3: ...mothered completely by closing the oven door and turning the oven off or by using a multi purpose dry chemical or foam type fire extinguisher For your safety never use your appliance for warming or he...

Страница 4: ...se a deep fat thermometer whenever possible to prevent overheating fat beyond the smoking point Avoid scratching the glass cooktop The cooktop can be scratched with items such as sharp instruments rin...

Страница 5: ...n the oven when not in use Do not use aluminum foil to line oven bottoms except as suggested in this manual Improper installation of aluminum foil may result in a risk of electric shock or fire Stand...

Страница 6: ...nit is hot to the touch stay on even after the unit is turned off glow until the unit is cooled to approximately 150 F The WARM setting on the right REAR surface unit keeps already heated food warm un...

Страница 7: ...aterials and will disappear in a short time The surface unit will cycle on and off to maintain your selected control setting It is safe to place hot cookware on the glass surface even when the cooktop...

Страница 8: ...nded As long as the cookware is covered completely with porcelain enamel this cookware is recommended Caution is recommended for cast iron cookware that is not completely covered with smooth porcelain...

Страница 9: ...vailable from the manufacturer of your canner manufacturers of glass jars for canning such as Ball and Kerr brand and the United States Department of Agriculture Extension Service Remember that cannin...

Страница 10: ...t off when the cooking time has run out DELAY START Pad Use along with COOKING TIME or SELF CLEAN LO STD pads to set the oven to start and stop automatically at a time you set CLOCK Pad Press this pad...

Страница 11: ...r doneness at minimum time on recipe Cook longer if necessary Press the CLEAR OFF pad when cooking is complete NOTE A cooling fan may automatically turn on and off to cool internal parts This is norma...

Страница 12: ...aks may be broiled by preheating the broiler and positioning the oven rack one position higher The oven has 7 rack positions Broiling Guide Quantity and Rack First Side Second Side Food or Thickness P...

Страница 13: ...celed by following the steps in the Special features of your oven control section under Tones at the End of a Timed Cycle The timer is a minute timer only The timer does not control oven operations Th...

Страница 14: ...ture was set See the Special features of your oven control section Press the CLEAR OFF pad to clear the display How to Set a Delayed Start and Automatic Stop You can set the oven control to delay star...

Страница 15: ...lternate between increasing and decreasing the oven temperature The oven temperature can be adjusted up to 35 F hotter or 35 F cooler Press the number pads the same way you read them For example to ch...

Страница 16: ...s is extremely sensitive to the fumes given off during the self cleaning cycle of any range Move birds to another well ventilated room Wipe up heavy soil on the oven bottom How to Set the Oven for Cle...

Страница 17: ...t Press the START pad The door locks automatically The display will show the start time It will not be possible to open the oven door until the temperature drops below the lock temperature and the LOC...

Страница 18: ...shdn no shut off appears in the display Press the START pad to activate the no shut off and leave the control set in this special features mode Fahrenheit or Celsius Temperature Selection Your oven co...

Страница 19: ...this is the choice you want press the START pad NOTE If the clock is in the black out mode you will not be able to use the Delay Start function Cook and Hold Your control has a cook and hold feature t...

Страница 20: ...l the display shows SF NOTE If bake or broil appears in the display the BAKE and BROIL HI LO pads were not pressed at the same time Press the CLEAR OFF pad and begin again Tap the DELAY START pad unti...

Страница 21: ...ol knobs may be removed for easier cleaning Make sure the knobs are in the OFF positions and pull them straight off the stems for cleaning The knobs can be cleaned in a dishwasher or they may also be...

Страница 22: ...e cleaner and a sponge scrubber for best results Spillage of marinades fruit juices tomato sauces and basting materials containing acids may cause discoloration and should be wiped up immediately When...

Страница 23: ...ing cycle but they will lose their luster and become hard to slide It will be necessary to grease all oven rackside edges with a light coating of vegetable oil after cleaning them by hand or in the ov...

Страница 24: ...cover Replace bulb with a 40 watt appliance bulb or two prong halogen bulb as appropriate To replace the cover Line up tabs of lens in front of tabs on housing and rotate clockwise to engage Oven Heat...

Страница 25: ...ed polish the entire surface with CERAMA BRYTE Ceramic Cooktop Cleaner and a paper towel The CERAMA BRYTE Ceramic Cooktop Scraper and all recommended supplies are available through our Parts Center Se...

Страница 26: ...etely removed NOTE If pitting or indentation in the glass surface has already occurred the cooktop glass will have to be replaced In this case service will be necessary Damage from Sugary Spills and M...

Страница 27: ...spillovers not cleaned See the Cleaning the glass cooktop section on the cooktop before next use Hot surface on a model This is normal The surface may appear discolored with a white glass cooktop when...

Страница 28: ...me recommended in the Broiling Guide Oven temperature too Oven thermostat See the Adjust the oven thermostat Do it yourself hot or too cold needs adjustment section Oven will not work A fuse in your h...

Страница 29: ...oo hot Allow the oven to cool below locking temperature open after a clean cycle Oven not clean after Oven controls not properly set See the Using the self cleaning oven section a clean cycle Oven was...

Страница 30: ...es it by pressing the CLEAR OFF pad setting the clock and resetting any cooking function Burning or oily This is normal in a new To speed the process set a self clean cycle for a odor emitting from ov...

Страница 31: ...31 Safety Instructions Operating Instructions Safety Instructions Operating Instructions Care and Cleaning Troubleshooting Tips Consumer Support Notes...

Страница 32: ...ing normal business hours Have your model number ready Tired of discolored racks Wishing you had extra heavy duty oven racks NOW AVAILABLE for your range GE s innovative self cleanable porcelain coate...

Страница 33: ...tection or you may request your money back on the remaining value of your contract No questions asked It s that simple Protect your refrigerator dishwasher washer and dryer range TV VCR and much more...

Страница 34: ...ere Complete and mail your Consumer Product Ownership Registration today Have the peace of mind of knowing we can contact you in the unlikely event of a safety modification After mailing the registrat...

Страница 35: ...home to teach you how to use the product Improper installation delivery or maintenance Failure of the product if it is abused misused or used for other than the intended purpose or used commercially...

Страница 36: ...while your warranty is still in effect You can purchase it on line anytime or call 800 626 2224 during normal business hours GE Consumer Home Services will still be there after your warranty expires P...

Отзывы: