background image

GCI E84 Emulator Getting Started Manual

Version 2.4a

GCI E84 Emulator Getting Started Manual

4

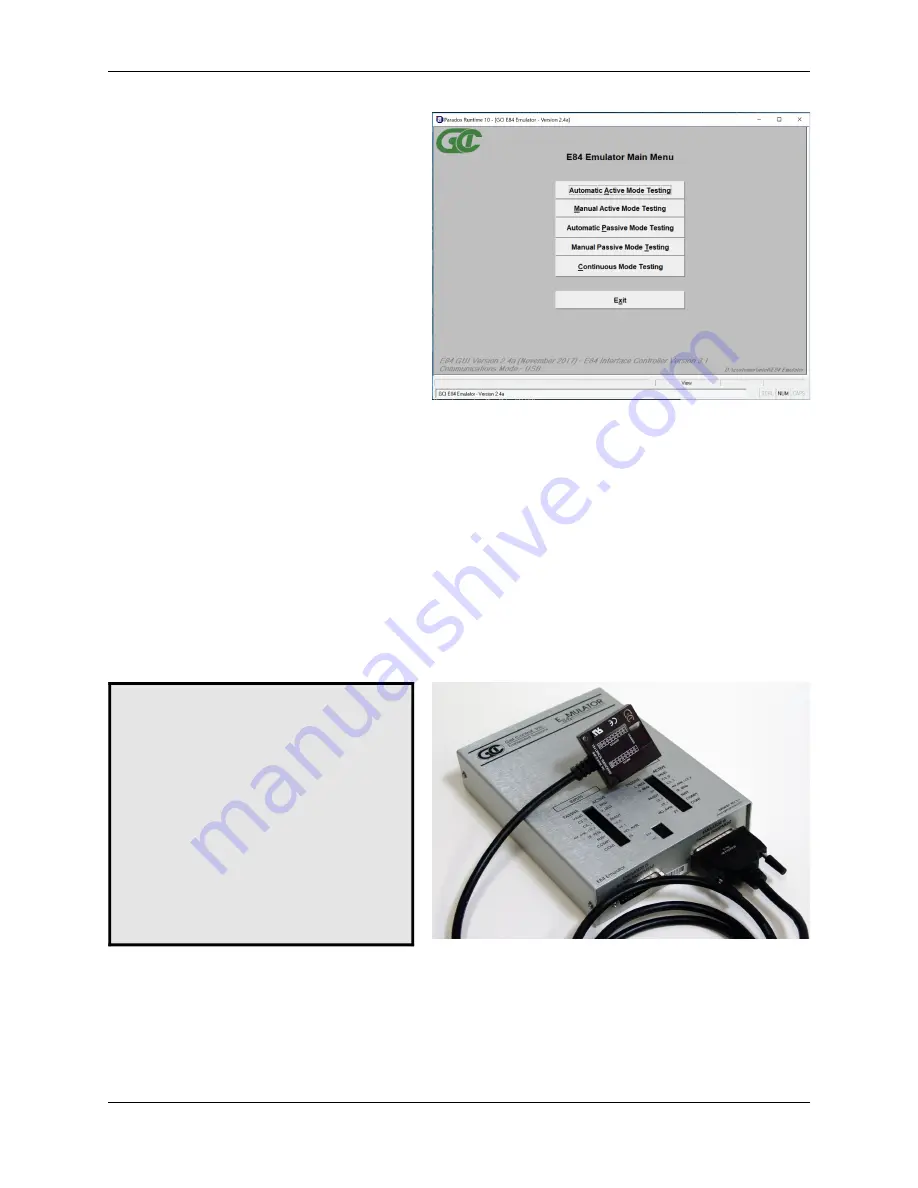
E84 Emulator Main Menu

Optical Transceiver connects to the 

Emulator as

Passive Equipment

 Female DB-25 connector

Plug an E84 compatible optical transceiver
into the female DB-25 port on the 

E84

Emulator

 labeled 

Emulator as Passive

Equipment

 as shown.  With an optical

transceiver connected in this way, the E84
Emulator Application can run both Active
and Passive mode tests.  

Do not attempt to install a gender changer
between the optical transceiver and the

E84 Emulator

.  Connecting the optical

transceiver to the male DB-25 port labeled

Emulator as Active Equipment

 using a

gender changer will not work.

Connection Status Indicator

Launch the 

E84 Emulator Application

 from the

shortcut in the Startup menu.  The 

Main Menu

will be displayed, and all option buttons are
enabled as shown.  

The Communications status is displayed in the
lower left of the 

Main Menu

.  It will display

Communications Mode - USB

 when the 

E84

Emulator Application

 is properly

communicating with the 

E84 Emulator

 USB

Interface. 

When the user attempts to use any of the four
test buttons, the 

E84 Emulator Application

attempts to communicate with the E84
Emulator.  With communication established,
testing continues normally.  If the 

E84

Emulator Application

 cannot communicate

with the 

E84 Emulator

, a Communication Error Message will be displayed, and testing will be disabled.

Using Optical Transceivers

The Get Control 

E84 Emulator

 is shipped with a 15' connecting cable used for hardwired E84 emulation. 

The 

E84 Emulator

 is compatible with all E84 compatible Optical Transceivers.  GCI produces several 

optical transceivers that can be used with the 

E84 Emulator

.  

P/N GCI04002 - 

GCI E84 Optical Transceiver 

(available in 2 and 5 meter cable lengths)

P/N GCI04100 - 

GCI RJ-11 E84 Optical Transceiver

 (with data logging)

Optical transceivers from GCI are compatible as shipped.  Other optical transceivers must first be properly
terminated with a male DB-25 connector, according to the E84 specification.

Содержание E84

Страница 1: ...GCI E84 Emulator Getting Started Version 2 4a...

Страница 2: ......

Страница 3: ...d Test Setup Screens 7 Select Default Tests Button 8 Select Unload Port Tests Button 8 De Select All Tests Button 8 Test Setup Option Buttons 8 Continuous Handoff Test Setup Screen 9 Defining the Cont...

Страница 4: ...ssive Equipment Female DB 25 connector 4 Example Single Handoff Mode Transfer 5 Example Simultaneous Handoff Mode Transfer 5 Example Continuous Handoff Mode Transfer 6 Main Menu 7 Automated Active Mod...

Страница 5: ...ndoff sequences are supported including Single Simultaneous and Continuous modes E84 Emulator Application Version 2 4a requires a USB Interface E84 Emulator whose hardware has been updated to version...

Страница 6: ...tory within the C Program Files or C Program Files x86 directory structure is not recommended and may cause unexpected application behavior When installation is complete a dialog box is displayed indi...

Страница 7: ...module It is labeled PC INTERFACE Powering Up the E84 Emulator Plug the provided standard power cord into the E84 Emulator and into a 100V 240V AC wall outlet Turn the power switch on The power switch...

Страница 8: ...lower left of the Main Menu It will display Communications Mode USB when the E84 Emulator Application is properly communicating with the E84 Emulator USB Interface When the user attempts to use any o...

Страница 9: ...doff sequence The figure at right shows E84 interface signals recorded during a typical Single Handoff Mode transfer The timing diagram shows the CS_0 signal turning ON to indicate a Single Handoff Mo...

Страница 10: ...1 VALID TR_REQ BUSY COMPT CONT HO_AVBL ES Example Continuous Handoff Mode Transfer The 15 passive mode tests provided by the E84 Emulator Application can be also run in Simultaneous Handoff Mode as we...

Страница 11: ...e Active entity Attach the female end of a straight through 25 pin male to female cable provided to the DB 25 connector labeled EMULATOR IS ACTIVE EQUIPMENT on the E84 Emulator Attach the male end of...

Страница 12: ...s to run This provides a quick method of selecting all tests For Passive Mode testing this is the only function of the Select Default Tests button For Active Mode testing this button has one additiona...

Страница 13: ...the end of this manual Defining the Continuous Mode Test Sequence List A DEFINE CONTINUOUS MODE TEST SEQUENCE box allows the user to define the specific order of handoff s to run during Continuous Han...

Страница 14: ...one step in the SELECTED CYCLES list The bottom button displayed as a downward pointing arrow moves the selected cycle down one step in the SELECTED CYCLES list Default Cycles Buttons A set of Defaul...

Страница 15: ...sage Continuous Handoff Mode testing involves running several separate handoff s sequentially An typical Continuous Handoff Mode test might first Unload the carrier on Load Port CS_0 then load a new c...

Страница 16: ...Pass Fail status of the test based on feedback unavailable to the E84 Emulator from the equipment being tested For example when testing passive equipment timeout settings the E84 Emulator will force...

Страница 17: ...t signals The Passive Mode Manual Control Screen allows toggling of all Passive E84 output signals The screen also displays the live status of the Active equipment s output signals No automated timing...

Страница 18: ...evious versions did not monitor the ES signal during timeout and port sensor tests This falsely passed load ports that dropped ES along with HO_AVBL on timeout errors This change properly implements t...

Страница 19: ...on numbers in your email along with the following details The Test Mode Active Passive or Continuous you are running The Test Number and State where the problem is occurring Any Error messages display...

Отзывы: