10
Chapter : Replacing Components in Your Gateway Solo 1450
www.gateway.com
5
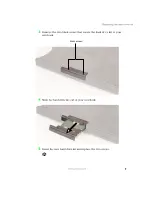
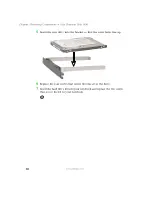
Insert the new drive into the bracket so that the screw holes line up.
6
Replace the four screws that secure the bracket to the drive.
7
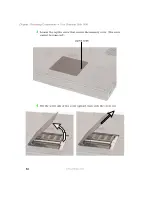
Insert the hard drive kit into your notebook and replace the two screws
that secure the kit to your notebook.
Содержание Solo1450
Страница 1: ...Gateway Solo 1450 Service Guide...
Страница 2: ......
Страница 4: ...ii...
Страница 44: ...39 Replacing the cooling assembly www gateway com 6 Unplug the cooling fan...
Страница 54: ...49 Replacing the palm rest assembly www gateway com 10 Unplug the touchpad s ribbon cable from your notebook...
Страница 71: ...66 Chapter Replacing Components in Your Gateway Solo 1450 www gateway com...
Страница 72: ......
Страница 73: ...MAN SYS SL1450 SERVICE GDE R1 6 02...

