40
www.gateway.com
Chapter 4: Installing Components
5
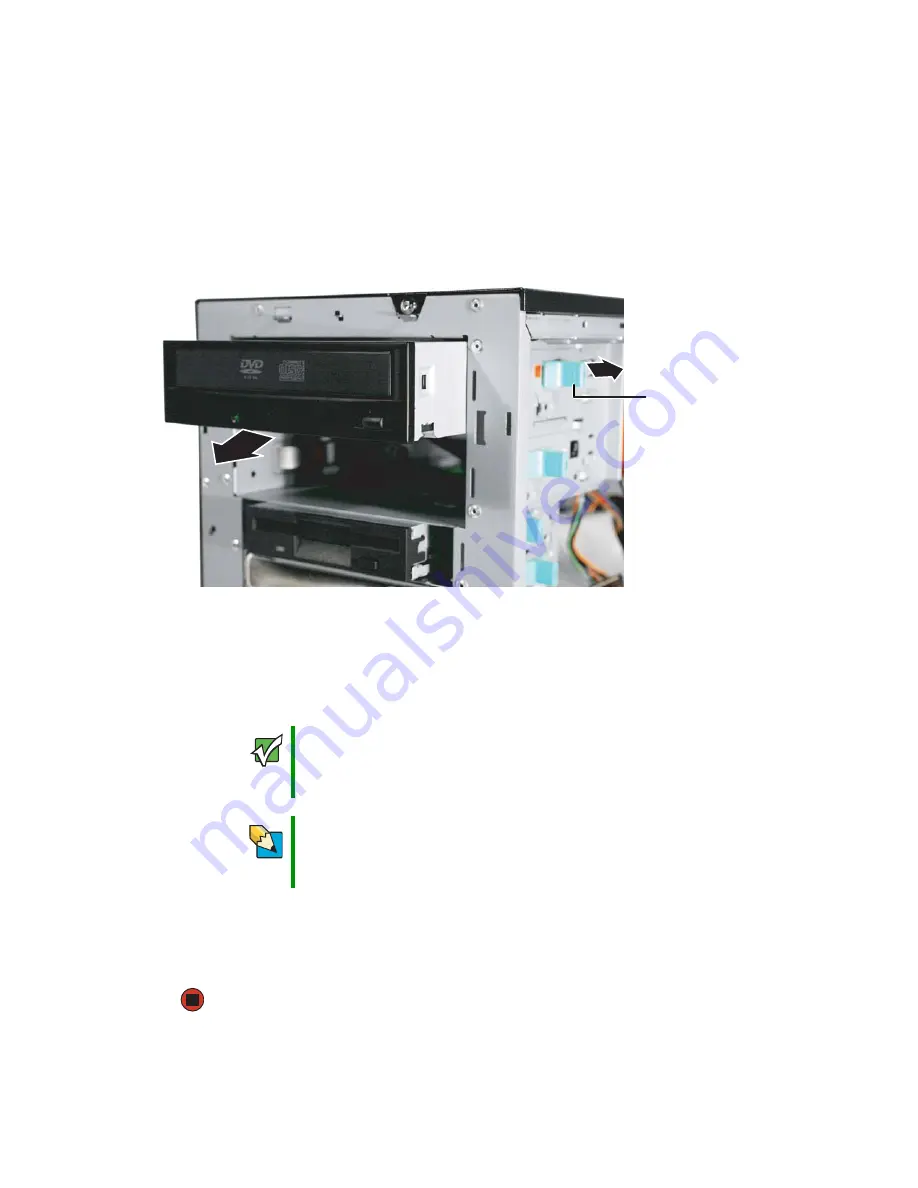
Slide the green drive retainer lever toward the back of the drive bay, then go to
.
6
Disconnect the old drive’s cables from the back of the drive.
7
Slide the green drive retainer lever toward the back of the drive bay, then pull the
drive out of the bay.
8
Set any jumpers on the new drive. See the drive’s documentation for further
instructions.
9
Slide the new drive into the drive bay allowing it to protrude enough to line up with
the bezel when it is replaced, then push the green drive retainer lever toward the front
of the drive bay to lock the drive into place.
10
Connect the power and data cables.
11
Follow the instructions on
“Installing the bezel assembly” on page 36
12
Follow the instructions in
“Closing the server case” on page 37
Important
If you are installing a hard drive in the bottom, external 3.5-inch drive
bay, the green drive retainer lever will not slide forward to lock the
drive into place. Instead, you must use a screw to secure the drive
in the bay.
Tips & Tricks
When installing a CD, DVD, tape drive, or diskette drive, if the green
drive retainer lever will not slide forward all the way to lock the drive
into place, move the drive slightly, until the lever can be moved forward
enough to lock the drive into place.
Drive retainer
lever
Содержание E-9220T
Страница 5: ...iv www gateway com ...
Страница 19: ...14 www gateway com Chapter 2 Setting Up Your Server ...
Страница 93: ...88 www gateway com Chapter 6 Troubleshooting ...
Страница 100: ...Appendix B 95 BIOS Settings You can print this appendix then record your custom BIOS settings on the printout ...
Страница 108: ...Appendix C 103 Safety Regulatory and Legal Information Safety information Legal and Regulatory Information ...
Страница 117: ...112 www gateway com Appendix C ...
Страница 123: ...118 www gateway com 8510879IX fm Page 118 Friday August 5 2005 9 33 AM ...


