background image

16

CALIBRATION

GC16XD MINI CRIMPER & PUMP SAFETY & OPERATION MANUAL

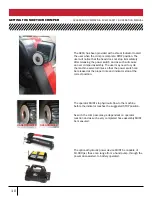
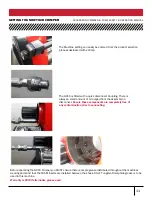
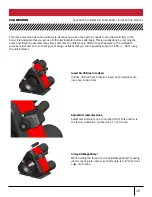
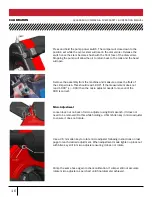
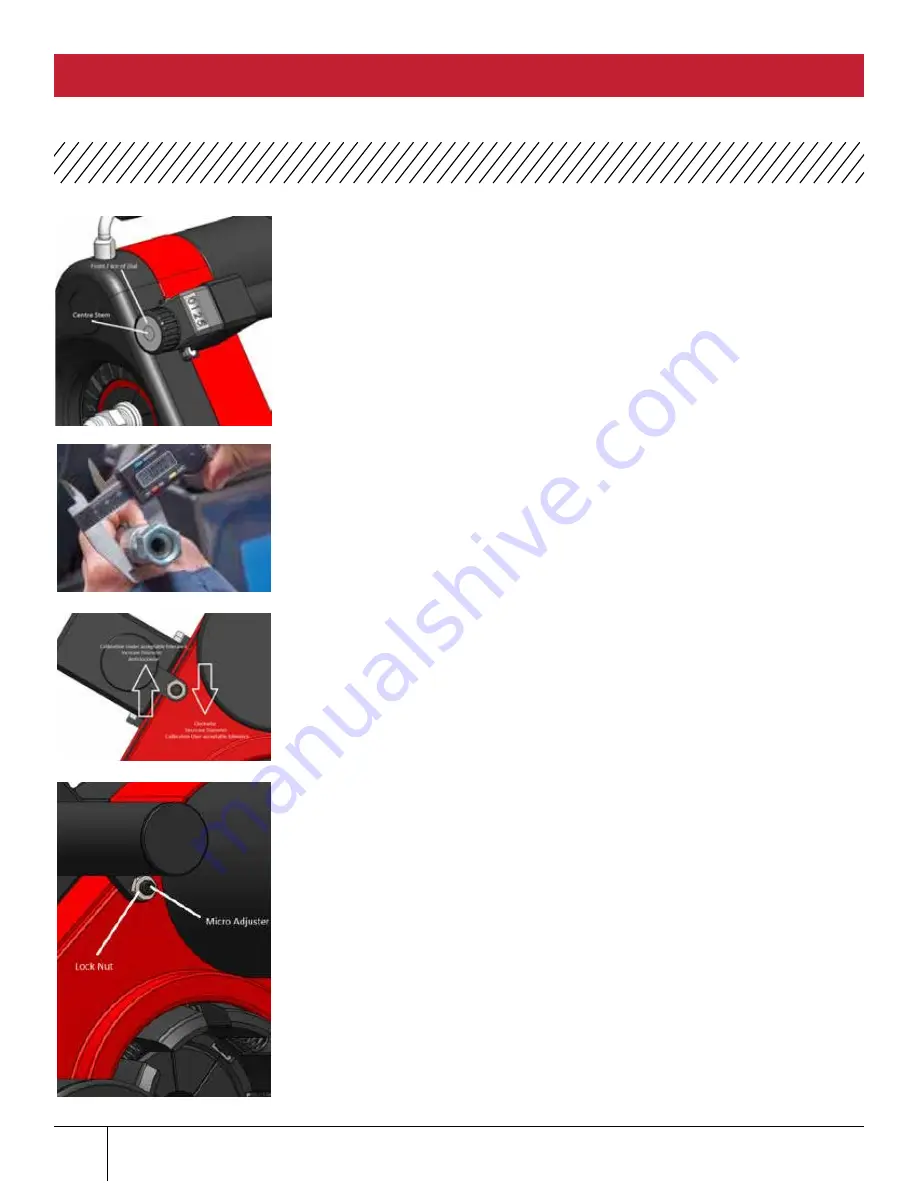
Press and hold the pump power switch. The crimper will close down to the 

position set while the center stem will rise on the dial vernier. Release the 

switch once the stem becomes flush with the front face of the dial vernier. 

Stopping the pump will allow the oil to return back to the tank and the head 

will open.

Remove the assembly from the machine and measure across the flats of 

the crimped area. This should read 1.000”. If the measurement does not 

read 1.000” (+/- .003) then the micro adjuster needs to move until the               

COD is correct.

Micro Adjustment

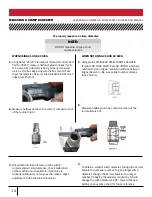
Loosen lock nut on back of micro adjuster using 8mm wrench. (It does not 

need to be removed) Do this while holding a 2.5mm Allen key in micro adjuster 

to ensure it does not rotate.

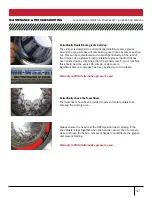
Use a 2.5 mm allen key to rotate micro adjuster following instructions on last 

page to reach desired adjustment. When adjustment made tighten up lock nut 

with Allen key still in micro adjuster ensuring it does not rotate.

Crimp the same hose again to check calibration. If crimper still not accurate 

rotate micro adjuster as per chart until final diameter achieved.

Содержание GC16XD

Страница 1: ...GC16XD MINI CRIMPER PUMP SAFETY AND OPERATING MANUAL Product Number 7480 7006...

Страница 2: ...ize 1 2 and 3 4 4 wire Die Set Type GC16XD Series Dies Crimping Range Inch with Std Die Set Radial Swaging Force 1000kN Cycle Speed Full stroke Complete Cycle Sec 23 5 seconds PHYSICAL Dimensions Plan...

Страница 3: ...NG TO KNOW YOUR CRIMPER 10 12 HOSE PREPARATION 13 MEASURING THE CRIMP DIAMETER 14 CALIBRATION 15 16 PERIODIC MAINTENANCE TROUBLE SHOOTING 17 EXPLODED VIEW 18 PARTS LIST 19 WARRANTY 21 TABLE OF CONTENT...

Страница 4: ...rom different manufacturers unless approved by both parties Hose assembly equipment crimpers Hoses and fittings from one manufacturer should not generally be assembled with the equipment of another ma...

Страница 5: ...this crimper be allowed to operate this crimper It is the responsibility of the operator of this crimper to observe the rules and guidelines set out in this manual and those provided by the owner of t...

Страница 6: ...d condition can be provided on request but generally include conditions for inteded use and purpose improper observation concerning transport storage maintenance unauthorized use constructional change...

Страница 7: ...ed 3 Make sure the work area is clear of obstruction and be a suitable work environment 4 Never start the machine unless intending to make a hose assembly and the head is free of objects and persons 5...

Страница 8: ...UMP SAFETY OPERATION MANUAL WARNING DO NOT USE HANDLE AS A SLING POINT The handle is designed for manual lifting only Do not use as a lifting point for slings Doing so may result in the crimper fallin...

Страница 9: ...7 GC16XD MINI CRIMPER PUMP SAFETY OPERATION MANUAL THIS PAGE IS INTENTIONALLY BLANK...

Страница 10: ...ube calipers hose assembly quick disconnects crimp charts Start up Kit Ordered Separately Part Number 78733 Product Number 7482 7313 1 Digital Caliper 6 78241 7369 0322 1 Hose Assembly 78467 7482 1017...

Страница 11: ...9 CRIMPER GC16XD MINI CRIMPER PUMP SAFETY OPERATION MANUAL...

Страница 12: ...ed to cycle the machine serveral times so that the power switch can be released at the proper time and indicator stop at the correct position The operator MUST stop hydraulic flow to the machine befor...

Страница 13: ...s always a small amount of oil purged from the assembly on disconnect Ensure these components are completely free of any contamination prior to connecting Before operating the GC16 Crimper you MUST en...

Страница 14: ...ully study the images the dies have a dove tail shape that is designed to mate with the die retainer plates Once the dies are located between the die retainer plates firmly push until the notch locate...

Страница 15: ...oupling are now ready for crimping MEGACRIMP PRE ASSEMBLED COUPLINGS Cut Hose to desired length Using Gates Crimp Data Manual 3509 Ind 428 7365 Auto select the correct MegaCrimp coupling Or log onto w...

Страница 16: ...machine is properly calibrated you may need to make a slight adjustment to the Dial Vernier Adjuster WHEN NOT USING 21 AND 22 DIES Using Gates STAINLESS STEEL DIGITAL CALIPER Product NO 7369 0322 Par...

Страница 17: ...w when the operator needs to stop hydraulic flow to the head It is advisable that you get use to the dial indicator before calibrating This is usually done by crimping the same specification assembly...

Страница 18: ...read 1 000 If the measurement does not read 1 000 003 then the micro adjuster needs to move until the COD is correct Micro Adjustment Loosen lock nut on back of micro adjuster using 8mm wrench It does...

Страница 19: ...ck torque bolts Check torque on flange bolts every 330 Nm or 243 ftlb AM FILLER PADS Periodically inspect filler pads 20 Gates Corporation This crimper requires minimal maintenance However the followi...

Страница 20: ...ING GC16XD MINI CRIMPER PUMP SAFETY OPERATION MANUAL 1 2 5 8X 6 8X 3 4 3X Item No Description Southcott Part Number Gates Part Number Qty 1 Handle Assembly 1 2 Dial Vernier Assembly 1 C 2 3 1 4 B A D...

Страница 21: ...ST GC16XD MINI CRIMPER PUMP SAFETY OPERATION MANUAL ITEM NO DESCRIPTION PART NO QTY 1 Handle Assembly 1 2 Dial Vernier Assembly 1 3 Standoff Assembly 1 4 End Caps 3 5 Foam Filler 8 6 Die Retainer Clip...

Страница 22: ...20 NOTES GC16XD MINI CRIMPER PUMP SAFETY OPERATION MANUAL...

Страница 23: ...ntial damages and some states do not allow limitations on how long an implied warranty lasts so the above limitation and exclusion may not apply to you This warranty gives you specific legal rights an...

Страница 24: ...22 7480 7006 70115 GC16XD Auto 428 3509 Ind 34008 M GATES COM Printed in the USA 09 2020...

Отзывы: