background image

Owner's Manual

-12-

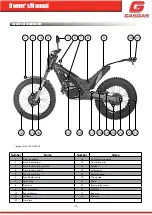
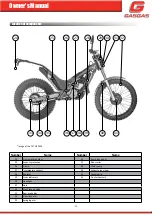
Number

Name

Number

Name

42

Rear mudguard

54

Clutch pump

43

Silencer

55

Handlebars

44

Left foot peg

56

Left suspension regulation

45

Air filter cover

57

Multifunction

46

Gear shift pedal

58

Right suspension regulation

47

Ignition cover

59

Front brake pump

48

Fuel tank

60

Throttle mechanism cover

49

Fuel tank cap

61

Front brake lever

50

Left-hand grip

62

Throttle grip

51

Light controls

63

Right foot peg

52

MIL

53

Clutch lever

Location of components   

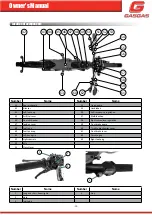
Number

Name

Number

Name

1

Long and short-beam lights

4

Stop

2

Horn 

3

Indicators

42

43

49

48

46 47

44

45

50

51 52 53

54

55

56

57

58
59

61

60 62

63

1

2

3

4

Содержание 125 TXT GP 2019

Страница 1: ......

Страница 2: ...in part is prohibited without the written permission of the copyright holder The company has the right without prior notice to change the technical content of the products The models in the images may...

Страница 3: ...air filter 20 Removing the fuel tank 21 Filling the radiator 22 Removing and checking the spark plug 23 Removing the filter box 24 Removing the carburettor 24 Removing the reed block 26 Clutch discs...

Страница 4: ...ill at the handlebars of the motorcycle proper preparation and the appro priate checks vital for it to be highly reliable you can enjoy trials riding at it most comfortable and fulfilling Thank you fo...

Страница 5: ...t quality stand ards Consequently GG hereby warrants to the final purchaser hereinafter the purchaser in accordance with the conditions set forth below the repair of any defects in materials or workma...

Страница 6: ...ed out after the established date b Inspection maintenance work or repair has been carried out by third parties not recognised or authorised by GG c Any maintenance or repair that has been carried out...

Страница 7: ...le discretion whether to repair or replace defective parts The owner of the spare parts if any will be GG without any other consideration The GG authorised dealer who has been entrusted with the repai...

Страница 8: ...Cylinder size 124 8 cc Bore and stroke 54 x 54 5 mm 250cc engine Cylinder size 247 7 cc Bore and stroke 72 5 x 60 mm 280cc engine Cylinder size 272 2 cc Bore and stroke 76 x 60 mm 300cc engine Cylind...

Страница 9: ...pic fork 39mm Rear Progressive system with adjustable monoshock Suspension stroke Front 177mm Rear 164mm Front fork oil OJ 01 SAE 5 Front fork oil level 39mm left 130mm air chamber right 75mm air cham...

Страница 10: ...r tube 15 Cylinder 4 Front suspension bar 16 Carburettor 5 Rear view mirrors 17 Chain tensioner 6 Fuel breather hose 18 Chain guide 7 Spark plug 19 Chain 8 Filter box 20 Rear sprocket cover 9 Rear mud...

Страница 11: ...al 25 Exhaust protection 37 Kick starter 26 Frame 38 Water pump 27 Intermediate exhaust 39 Exhaust pipe elbow 28 Radiator 40 Catadioptric 29 Front indicators 41 Front wheel axle 30 Headlight 31 Horn 3...

Страница 12: ...t suspension regulation 47 Ignition cover 59 Front brake pump 48 Fuel tank 60 Throttle mechanism cover 49 Fuel tank cap 61 Front brake lever 50 Left hand grip 62 Throttle grip 51 Light controls 63 Rig...

Страница 13: ...f is damaged Brake discs Every race First 5 hours If is damaged Every 2 race Clutch discs If is damaged Clutch Every race If is damaged Engine protector plate In a fall Exhaust Every race 500 hours Mu...

Страница 14: ...the frame number under which the vehicle is registered Manufacturer s nameplate B The motorcycle has a manufacturer s nameplate including the serial number marked on the front and information that mu...

Страница 15: ...e of which in the main switch which rotates to various positions The indicator control is located at the bottom of the left hand grip By moving the switch to the right or left the right hand or left h...

Страница 16: ...could become damaged and break the locking system Fuel tank capacity 2 3 litres Use unleaded petrol with an octane rating equal to or greater than that shown in the table Petrol is extremely flammabl...

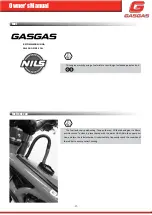
Страница 17: ...d petrol and oil The fuel tank cap is quick acting To open the cap lift the tab and give it a turn anti clockwise To close it place the cap with the words GAS GAS in the upper posi tion and turn the t...

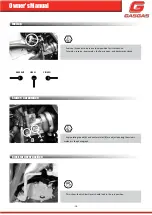
Страница 18: ...ards reserve downwards the flow is open and backwards closed Engine idling speed A and mixture inlet B are adjusted using the screws marked in the photograph This is how the kick start lever should lo...

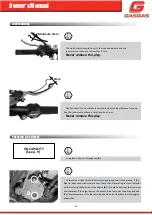
Страница 19: ...play To replace oil pour it through cap A To check the oil level place the motorcycle perpendicular to the ground If the bike has been used wait a few minutes Check the oil level using the level indi...

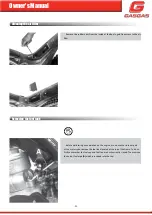
Страница 20: ...cated on the tail fairing of the motorcycle as shown in the photograph To clean it use water and detergent dry it and lubricate it with special filter oil Make sure that it is correctly fitted once cl...

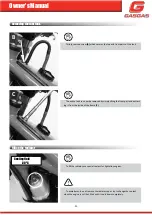
Страница 21: ...free access to the air filter Before performing any operation on the engine or on any other interior part of the motorcycle remove the fuel tank located at the top of the frame To do so firstly ensure...

Страница 22: ...removed by simply lifting the front part and extract ing it from the inside of the frame C To fill the radiator use special coolant for light alloy engines To avoid burns do not remove the radiator c...

Страница 23: ...st remove the cap from the current and unscrew the spark plug using a suitable spanner Blow the spark plug with pres surised air to remove traces of dirt and prevent debris from entering the engine co...

Страница 24: ...e rear wiring is visible Fig 1 4 Disconnect the connector Fig 2 5 Completely remove the filter box The carburettor will be left exposed and can be removed from the engine assem bly by loosening the re...

Страница 25: ...s important to check the fuel level inside the carburettor The height of the float should be 15 16mm It is necessary to carry out a thorough cleaning of the carburettor For this use compressed air Rem...

Страница 26: ...ccess door to the inside of the cylinder take special care to keep it in good condition and regularly check its properties Take care to cover the cylinder inlet with a clean cloth to prevent foreign o...

Страница 27: ...rations any traces of air can be removed with a bleeder A The circle indicates where the engine oil is filled up After many hours of use check for possible wear to the clutch discs The mini mum measur...

Страница 28: ...vior of your vehicle The following table shows how the behavior of the motorcycle according to the pre selection that is selected To adapt the different preloads in the optimal way Go to your nearest...

Страница 29: ...5 turns Measurement without spring and with compressed hydraulic rod Air chamber level A B The front suspension is adjusted manually A Right hydraulic extension B Left spring preloading In the lower p...

Страница 30: ...pring and preloading table Preloading is the difference in length in mm between a spring when it is tensioned and when it is at rest The rebound or extension is adjusted with the screw Its standard po...

Страница 31: ...egularly remove and check the condition of the swinging arm bearings and supports Regularly clean check and grease the joint adjustments of the lower part of the rear suspension With special oil greas...

Страница 32: ...Owner s Manual 32 Joint lubrication 2 The gear lever joint 3 Also the rear brake pedal bearings 4 Grease the fixings and springs of the footrests...

Страница 33: ...e engine start lever joint 6 The drive chain needs to be cleaned and greased regularly due to its constant friction and exposure to all types of elements 7 Grease the handlebars with a thin coat of oi...

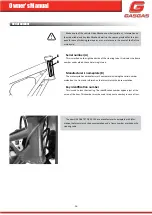
Страница 34: ...t lubrication 8 Grease and clean the throttle control frequently especially after washing the motorcycle with pressurised water equipment 9 Lift the upper cover of the throttle control to access the c...

Страница 35: ...wheel the shaft has easily adjustable eccentrics The coupling of the chain needs to be placed opposite the direction of travel Check the condition of the tyres to achieve optimum adhesion Fig 1 Bad c...

Страница 36: ...4 00 x 18 TRIAL tubeless Regularly check tyre pressure Front wheel pressure 1 2 bar normal 0 420 bar only competition Rear wheel pressure 1 2 bar normal 0 300 bar only competition The level of the fro...

Страница 37: ...ll times To eliminate traces of air from the brake circuit the calipers are equipped with bleeders Regularly check the level of the liquid Top up if necessary To check the level of the tank place the...

Страница 38: ...or the MIL light stays on permanently It will turn off if it is started 3 consecutive times exceeding 2 000 rpm if no error is detected It can be connected to the OBD system using a diagnostics machin...

Страница 39: ...onnector When the scan tool is connected it turns on and the start screen appears connecting to the ISO 15765 4 CAN protocol that our OBD system has If the OBD system detects an historical error the M...

Страница 40: ...ey light And at the same time the MIL turns off on the switch On the scan tool the following information can be viewed Current RPM maximums Time in seconds that the engine is running Minutes running w...

Страница 41: ...Owner s Manual 41 Approved electrical system...

Страница 42: ...Owner s Manual 42 Ignition electrical system...

Страница 43: ...ear brake caliper fixing 27 32 Front brake caliper fixing 27 32 Exhaust elbow fixing 27 32 Engine fixing 18 25 Rear brake pump fixing 7 10 PART NAME N m ENGINE Spark plug 11 Ignition fixing 7 8 Clutch...

Страница 44: ...Place the motorcycle in such a way that the two wheels do not touch the ground if this is not possible put cardboard underneath the wheels Cover the motorcycle to protect it from dust and dirt To put...

Страница 45: ...rect sunlight when the motorcycle is not being used Avoid contact with petrol degreasers or other chemical cleaners as they could damage the device Remember to always pay attention to the road when yo...

Страница 46: ...duct Fill fuel tank 3 Engine overheats Insufficient coolant in circuit Radiator dirty or partially clogged Add coolant and check watertightness of cooling system Clean radiator fins or replace it 4 En...

Страница 47: ...t engage Clutch does not detach Bent or seized shift fork Seized gear in transmission Damaged gear shift lever Broken or loose selector position spring Broken selector reverse mechanism spring Broken...

Страница 48: ...ecialized workshop Adjust rear shock absorber 16 Motorcycle makes abnormal noises Badly adjusted chain Worn chain Worn rear sprocket teeth Insufficient lubrication of chain Misaligned rear wheel Insuf...

Страница 49: ...g Go to a specialized workshop Change steering shaft Go to a specialized workshop Change front fork Align wheels 19 Brakes do not work properly Worn disc Loss of brake fluid Impaired brake fluid Broke...

Страница 50: ...es to ensure that the plastic stays shiny and the stickers that decorate the motorcycle are not removed SAFE OPERATION OF YOUR MOTORCYCLE Safe riding of a motorcycle does not only depend on the machin...

Страница 51: ......
Отзывы: