metal from the ground.
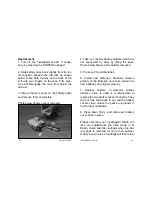
Next, select targets such as .22-caliber bullets,
.38-caliber shell casings, a dummy pistol, a
knife, a bottlecap, a nail and a pulltab. Select
also a pint jar filled with scrap copper and/or
aluminum metal, a long object such as a foot-
long pipe and a large object such as a gallon
can. Bury all these objects in rows about three
feet apart and make a map showing where and
how deeply each item is buried.
Bury shell casings and bullets at varying
depths, beginning at one inch. Continue, with
the deepest buried about six inches. Bury one
at about two inches but stand it on edge. Bury
a shell casing at about two inches with a bot-
tlecap about four inches off to one side. Bury
the bottlecap, nail and pulltab separately about
two inches deep.
Bury the jar at twelve inches to the top of its lid.
Bury the pipe horizontally three or four inches
deep. Bury the gallon can with the lid two feet
below the surface. Remember to make a map
Don't worry about losing "deep targets!" You
won't lose anything since you can always oper-
ate as deeply as conditions permit. Attempting
to operate above a level that permits a quiet
and stable audio threshold may actually cause
you to miss deep targets that you would have
found had you not "pushed" the detector.
Another point to remember is that when you
are operating with Depth set below the maxi-
mum because "less-than-perfect" environmen-
tal conditions, you will have additional detec-
tion power whenever it is possible for you to
use it.
Test Plot Construction
As you operate and use your Investigator G-
500, you will quickly grow more proficient in its
use. It is suggested that you develop a "test
plot" to hear how various targets will "sound" to
the detector or how they will appear on its LCD
display. This Test Plot will also prove invalu-
able in training others to use metal detection
equipment. After you select the area for your
test plot, scan it thoroughly and remove all
39
PN 1529570 Rev B
38
Garrett G-500


