background image

Navigating to a Distress Signal Transmission

When you receive a distress signal transmission, a distress 

signal alarm appears.

Select 

Review

 > 

Go To

 to begin navigation to the 

transmission.

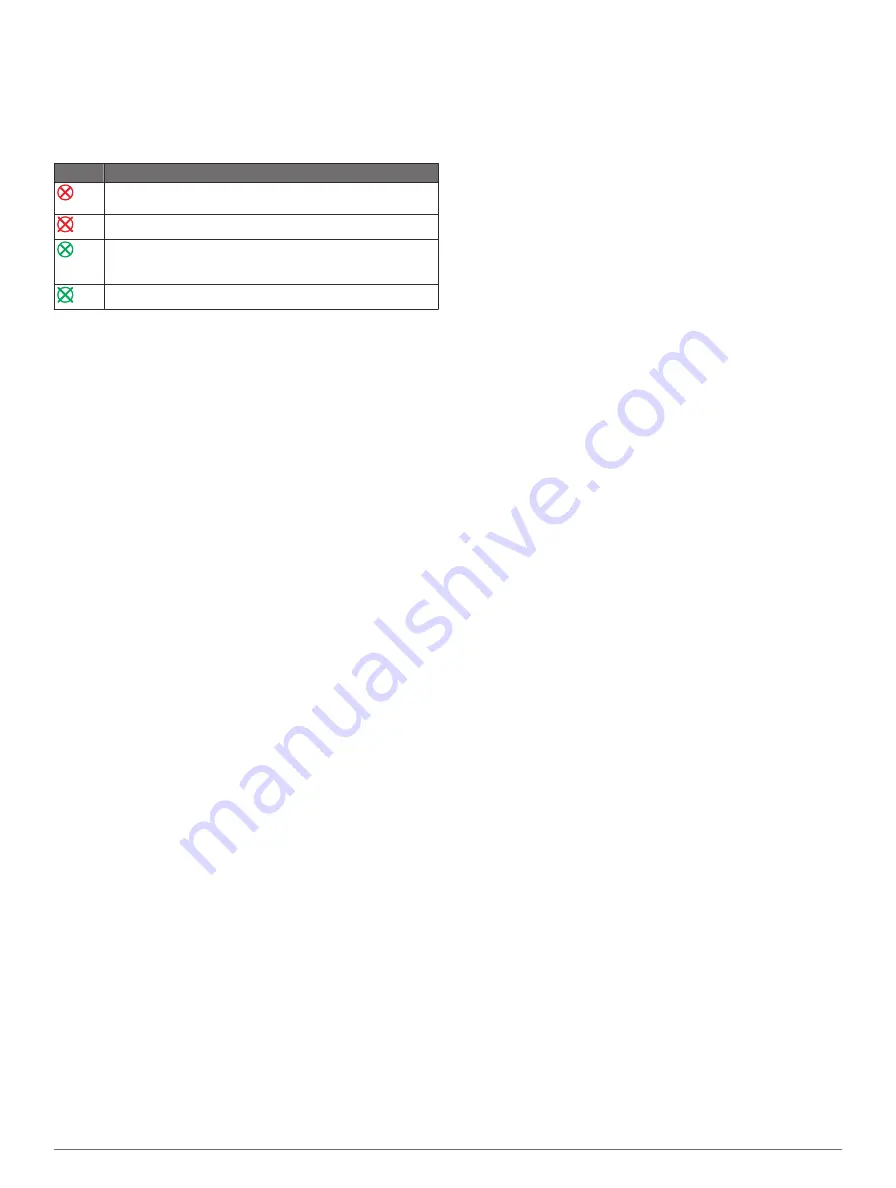
AIS Distress Signal Device Targeting Symbols

Symbol Description

AIS distress signal device transmission. Select to see more 
information about the transmission and begin navigation.
Transmission lost.

Transmission test. Appears when a vessel initiates a test of 
their distress signal device, and does not represent a true 
emergency.
Transmission test lost.

Enabling AIS Transmission Test Alerts

To avoid a large number of test alerts and symbols in crowded 

areas such as marinas, you can select to receive or ignore AIS 

test messages. To test an AIS emergency device, you must 

enable the chartplotter to receive test alerts.

1

Select 

Settings

 > 

Alarms

 > 

AIS

.

2

Select an option:
• To receive or ignore Emergency Position Indicating Radio 

Beacon (EPRIB) test signals, select 

AIS-EPIRB Test

.

• To receive or ignore Man Overboard (MOB) test signals, 

select 

AIS-MOB Test

.

• To receive or ignore Search and Rescue Transponder 

(SART) test signals, select 

AIS-SART Test

.

Turning Off AIS Reception

AIS signal reception is turned on by default.

Select 

Settings

 > 

Other Vessels

 > 

AIS

 > 

Off

.

All AIS functionality on all charts and 3D chart views is 

disabled. This includes AIS vessel targeting and tracking, 

collision alarms that result from AIS vessel targeting and 

tracking, and the display of information about AIS vessels.

Chart and 3D Chart View Settings

NOTE: 

Not all settings apply to all charts and 3D chart views. 

Some options require premium maps or connected accessories, 

such as radar.
These settings apply to the charts and 3D chart views, except 

the radar overlay and Fish Eye 3D (

Fish Eye 3D Settings

).

From a chart or a 3D chart view, select 

Menu

.

Waypoints & Tracks

: See 

Waypoints and Tracks Settings on 

the Charts and Chart Views

.

Other Vessels

: See 

Other Vessels Settings on the Charts and 

Chart Views

.

Surface Radar

: Shows surface radar details on the Perspective 

3D or Mariner's Eye 3D chart views.

Weather Radar

: Shows weather radar imaging on the 

Perspective 3D or Mariner's Eye 3D chart views.

Navaids

: Shows navigational aids on the Fishing chart.

Laylines

: Adjusts the laylines, when in sailing mode (

Laylines 

Settings

).

Chart Setup

: See 

Navigation and Fishing Chart Setup

.

Overlay Numbers

: See 

Overlay Numbers Settings

. This might 

appear in the Chart Setup menu.

Chart Appearance

: See 

Chart Appearance Settings

. This might 

appear in the Chart Setup menu.

Navigation and Fishing Chart Setup

NOTE: 

Not all settings apply to all charts and 3D chart views. 

Some settings require external accessories or applicable 

premium charts.
From the Navigation chart or Fishing chart, select 

Menu

 > 

Chart Setup

.

Satellite Photos

: Shows high-resolution satellite images on the 

land or on both land and sea portions of the Navigation chart, 

when certain premium maps are used (

Showing Satellite 

Imagery on the Navigation Chart

).

Water Overlay

: Enables relief shading, which shows the 

gradient of the bottom with shading, or sonar imagery, which 

helps identify the density of the of the bottom. This feature is 

available only with some premium maps.

Tides & Currents

: Shows current station indicators and tide 

station indicators on the chart (

Showing and Configuring 

Tides and Currents

) and enables the tides and current slider, 

which sets the time for which tides and currents are reported 

on the map.

Roses

: Shows a compass rose around your boat, indicating 

compass direction oriented to the heading of the boat. A true 

wind direction or apparent wind direction indicator appears if 

the chartplotter is connected to a compatible marine wind 

sensor. When in sailing mode, true and apparent wind are 

shown on the wind rose.

Lake Level

: Sets the present water level of the lake. This 

feature is available only with some premium maps.

Overlay Numbers

: See 

Overlay Numbers Settings

.

Weather

: Sets which weather items are shown on the chart, 

when the chartplotter is connected to a compatible weather 

receiver with an active subscription. Requires a compatible, 

connected antenna and an active subscription.

Chart Appearance

: See 

Chart Appearance Settings

.

Waypoints and Tracks Settings on the Charts and 

Chart Views

From a chart or a 3D chart view, select 

Menu

 > 

Waypoints & 

Tracks

.

Tracks

: Shows tracks on the chart or 3D chart view.

Waypoints

: Shows the list of waypoints (

Viewing a List of all 

Waypoints

).

New Waypoint

: Creates a new waypoint.

Waypoint Display

: Sets how to display waypoints on the chart.

Active Tracks

: Shows the active track options menu.

Saved Tracks

: Shows the list of saved tracks (

Viewing a List of 

Saved Tracks

).

Tracks Display

: Sets which tracks to display on the chart 

based on track color.

Laylines Settings

When in sailing mode (

Setting the Vessel Type

), you can 

display laylines on the navigation chart. Laylines can be very 

helpful when racing.
From the navigation chart, select 

Menu

.

Laylines Display

: Adjusts how the laylines and vessel are 

shown on the chart, and adjusts the length of the laylines.

Sailing Angle

: Allows you to select how the device calculates 

laylines. The 

Actual

 setting calculates the laylines by using 

the measured wind angle from the wind sensor. The 

Manual 

setting calculates the laylines by using manually entered 

windward and leeward angles.

Tide Correction

: Corrects the laylines based on the tide.

Overlay Numbers Settings

From a chart, 3D chart view, the Radar screen, or a 

Combinations screen, select 

Menu

 > 

Overlay Numbers

.

Charts and 3D Chart Views

7

Содержание nuvi 500-Series

Страница 1: ...GPSMAP 500 700 Series and echoMAP 50 70 Series Owner s Manual June 2014 190 01556 10_0C Printed in Taiwan...

Страница 2: ...sidiaries These trademarks may not be used without the express permission of Garmin Android is a trademark of Google Inc The Bluetooth word mark and logos are owned by the Bluetooth SIG Inc and any us...

Страница 3: ...ings 9 Navigation with a Chartplotter 9 Basic Navigation Questions 9 Destinations 9 Searching for a Destination by Name 9 Selecting a Destination Using the Navigation Chart 9 Searching for a Destinati...

Страница 4: ...nizing the Fuel Data with the Actual Vessel Fuel 22 Setting the Fuel Alarm 22 Viewing the Wind Gauges 22 Configuring the Sailing Wind Gauge 22 Configuring the Speed Source 22 Configuring the Heading S...

Страница 5: ...ng Data from a Memory Card 29 Copying Waypoints Routes and Tracks to a Memory Card 29 Copying Waypoints Routes and Tracks to or from all Chartplotters on the Network 29 Copying Built In Maps to a Memo...

Страница 6: ......

Страница 7: ...port 2 Select Manuals 3 Follow the on screen instructions to download the manual for your product Manual Conventions In this manual the term select is used to describe these actions Touching an item o...

Страница 8: ...Vessel Type You can select your boat type to configure the chartplotter settings and to use features customized for your boat type 1 Select Settings My Vessel Vessel Type 2 Select Powerboat or Sailboa...

Страница 9: ...d This view is helpful when navigating tricky shoals reefs bridges or channels and is beneficial when trying to identify entry and exit routes in unfamiliar harbors or anchorages Mariner s Eye 3D Show...

Страница 10: ...options that appear vary based on the location or object you selected 2 Select an option To view details of objects in the vicinity of the cursor select Review NOTE Review does not appear if the curso...

Страница 11: ...igation or Fishing chart select Menu Chart Setup Tides Currents 2 Select an option To show current station indicators and tide station indicators on the chart select On To show animated tide station i...

Страница 12: ...e target is calculated based on the course over ground information Showing AIS Vessels on a Chart or 3D Chart View Before you can use AIS you must connect the chartplotter to an external AIS device an...

Страница 13: ...or applicable premium charts From the Navigation chart or Fishing chart select Menu Chart Setup Satellite Photos Shows high resolution satellite images on the land or on both land and sea portions of...

Страница 14: ...to or more shallow than the dangerous depth are indicated by red text Safety Shading Sets the shades from the shoreline to the specified depth Depth Range Shading Specifies an upper and lower depth to...

Страница 15: ...To See Creating and Navigating a Route From Your Present Location How do I make the device steer my automatic pilot Navigate using Route To See Creating and Navigating a Route From Your Present Locati...

Страница 16: ...magenta line steering to avoid land shallow water and other obstacles 4 If you are off course follow the purple line corrected course to go to your destination or steer back to the magenta line direc...

Страница 17: ...e To Route To 3 Select the location of the last turn before the destination 4 Select Add Turn 5 If necessary repeat step 3 and 4 to add additional turns working backward from the destination to the pr...

Страница 18: ...iew select Menu Waypoints Tracks Tracks On A trailing line on the chart indicates your track Setting the Color of the Active Track 1 Select Nav Info Tracks Active Track Options Track Color 2 Select a...

Страница 19: ...Menu 4 Select an option To change the name select Name and enter a new name To customize the numbers shown on the screen select Overlay Numbers To change the data shown in the combination select Edit...

Страница 20: ...e side of the screen shows a full view graph of high frequency sonar data and the other side of the screen shows a full view graph of lower frequency sonar data NOTE The split frequency sonar view req...

Страница 21: ...lly select Up or Down To allow the chartplotter to adjust the gain or brightness automatically select an automatic option Adjusting the Color Intensity You can adjust the intensity of colors and highl...

Страница 22: ...gher frequency return Selecting Frequencies NOTE You cannot adjust the frequency for all sonar views and transducers You can indicate which frequencies appear on the sonar screen 1 From a sonar view s...

Страница 23: ...ntation of the SideV sonar view when the transducer is installed backward Sonar Alarm Settings NOTE Some settings require external accessories Select Settings Alarms Sonar Shallow Water Sets an alarm...

Страница 24: ...signals can increase the clutter on the Radar screen and make it more difficult to view information about shorter range targets In rain shorter range radar signals can enable you to view information a...

Страница 25: ...on point of the VRM and the EBL 2 Select Drop VRM EBL 3 Select Stop Panning Measuring the Range and Bearing to a Target Object Before you can adjust the VRM and the EBL you must show them on the Radar...

Страница 26: ...ence on the Radar Screen Side lobe interference may appear to streak outward from a target in a semi circular pattern Side lobe effects can be avoided by reducing the gain or reducing the radar range...

Страница 27: ...nfigured for use in one radar mode is applied to every other radar mode and to the Radar overlay 1 From a Radar screen or the Radar overlay select Menu Radar Setup Front of Boat 2 Select Up or Down to...

Страница 28: ...e you can set a fuel level alarm a compatible fuel flow sensor must be connected to the NMEA 2000 network You can set an alarm to sound when the total amount of remaining onboard fuel reaches the leve...

Страница 29: ...mation for today select Change Date Current If available to view information for the day after the date shown select Next Day If available to view information for the day before the date shown select...

Страница 30: ...a Navigation chart marking the location select Next Page To view the position report details select Previous Page Navigating to a Tracked Vessel 1 Select Nav Info Other Vessels DSC List 2 Select a po...

Страница 31: ...Media Player You can wirelessly connect the media player to a Bluetooth device 1 Place the Bluetooth device within 33 ft 10 m of the media player 2 From the media screen select BT Devices or Bluetooth...

Страница 32: ...not fill the entire screen To show the video using a standard aspect ratio select Aspect Standard To adjust the brightness select Brightness and select Up Down or Auto To adjust the color saturation...

Страница 33: ...ne forecasts coastal forecasts and offshore forecasts Weather bulletins may consist of either weather watches or weather advisories To view information about the warning or bulletin select the shaded...

Страница 34: ...ilable on all devices and in all subscriptions 1 From the weather Fishing chart select Weather Fishing Menu Fish Species 2 Select a species of fish 3 Select On 4 Repeat steps 2 and 3 to show areas wit...

Страница 35: ...ata from MapSource to the prepared memory card For more information see the MapSource help file Copying Data from a Memory Card 1 Insert a memory card into a card slot 2 Select Nav Info Manage Data Da...

Страница 36: ...y hides the menu bar when it is not needed GPS Settings Select Settings System GPS Skyview Shows the relative position of GPS satellites in the sky GLONASS Turns on or off GLONASS usage Russia satelli...

Страница 37: ...ing colder than it actually is Enter this value in step 5 as a negative number if the sensor connected to the chartplotter measures the water temperature as being warmer than it actually is 4 Select S...

Страница 38: ...map is structured Do not change this setting unless you are using a map or chart that specifies a different map datum Pressure Ref Time Sets the reference time used to calculate the barometer trend T...

Страница 39: ...tion through a narrow waterway 8 Select an option If the placement of the Auto Guidance line is satisfactory select Menu Stop Navigation and proceed to step 10 If the Auto Guidance line is too close t...

Страница 40: ...oltage is less than 10 volts the device will not turn on If the device is receiving enough power but does not turn on contact Garmin product support at www garmin com support My device is not creating...

Страница 41: ...02 AIS safety related broadcast message 129808 DSC call information 130310 Environmental parameters 130311 Environmental parameters obsolete 130313 Humidity 130314 Actual pressure 130576 Small craft s...

Страница 42: ...anning 3 setup 7 fuel alarm 22 32 fuel capacity 22 30 fuel gauges 21 22 configuring 22 status alarm 22 32 synchronizing with actual fuel 22 fuel onboard 30 G Garmin Marine Network 13 31 Garmin product...

Страница 43: ...ews 13 14 waypoint 14 whiteline 17 zoom 15 SOS 10 24 suspended targets 9 symbols 5 synchronizing user data 13 system information 30 T tide stations 5 23 indicators 5 touchscreen 1 calibrating 33 track...

Страница 44: ...02 36 699699 52 001 855 792 7671 0800 0233937 47 815 69 555 00800 4412 454 44 2380 662 915 35 1214 447 460 386 4 27 92 500 0861 GARMIN 427 646 27 0 11 251 9999 34 93 275 44 97 46 7744 52020 886 2 2642...

Отзывы: