background image

13

Menu Mode

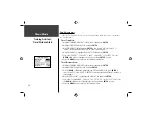
Interval Training

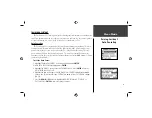
Interval Training enables you to improve your workout by alternating time intervals or 

distances of exercise with rest periods of stopping or slower speeds. You may choose to set an 
exercise distance & a rest time, set an exercise distance & a rest distance, set an exercise time 
& a rest time, or set an exercise time & rest distance. 

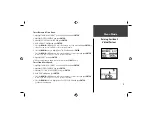
To start Interval Training:

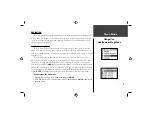
1. From the Training Assistant menu press the 

DOWN 

or

UP

 button to highlight ‘INTERVAL 

TRAINING’. Press 

ENTER

.

2. Press the 

DOWN 

or

UP

 button to highlight the desired training method fi eld and press 

ENTER

.

3. Press the 

DOWN 

or

UP

 button to highlight the setting you wish to change and press 

ENTER

.

4. Press the 

DOWN 

or

UP

 button to highlight the desired time or distance and press 

ENTER

.

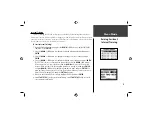
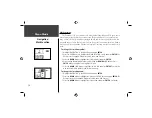
For ‘CUSTOM’ choices, scroll through the place holders using the 

DOWN 

or

UP

 buttons. 

(UP button moves the cursor right to left, and the 

DOWN 

button moves the cursor left 

to right). When you reach the position place you want to change, stop and press 

ENTER

.

Using the 

DOWN 

or

UP

 button, highlight the number you want, and press 

ENTER

. The 

minimum Time you may enter is 30 seconds. The minimum Distance you may enter is 0.12 
miles (0.20 km). Highlight ‘OK’ and press 

ENTER

 when done

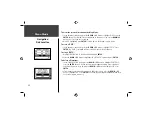
5. When you have entered all your settings, highlight ‘DONE?’ and press 

ENTER

.

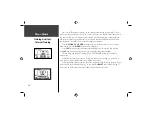
6. Press 

START/STOP

 to begin your Interval Training. Press 

START/STOP

 during your work-

out to pause Interval Training. 

Training Assistant:

Interval Training

Содержание Forerunner 201 - Running GPS Receiver

Страница 1: ...owner s manual Forerunner 201 personal trainer Forerunner 201 Cover indd 1 7 28 2004 2 27 03 PM...

Страница 2: ...y of this manual or of any revision hereto provided that such electronic or printed copy of this manual or revision must contain the complete text of this copyright notice and provided further that an...

Страница 3: ...d the Quick Start Guide to understand the operating features of the unit PRODUCT REGISTRATION Help us better support you by completing your on line registration today Connect to our Web Site www garmi...

Страница 4: ...tory By Week 7 History History Totals Delete 8 Training Assistant Auto Pause Lap 9 Training Assistant Virtual Partner 10 Training Assistant Interval Training 13 Training Assistant Pace Alert 15 Traini...

Страница 5: ...TE TO STATE IN NO EVENT SHALL GARMIN BE LIABLE FOR ANY INCIDENTAL SPECIAL INDIRECT OR CONSEQUENTIAL DAMAGES WHETHER RESULTING FROM THE USE MISUSE OR INABILITY TO USE THIS PRODUCT OR FROM DEFECTS IN TH...

Страница 6: ...communications However there is no guarantee that interference will not occur in a particular installation If this equipment does cause harmful interference to radio or television reception which can...

Страница 7: ...the property of Garmin and is protected under the United States of America copyright laws and international copyright treaties You further acknowledge that the structure organization and code of the S...

Страница 8: ...isk To reduce the risk of unsafe opera tion carefully review and understand all aspects of this Owner s Manual When in actual use carefully compare indications from the Forerunner 201 to all available...

Страница 9: ...ons tracks and workout history is retained inde nitely in the units memory without the need for external power It is always a good practice to back up important user data by manually recording it or d...

Страница 10: ...reset enter lap start stop Back View without strap Built in GPS Antenna Power Data Contacts ENTER START STOP POWER BACKLIGHT MODE RESET LAP Serial Number Speaker LCD Display with Backlight Front View...

Страница 11: ...ro oriented the same direction on each strap 2 Place on your wrist or arm 3 Slide the end of the extension through the existing connector 4 Adjust to t comfortably and secure the strap using the Velcr...

Страница 12: ...echarging cradle to the unit with the 4 contact end in rst shown below Connect to a power source Full recharge time should take between 1 3 hours The battery must be charged at least 2 hours before in...

Страница 13: ...mance In a nutshell the GPS receiver s view of the sky generally determines how fast you get a location x or if you get a x at all GPS signals are relatively weak and do not travel through rocks build...

Страница 14: ...e dish icon on the left side of the screen ashes while the Forerunner determines your location 3 Leave the Forerunner with a clear view of the sky for 15 30 minutes initially If the Forerun ner does n...

Страница 15: ...lap is completed 4 While in Timer Mode the data you are recording is called your Current Run When you reset the Timer the data is considered your Last Run When the timer is stopped press and hold RES...

Страница 16: ...By using a combina tion of the GPS and the Timer you can start running anywhere you want and let the Forerun ner 201 track your speed distance and time Timer Mode Buttons The MODE Button Press to go...

Страница 17: ...Pause Lap 9 Virtual Partner 10 11 Interval Training 12 13 Pace Speed Alert 15 Time Dist ance Alert 16 Navigation 17 24 Add Remove Map Mode 17 Mark Location 18 20 Find Location 20 22 Back to Start 23...

Страница 18: ...y Totals gives a total overview which is then broken down into weeks with By Week and into the seven days of that week with By Day From the History menu you can choose which information you want to st...

Страница 19: ...week highlighted the lower half displays total time total distance average speed and total calories burned for that week Once you select the week you want to review the Forerunner 201 breaks the week...

Страница 20: ...1 month Older than 3 months Older than 1 year or Delete All Once you choose one of the available options a window appears asking if you are sure you want to delete the lap or workout To delete a work...

Страница 21: ...s below that setting The stop watch indicator ashes when the timer is paused The Auto Lap is useful if you want the Forerunner 201 to keep track of your laps without having to press the LAP button eac...

Страница 22: ...orkout goals The Virtual Partner always completes the goal you set Your job is to keep up with your Virtual Partner Your Virtual Partner can help you with Distance Time Time Pace Speed or Distance Pac...

Страница 23: ...s the DOWN or UP button to select the total time of your workout and press ENTER to select You can choose CUSTOM to set your own time 8 Highlight DONE and press ENTER 9 When you are ready to begin you...

Страница 24: ...hlight VIRTUAL PARTNER and press ENTER 3 Highlight SET DISTANCE PACE SPEED and press ENTER 4 With DISTANCE highlighted press ENTER 5 Press the DOWN or UP button to select the distance of your workout...

Страница 25: ...he setting you wish to change and press ENTER 4 Press the DOWN or UP button to highlight the desired time or distance and press ENTER For CUSTOM choices scroll through the place holders using the DOWN...

Страница 26: ...ner To show the Rest Banner again press the MODE button until it is displayed Press LAP any time during a workout to immediately start a rest period You may also press LAP any time during a rest perio...

Страница 27: ...ss the DOWN button to highlight the ALERT AT eld and press ENTER 5 Select from a quick option menu SPRINT RUN JOG SPEED WALK WALK or CUSTOM and press ENTER 6 Press the MODE button to return to the Tra...

Страница 28: ...MINUTES or CUSTOM Press the DOWN or UP button to highlight your selection and press ENTER to select 6 Press the MODE button to return to the Training Assistant mode To set Distance Alert 1 Highlight...

Страница 29: ...detailed map data into the Forerunner 201 The Map Mode shows where you the animated gure are and provides a picture of where you have traveled As you travel the animated gure walks and leaves a trail...

Страница 30: ...the DOWN button to highlight the MARK LOCATION option and press ENTER The Review Location appears Flag with symbol name and location 3 Press the DOWN button to highlight the location symbol and press...

Страница 31: ...in memory To change the elevation 1 Highlight NAVIGATION in the Menu Mode and press ENTER 2 Press the DOWN button to highlight the MARK LOCATION option and press ENTER The Review Location Mode appears...

Страница 32: ...you want Press ENTER The position place is now changed 5 Press the DOWN or UP button to highlight the OK eld and press ENTER The Location Mode appears again with the corrected location 6 Press the DOW...

Страница 33: ...if you really want to delete the location If you do press the DOWN or UP button highlight YES and press ENTER 2 If you change your mind and do not want to delete the location press the DOWN or UP butt...

Страница 34: ...tivated with the selected location as the destination To stop a GOTO 1 Highlight NAVIGATION in the Menu Mode and press ENTER 2 Press the DOWN or UP button to highlight the STOP GOTO option and press E...

Страница 35: ...hould travel 2 Press the DOWN or UP button to zoom in or zoom out on the map Press MODE to return to the Menu Mode 3 To stop highlight NAVIGATION press the ENTER button Press the DOWN or UP button to...

Страница 36: ...at enter the proper time zone and choose Daylight Savings Time When you select 12 hour time format ting the clock reads like a standard clock with 12 hour AM and 12 hour PM cycles The 24 hour option s...

Страница 37: ...ou must enter the UTC offset for your location and the Daylight Savings time option is not available SET TIME Daylight Savings Daylight savings time can be set to Automatic which automatically changes...

Страница 38: ...hlight the UNITS eld Press ENTER 4 Press the DOWN or UP button high light STATUTE or METRIC and press ENTER Press the MODE Button to return to the mode of your choice To change the pace speed mode 1 H...

Страница 39: ...ta types are available AVERAGE PACE SPEED overall average speed of workout AVG LAP TIME average time of all the laps BEST PACE fastest speed of workout CALORIES total calories burned since timer start...

Страница 40: ...e pg 26 and performance data customized to you This data is also used for the Training Assistant pace and settings To change the pro le setting 1 From the Menu Mode press the DOWN or UP button to high...

Страница 41: ...UP button to highlight your selection and press ENTER 5 Press the MODE Button to return to the SETTINGS mode To adjust the display contrast 1 From the Menu Mode press the DOWN or UP button to highlig...

Страница 42: ...ghlighted press ENTER 4 Press the DOWN or UP button to highlight your selection and press ENTER 5 Press the MODE Button to return to the SETTINGS mode To change the language 1 From the Menu Mode press...

Страница 43: ...Press ENTER 2 Press the DOWN or UP button to highlight the RESTORE SETTINGS eld and press ENTER 3 Press the DOWN or UP button to highlight your selection and press ENTER About Forerunner Displays the...

Страница 44: ...o an XML data format Please refer to our web site on how to download the Forerunner Logbook software at http www garmin com products forerunner201 Minimum System Requirements IBM compatible PC with Pe...

Страница 45: ...er 12 parallel channel Acquisition time Approx 15 seconds warm start Approx 45 seconds cold start Approx 5 minutes First Time Update Rate 1 second continuous GPS Accuracy 15 meters 49 ft RMS1 95 typic...

Страница 46: ...en 4 Custom Page 27 Custom Screen 4 D Data Screens 4 28 Daylight Savings 25 Delete History 8 Delete Location 22 Display Contrast 29 Distance Alert 16 Distance Goals 11 E Elevation 19 F Factory Setting...

Страница 47: ...Registration i Restore Settings 31 S Serial Number i Set Display 29 Set Pro le 28 Set System 30 Set Time 24 25 Set Units 26 Software 32 Software License v Software Version 31 Speci cations 33 Speed Pa...

Страница 48: ...Run Notes...

Страница 49: ...Run Notes...

Страница 50: ...Run Notes...

Страница 51: ...Forerunner 201 Cover indd 3 7 28 2004 2 27 59 PM...

Страница 52: ...04 Garmin Ltd or its subsidiaries Garmin International Inc 1200 East 151st Street Olathe Kansas 66062 U S A Garmin Europe Ltd Unit 5 The Quadrangle Abbey Park Industrial Estate Romsey SO51 9DL U K Gar...

Отзывы: