Navigating to a Destination
You can navigate to a destination using the compass or map
1
Select the
Orange
key.
2
Select
Start GPS
.
3
Wait while the device locates satellites.
4
Select the
Orange
key.
5
Select an option:
• Select
Waypoints
.
• Select
Tracks
.
• Select
Routes
.
• Select
GPS Tools
>
Coordinates
.
• Select
GPS Tools
>
POIs
.
• Select
GPS Tools
>
Geocaches
.
6
Select a destination.
7
Select
Go
.
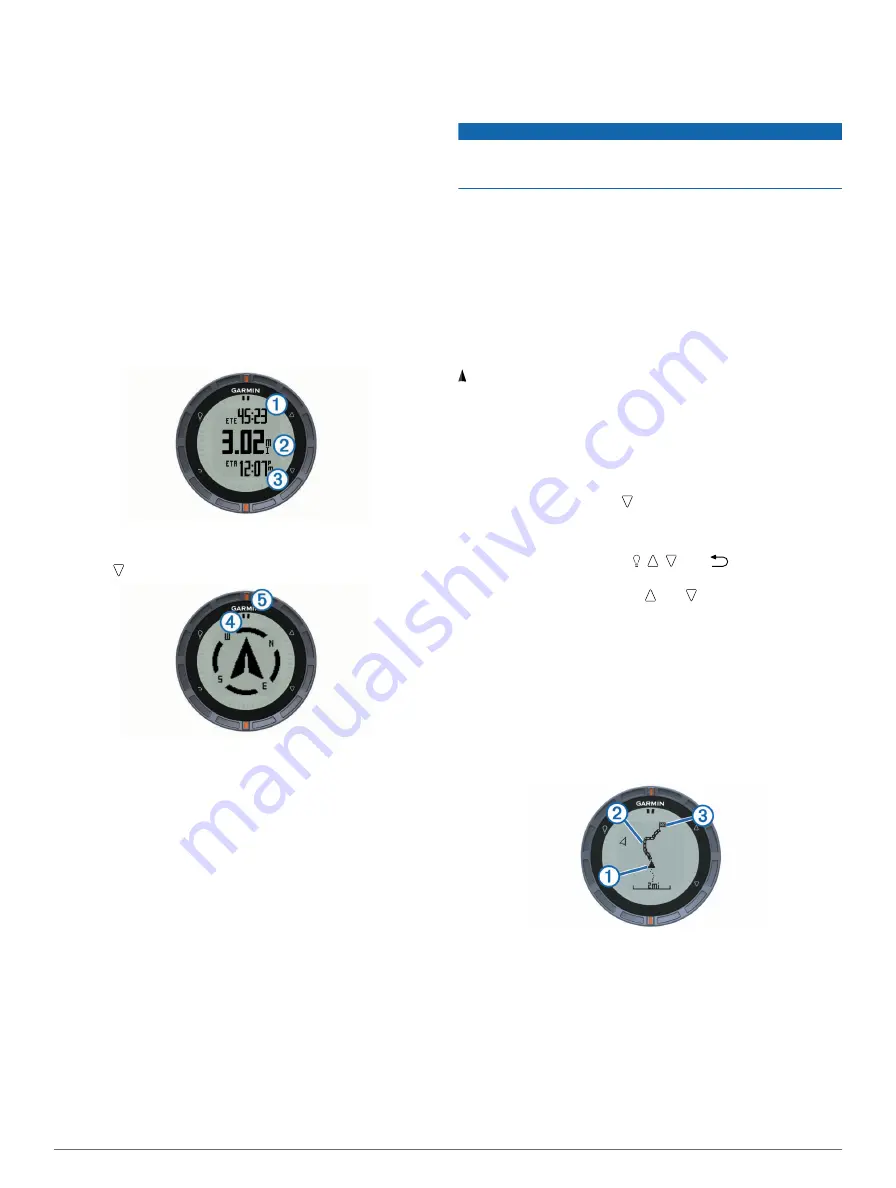
The device displays time to destination
À
, distance to
destination
Á
, and estimated time of arrival
Â
.
8
Select to view the compass page.
The two pointer marks
Ã
serve as a bearing pointer. The top
orange mark
Ä
points in the direction you are facing.
9
Align the pointer marks with the top orange mark.
10
Continue to walk in that direction until you reach the
destination.
Navigating with Sight 'N Go
You can point the device at an object in the distance, such as a
water tower, lock in the direction, and then navigate to the
object.
1
Select the
Orange
key.
2
Select
GPS Tools
>
Sight 'N Go
.
3
Point the orange marks on the bezel at an object.
4
Select the
Orange
key.
5
Select an option:
• Select
Set Course
to navigate to the distant object.
• Select
Project
6
Navigate using the compass (
) or map (
Compass
The device has a 3-axis compass with automatic calibration.
• Compass navigation (
)
• Compass settings (
)
Calibrating the Compass
NOTICE
Calibrate the electronic compass outdoors. To improve heading
accuracy, do not stand near objects that influence magnetic
fields, such as vehicles, buildings, and overhead power lines.
Your device was already calibrated at the factory, and the
device uses automatic calibration by default. If you experience
irregular compass behavior, for example, after moving long
distances or after extreme temperature changes, you can
manually calibrate the compass.
1
Select the
Orange
key.
2
Select
Setup
>
Sensors
>
Compass
>
Calibrate
>
Start
.
3
Follow the on-screen instructions.
Map
represents your location on the map. As you travel, the icon
moves and leaves a track log (trail). Waypoint names and
symbols appear on the map. When you are navigating to a
destination, your route is marked with a line on the map.
• Map navigation (
)
)
Browsing the Map
1
While navigating, select to view the map.
2
Select the
Orange
key.
3
Select one or more options:
• Select
Pan
, and select , , , and
to view different
areas.
• Select
Zoom
, and select and to zoom in and out of
the map.
NOTE:
To exit or change the browsing mode of the map,
select the
Orange
key, and select an option.
Navigating Using TracBack®
While navigating, you can navigate back to the beginning of
your track. This can be helpful when finding your way back to
camp or the trail head.
1
Select the
Orange
key.
2
Select
Tracks
>
Current
>
TracBack
.
Your current location
À
, track to follow
Á
, and end point
Â
appear on the map.
Altimeter and Barometer
The device contains an internal altimeter and barometer.
•
On Demand
sensor data (
•
Always On
sensor data (
)
)
Changing the Plot Type
You can change the way the device plots barometer and
elevation data.
Navigation
5
Содержание fenix
Страница 1: ...fēnix Owner s Manual August 2012 190 01507 00_0A Printed in Taiwan ...
Страница 6: ......
Страница 19: ...æ ßQ í â píˆ ÏeÆW 0ìy ãñj...
Страница 20: ...ît ß The two pointer marks à ˇ ã ÍNÞ...
Страница 21: ...æ ß Œí3 Ôâ p ˆÌ ÖeÉW cì üñb...
Страница 22: ...çt ßYª 5 5 ú2 êG 3 orange mark Ä ˇ à ÍUÞ æ ßG í ıâVpüˆÆ ê ÖeÕW ì úñd...
Страница 23: ...çtüßEªC n ˆ µúw ò êK ÏŒk À Žé 9 ˇ Ñ ÍUÞ æ ß í âVpøˆÁ fl ÚeÕW ì8 áñ ...
Страница 25: ... t ßRª...
Страница 30: ...ìt ß ª...
Страница 31: ... y M 5 ú ú ...
Страница 35: ...çt ßHª n 0 ú9 ç EÊ Map ˇ ÍYÞ æ ßQ í ıâ pûˆ Ł Íe W7 ì òñ ...
Страница 36: ...àt ßRª...
Страница 37: ... t V ú2 êI 3ÏÖK ÀÙ r iÄ ÜDö åÞŠ ÕŽZã7 ...
Страница 38: ... R uxG ˇ ý ÍJÞ æ ß Œí âVpäˆË Ìe W cì áñj...
Страница 39: ...êt ß ª t _ q ú õ êD jÏÖK ÀÙ r iÄ uÜD åÉŠƒÕ Z 7 â ˇ ã ÍQÞ æ ßX í Łâ pøˆË À ÐeÉW 7ì1 öñ ...
Страница 40: ...ät ßLª 1 µú9 êG 6ÏØkzÀ h c pÄ ÉDð åÆŠ ÕÕZ 7J ˇ ô ÍOÞ æ ßZ Œí4 šâˇpæˆ H ÊeÕW 1ì6 æñ ...
Страница 44: ...ët ß ªD T ú ê ÏŒk À 6 k hĈ ÑDë åÚŠËÕ Z 7 O µRüucG ˇ ó ÍQÞ æíß í â píˆ ÖeËW ì òño...
Страница 47: ...æ ß ží ıâVpìˆÏ Î Navigation 5 ...
Страница 56: ...ÃàÀfl ÅeœI 4ö AÝ cÒ Ü DÞÈ âÂ...
Страница 74: ...Àã hK PZ ÙÄÒ Å ævQ Ùû ü æ Ï y0Ê ê óÚ Žr 7 b4Ù Å A6Rº Q Àè 1d_ÄŒ Ýg Ê Ñ ...
Страница 80: ...Öã H Device Care NOTICE Ï 0 ˇê6 µÚ rÞ 7h 8 b3Ù Å A Rô _ HÀç 9 31i_ŠŒ qÝ Ô ...
Страница 85: ...Q d1 _ÑŒ 0ý Ê X...
Страница 90: ...Q p1M_ÒŒX Ýb ƒ ˇ...
Страница 91: ...ÄãÅhJÂÌ XZ ÙÄÒmÅ æ QS ûç á bÆPrXÄúÁc 3ÖÅŽãé We6 ë Ï e0Ê ê2 åÚˇ ŁrŁ p7 _ b Ù Å A www dtsc ca govÏ Ò Ú t0 ...


