


GPS in Schools – Garmin eTrex User’s Guide
Produced by the University of Tasmania in conjunction with Geoscience Australia as part of the AuScope GPS in Schools Project – 2014.
10
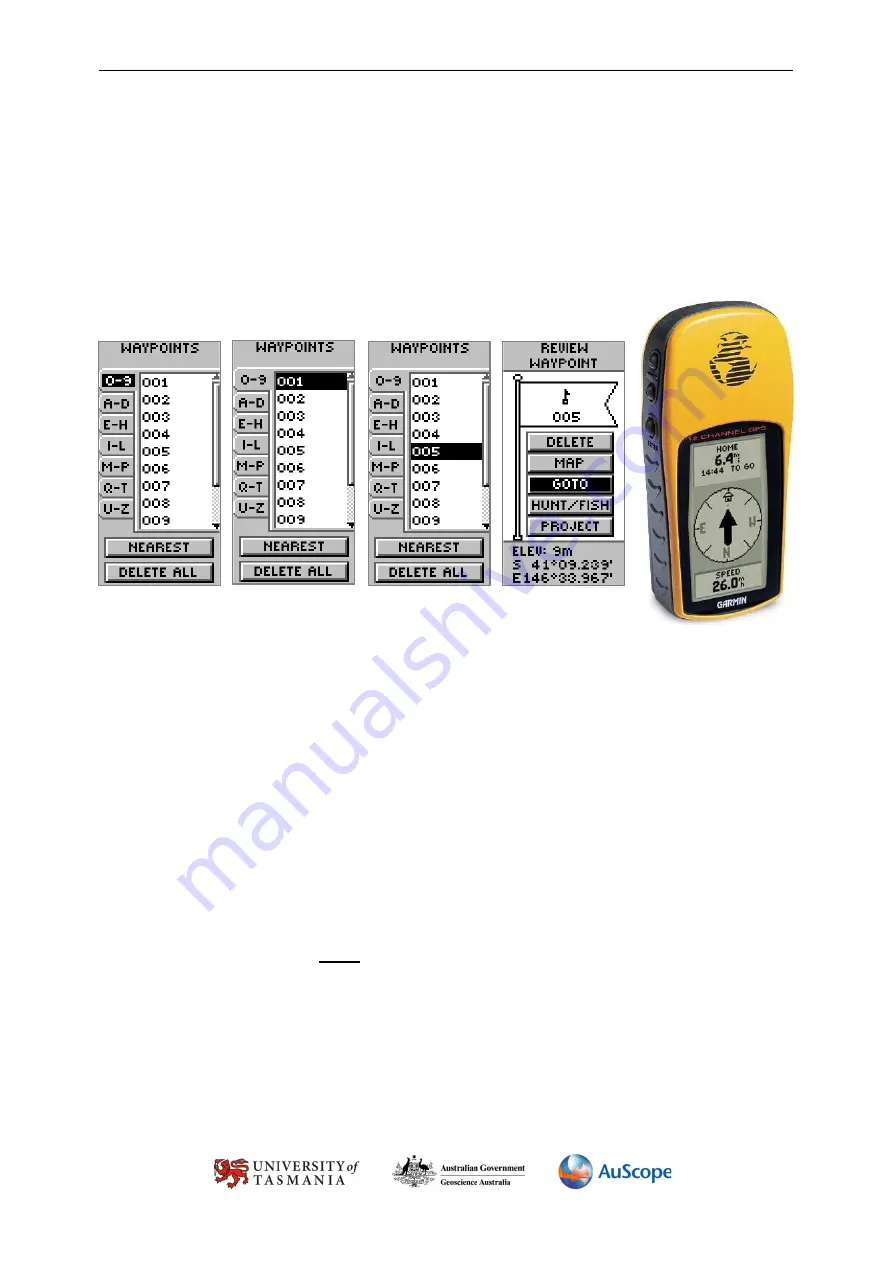
Selecting a waypoint:
1.
If the waypoint is identified as a number, then scroll until the cursor is on the
0-9
tab.
2.
Press
ENTER
(this will swap the cursor to the right hand side of the screen).
3.
Use the
UP/DOWN
buttons (if necessary) to navigate to your numbered waypoint. Press
ENTER
.
4.
The
GOTO
Page should appear and the word
GOTO
should be highlighted (if not, toggle up or down).
5.
Press
ENTER
and the GPS will tell you how far away you are from your waypoint and will give you
directions how to get there.
Please note
that you need to move around for a few metres before the compass arrow will settle and reliably
point in the direction of the waypoint.
Step 6: Using the GPS in the dark
When using the GPS in the dark, a backlight can be switched on. Give the
POWER
button a quick ‘dab’ and the
backlight should switch on.
Please note
that the battery consumption is GREATLY increased by the use of the backlight. This should be taken
into consideration as you may find the GPS will stop working due to low battery levels. This could mean that
navigation back to base/camp/home etc. may be without the aid of GPS!
Step 7: Checking the reference or Datum for the GPS.
The eTrex H allows you to specify a reference grid for your data points. This is called a Datum. The default
Datum can be set/checked by the following process:
•
Navigate to the
MENU
page.
•
Scroll to
SETUP
, press
ENTER
.
•
Scroll to
UNITS
.
1
2
3
4
5


