background image

Connect the device to vehicle power using the traffic 

compatible power cable (

Mounting and Powering the Garmin 

Drive Device in Your Vehicle

, page 1

).

If your product model includes traffic data, the vehicle power 

cable included with your device is traffic compatible.

When you are within a traffic coverage area, your device can 

display traffic information and help you avoid traffic delays.

Traffic Receiver Subscriptions

A regional traffic data subscription is included with most traffic 

receivers. You can add subscriptions for additional regions to 

your traffic receiver. For more information, go to 

garmin.com

/traffic

.

Viewing Traffic Subscriptions

Select 

Settings

 > 

Traffic

 > 

Subscriptions

.

Adding a Subscription

You can purchase traffic subscriptions for other regions or 

countries.

1

Select 

Settings

 > 

Traffic

.

2

Select 

Subscriptions

 >  .

3

Write down the FM traffic receiver unit ID.

4

Go to 

www.garmin.com/fmtraffic

 to purchase a subscription 

and get a 25-character code.
The traffic subscription code cannot be reused. You must 

obtain a new code each time you renew your service. If you 

own multiple FM traffic receivers, you must obtain a new 

code for each receiver.

5

Select 

Next

 on the device.

6

Enter the code.

7

Select 

Done

.

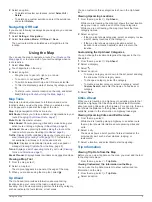
Receiving Traffic Data Using Smartphone 

Link

NOTE: 

Smartphone Link traffic data is available only for product 

models ending in MT-S.
Your device can receive subscription-free traffic data through 

the Smartphone Link app.

1

Connect your device to Smartphone Link (

Connecting to 

Smartphone Link

, page 11

).

2

On your Garmin Drive device, select 

Settings

 > 

Traffic

, and 

verify the 

Traffic

 check box is selected.

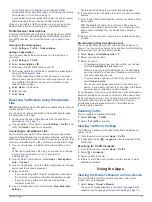
Connecting to Smartphone Link

You must pair your Garmin Drive device with your phone and 

connect to Smartphone Link to use some features, such as live 

traffic and parking information. After the devices are paired, they 

connect automatically when they are turned on and within range.

1

On your smartphone, install the Garmin Smartphone Link 

app.
To find the Smartphone Link app, you can search in the app 

store on your smartphone, or go to 

garmin.com

/smartphonelink

.

2

On your Garmin Drive device, select 

Apps

 > 

Smartphone 

Link

 > 

Connect

.

3

On your smartphone, open the Garmin Smartphone Link app, 

and accept the license agreement.

4

Select an option:
• If you are pairing with an Apple

®

 smartphone, respond to 

the on-screen prompts to complete the pairing process.

• If you are pairing with a smartphone with Android

complete steps 5-8.

5

On your smartphone with Android, select 

View Bluetooth 

Settings

.

The Bluetooth

®

 settings for your smartphone appear.

6

If necessary, select the option to search or scan for nearby 

devices.

7

From the list of Bluetooth devices, select your Garmin Drive 

device name.

TIP: 

The Bluetooth name for your Garmin Drive device 

appears on the Garmin Drive screen. You must select the 

device name indicated for your smartphone operating 

system.

8

Respond to the on-screen prompts to complete the pairing 

process.

Disconnecting from Smartphone Link

You can temporarily disconnect or permanently unpair your 

phone. Your device does not receive data from the Smartphone 

Link app while your phone is disconnected.

1

Select 

Apps

 > 

Smartphone Link

 >  .

2

Select your phone name.

3

Select an option:
• To temporarily disconnect your phone from your device, 

clear the 

Smartphone Link

 check box.

When you want to receive Smartphone Link data again, 

you must select the check box to enable your device to 

connect to Smartphone Link.

• To permanently unpair your phone from your device, 

select 

Unpair device

.

Your phone is no longer authorized to connect to your 

device. If you want to connect to your phone in the future, 

you must pair your phone and device again.

If you unpaired your phone, you should open your smartphone 

Bluetooth settings and remove your Garmin Drive device from 

the list of paired devices. This can help to prevent problems if 

you want to pair the devices again in the future. See your 

smartphone owner's manual for more information about 

removing paired devices.

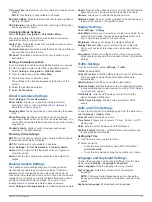
Enabling Traffic

You can enable or disable traffic data.

1

Select 

Settings

 > 

Traffic

.

2

Select the 

Traffic

 check box.

Viewing Traffic on the Map

The traffic map shows color-coded traffic flow and delays on 

nearby roads.

1

From the main menu, select 

Apps

 > 

Traffic

.

2

If necessary, select   > 

Legend

 to view the legend for the 

traffic map.

Searching for Traffic Incidents

1

From the main menu, select 

Apps

 > 

Traffic

.

2

Select   > 

Incidents

.

3

Select an item in the list.

4

If there is more than one incident, use the arrows to view 

additional incidents.

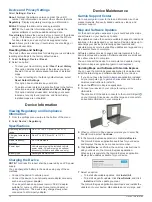
Using the Apps

Viewing the Owner's Manual on Your Device

You can view the complete owner's manual on the device 

screen in many languages.

1

Select 

Apps

 > 

Owner's Manual

.

The owner's manual appears in the same language as the 

software text (

Language and Keyboard Settings

, page 13

).

Using the Apps

11

Содержание DRIVE 52

Страница 1: ...GARMINDRIVE 52 GARMINDRIVE5PRO Owner sManual...

Страница 2: ...s and myTrends are trademarks of Garmin Ltd or its subsidiaries These trademarks may not be used without the express permission of Garmin Android is a trademark of Google Inc Apple and Mac are tradema...

Страница 3: ...Location to Your Route 7 Skipping the Next Destination in Your Route 7 Shaping Your Route 7 Taking a Detour 7 Changing the Route Calculation Mode 8 Stopping the Route 8 Using Suggested Routes 8 Avoid...

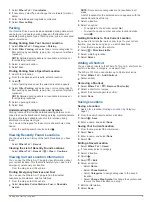
Страница 4: ...ing the Mount from the Suction Cup 15 Removing the Suction Cup from the Windshield 15 Changing the Fuse in the Vehicle Power Cable 15 Troubleshooting 15 The suction cup will not stay on my windshield...

Страница 5: ...f and the device uses very little power but it can wake instantly for use TIP You can charge your device faster by putting it in power saving mode while charging the battery To turn off the device com...

Страница 6: ...ble the audible tone for some types of driver alerts The visual alert appears even when the tone is disabled 1 Select Settings Driver Assistance Driver Alerts 2 Select or clear the check box next to e...

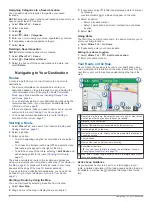
Страница 7: ...alternate routes to the locations Go Select to start navigating to the location using the recommended route Select to view the search results on the map Location Search Results on the Map You can vie...

Страница 8: ...location s history Foursquare Foursquare is a location based social network Your device includes pre loaded Foursquare points of interest which are indicated by the Foursquare logo in your location s...

Страница 9: ...iew information about your current location This feature is helpful if you need to tell emergency personnel your location From the map select the vehicle Finding Emergency Services and Fuel You can us...

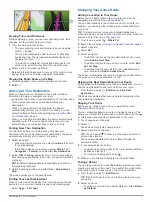
Страница 10: ...map Your Route on the Map page 6 A preview of the major roads in your route appears at the edge of the map for several seconds If you need to stop at additional destinations you can add the locations...

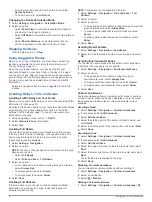
Страница 11: ...Active Route Adding a Location to Your Route Before you can add a location to your route you must be navigating a route Starting a Route page 6 You can add locations to the middle or end of your rout...

Страница 12: ...ways avoid tolls select Avoid To always allow tolls select Allow 4 Select Save Avoiding Toll Stickers If the map data on your device contains detailed toll sticker information you can avoid or allow r...

Страница 13: ...es information about upcoming locations along your route or the road on which you are traveling You can view upcoming points of interest by category such as restaurants fuel stations or rest areas You...

Страница 14: ...tings Map Vehicle Map Layers 2 Select the check box next to each layer you want to show on the map Changing the Map Data Field 1 From the map select a data field NOTE You cannot customize Speed 2 Sele...

Страница 15: ...respond to the on screen prompts to complete the pairing process If you are pairing with a smartphone with Android complete steps 5 8 5 On your smartphone with Android select View Bluetooth Settings T...

Страница 16: ...start your trip 1 Select Apps Trip Planner Saved Trips 2 Select a saved trip 3 Select Trip Settings 4 Select an option To add shaping points to your trip select Shape Route and follow the on screen in...

Страница 17: ...about pairing cameras and camera settings Go to garmin com backupcamera to purchase a Garmin backup camera Select Settings Backup Camera and select a paired camera Unpair Removes the paired camera You...

Страница 18: ...You can purchase an approved Garmin AC DC adapter suitable for home or office use from a Garmin dealer or www garmin com The device may charge slowly when connected to a third party adapter Device Ma...

Страница 19: ...mpartment Register your device using the Garmin Express software garmin com express Restarting the Device You can restart your device if it stops functioning Hold the power key for 12 seconds Removing...

Страница 20: ...stom POIs Connecting the Device to Your Computer You can connect the device to your computer using a USB cable 1 Plug the small end of the USB cable into the port on the device 2 Plug the larger end o...

Страница 21: ...9 updating 14 viewing routes 6 7 memory card 1 16 installing 16 microSD card 1 16 mount removing 15 mounting the device automobile 1 removing from mount 15 suction cup 1 15 myTrends routes 8 N nation...

Страница 22: ...updating maps 14 software 14 USB disconnecting 16 V vehicle power cable 1 venues 4 volume adjusting 2 W Where Am I 5 wireless camera 13 18 Index...

Страница 23: ......

Страница 24: ...support garmin com GUID 67DA720E 963D 48A3 B7FA DFEC1248BF79 v3 May 2020...

Отзывы: