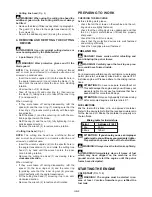
Before starting the engine:
-
Place the machine firmly on the ground.
-
Remove the guard from the blade (if used).
-
Make sure the blade (if used) is not touching the
ground or any other object.
1. Put the ignition switch (1) in position ‘START’.
2. Slide the choke to position ‘OFF’
.
3. Push the fuel pump (6) 3-4 times.
4. To push the throttle lever (2) it is necessary to first
push the locking lever (3).
Pull throttle lever and block
it in half-gas position using the locking button (7); let
go of the throttle lever.
5.
Firmly hold the device by the handle.
Pull the starter
rope 2-3 times (Fig. 8); to start the motor it is required
to evenly, quickly pull the rope.
6. Slide the choke to ‘ON’ .
Pull starter rope until the
engine starts.
7.
As soon as the engine starts running shortly open the
throttle to unlock the throttle lever from its half-gas
position.
8. Let the motor idle for about 10 seconds to warm up.
9. If the motor does not start re
peat the steps 1-8.
NOTE:
If the engine should not start after several tries
proceed as described in the chapter ‘Trouble-shooting’.
NOTE:
Always pull out the starter rope straight. If you
do not pull straight the rope will chafe at the eyelet.
This chafe will cause the rope to fan out and thus to
a higher wear and tear. Always hold the starter rope
handle when the rope is pulled back. Do not let the
rope flick back when it is pulled out. This could lead to
a hook-up of the rope and/or a damage to the starter
housing.
STARTING WARM ENGINE
DO NOT USE THE CHOKE!
If the fuel tank was empty, repeat steps 1, 5-7 under
STARTING COLD ENGINE after refilling.
USE OF THE ENGINE
(Fig. 7)
Cutting device speed is regulated by the throttle trigger
(2), right handgrip (4) of the handlebar.
The throttle trigger only works if the lockout (3) is pressed
at the same time.
The movement is transmitted from the engine to the
drive shaft by a centrifugal mass clutch that prevents
the shaft from moving when the engine is running at
minimum speed.
WARNING!
Do not use the machine if the cutting
device moves when the engine is running idle; in this
case, contact you dealer.
The correct running speed will be achieved by pressing
the throttle trigger (2) as far as possible.
IMPORTANT:
Avoid using the engine at full power for the
first 6-8 working hours.
STOPPING THE ENGINE
Release the throttle lever. Let the engine idle. Push the
ignition switch to position “STOP”. The motor will now
stop.
Emergency stop: If it should be necessary to
stop the tool immediately push the “STOP”
button.
OPERATING ADVICE
USING THE WEBBING
(Fig. 9)
WARNING!
The machine must always be used
connected to the webbing worn correctly. Frequently
check the efficiency of the quick release mechanism
used to quickly free the machine from the belts in
case of danger.
The webbing must be put on before connecting the
machine to the special coupling and the belts must be
adjusted to suit the operator’s height and stature.
If the machine has more than one coupling hole, use the
most favourable point for keeping the machine balanced
when working.
Always use webbing suited to the weight of the machine
and the cutting device used
-
the single or double belt models can be used
for
machines weighing less than 7.5 kg fitted with the
cutting line head or 3 or 4-point blades;
-
the double belt model must be used
for machines
weighing more than 7.5 kg fitted with the saw
blade (if permitted).
• Double belt models
The belt (2) must be worn with:
-
the machine‘s support and snap-hook coupling on the
right side (2.1);
-
the release in front (2.2);
-
the belts cross-over on the operator‘s back (2.3);
-
the buckle properly fastened on the left side (2.4).
The belts must be tensioned so that the load is evenly
distributed on the shoulders.
NOTE:
Never start the engine with the shoulder strap
hang up.
WARNING!
When working, the machine must
always be firmly held in both hands, keeping the
power unit on the right of the body and the cutting
group below the line of the belt.
WARNING!
Stop the engine immediately if the
blade stops during sawing. Always beware of a
kickback, which could occur if a blade encounters
a solid object (logs, roots, branches, stones, etc.).
Do not touch the ground with the blade. Kickbacks
cause blade recoils that are difficult to control, so as
to cause loss of control of the machine, compromise
operator safety and cause damage to the machine
itself.
- If you are not familiar with the trimmer train the handling
of the device with the engine not running (AUS /
STOP
).
- Always check the territory; solid objects as metal parts,
bottles, stones etc. may be hurled away and cause seri-
ous injuries or permanently damage the device.
Should
GB-9
Содержание gbfi 90
Страница 2: ......
Страница 3: ...1...
Страница 4: ...2...
Страница 5: ...3...
Страница 139: ...BG 1 1 3 BG 2 BG 3 BG 5 BG 6 BG 7 BG 8 BG 9 BG 9 BG 11 BG 12 BG 13 BG 13...
Страница 140: ...BG 2 1 2 3 a 3 b 4 5 7 9 10 11 12 13 14 15 21 22 23 24 25 26 27 31...
Страница 141: ...BG 3 15...
Страница 142: ...LWA 114 dB A a Off b On BG 4...
Страница 144: ...15 1 2 3 4 5 6 7 BG 6...
Страница 145: ...BG 7...
Страница 148: ...7 5 kg 3 4 7 5 kg 2 2 1 2 2 2 3 2 4 FF 3 11 12 13 BG 10...
Страница 149: ...30 10 12 13 14 26 15 1 3 1 2 2 3 4 ex works BG 11...
Страница 150: ...BG 12 16 1 0 5 16 2 12 15Nm 17 1 1 3 18 18 A B C 3 19 20 1 1 2 20 2 2 3 1 2 3 4 5 6 5 7 8 9 1 2 3 4 5...
Страница 165: ...RU 1 1 3 RU 2 RU 3 RU 5 RU 6 RU 7 RU 8 RU 9 RU 9 RU 11 RU 12 RU 13 RU 13...
Страница 166: ...RU 2 1 2 3 a b 4 5 7 9 10 11 12 13 14 15 21 22 23 24 25 26 27 31...
Страница 167: ...15 RU 3...
Страница 168: ...RU 4 LWA 114 dB A a b...
Страница 170: ...15 1 2 3 4 5 6 RU 6...
Страница 171: ...1 1 4 5 2 3 1 5 6 8 7 2 2 2 4 2 1 3 4 RU 7...
Страница 172: ...3 3 3 1 2 3 4 3 1 2 3 4 5 4 5 4 2 3 1 4 5 6 1 7 8 8 7 7 1 6 5 4 2 6 2 3 1 1 5 6 4 4 1 2 40 1 90 40 1 RU 8...
Страница 173: ...40 1 1 25 5 125 7 8 3 1 2 OFF 3 6 3 4 4 2 3 7 5 2 3 8 6 ON 7 8 10 9 1 8 1 5 7 7 2 4 3 2 6 8 Stop STOP 9 RU 9...
Страница 174: ...7 5 7 5 2 2 1 2 2 2 3 2 4 OFF 2 11 12 13 30 RU 10...
Страница 175: ...10 12 13 14 26 15 1 3 1 2 2 3 4 ex works 1 0 5 16 RU 11...
Страница 176: ...2 12 15N 17 1 10 18 18 A B C 19 20 1 1 3 20 2 2 3 1 2 3 4 5 6 5 7 8 9 1 2 3 4 5 RU 12...
Страница 204: ......
Страница 210: ......
Страница 212: ......
Страница 214: ......
Страница 219: ......


