


SB--7--622 Page 18
SECTION 7
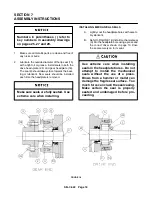
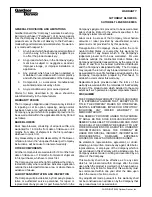
ASSEMBLY INSTRUCTIONS
Numbers in parentheses ( ) refer to
key numbers in assembly drawings
on pages 25, 27 and 29.
1.
Make sure all metallic parts are clean and free of
any nicks or burrs.
2.
Lubricate the outside diameter of the lip seal (15)
with a light oil or grease. Install seals in both the
drive head--plate (24) and gear headplate (18).
The seal lip should always face towards the bear-
ing or lubricant. New seals should be installed
each time the headplate is removed.
Make sure seals are fully seated. Use
extreme care when installing.
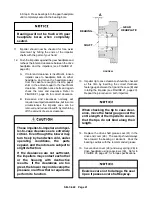
INSTALLING MECHANICAL SEALS
A. Lightly coat the headplate bores with assem-
bly lubricant.
B. Refer to FIGURE 18. Install mechanical seal
(A) into the headplate bore using a press and
the correct driver shown on page 13. Drive
the seal securely on to its seat.
Use extreme care when installing
seals in the headplate bores. Do not
attempt to install the mechanical
seals without the use of a press.
Blows from a hammer or mallet can
damage the fragile seal surface. Too
much force can crush the seal casing.
Make certain the seal is properly
seated and undamaged before pro-
ceeding.
FIGURE 18
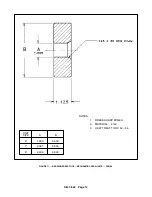
Содержание LEGEND GAF P Series
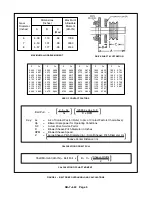
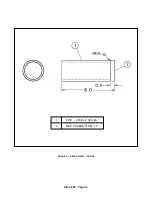
Страница 19: ...SB 7 622 Page 12 1 PIPE STEEL 2 SCH 80 2 MED CARBON STEEL 1 2 FIGURE 9 GEAR DRIVER SK2150...
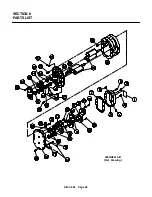
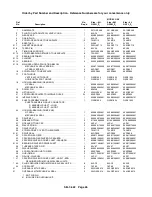
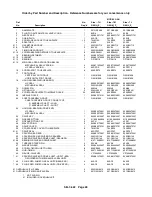
Страница 32: ...SB 7 622 Page 25 SECTION 8 PARTS LIST 300GAF810 B Ref Drawing...
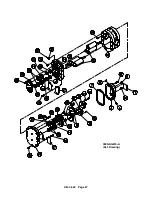
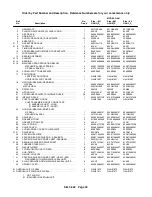
Страница 34: ...SB 7 622 Page 27 300GAG810 A Ref Drawing...
Страница 36: ...SB 7 622 Page 29 300GAH810 A Ref Drawing...
Страница 39: ......


