16
It must be on Master of hard disk before installing, the
way to set jumper depending on maker’s sorts, you
must set after checking hard disk’s manual or explain
involved.
IV. How to use
4. Getting Start
◆
Hard disk installation & connection
◆
Connection DVR and Monitor
◆
Camera connection (maxim 8)
◆
the other equipments connection (mouse, USB Drive, Motion sensor,
Alarm)
◆
Switch code connection
◆
Power on the switch on back panel
◆
Start to record after confirmation of TV monitoring
Confirm whether hard disk and camera are installed or not.
Hard disk jumper setting should be “master”
After installing hard disk, before roofing case, confirm that DVR recognize
hard disk.
If DVR might be switched off during recording, DVR turn into “Power
Recovery” automatically, then take to rerecord pre-situation.
5. Installation
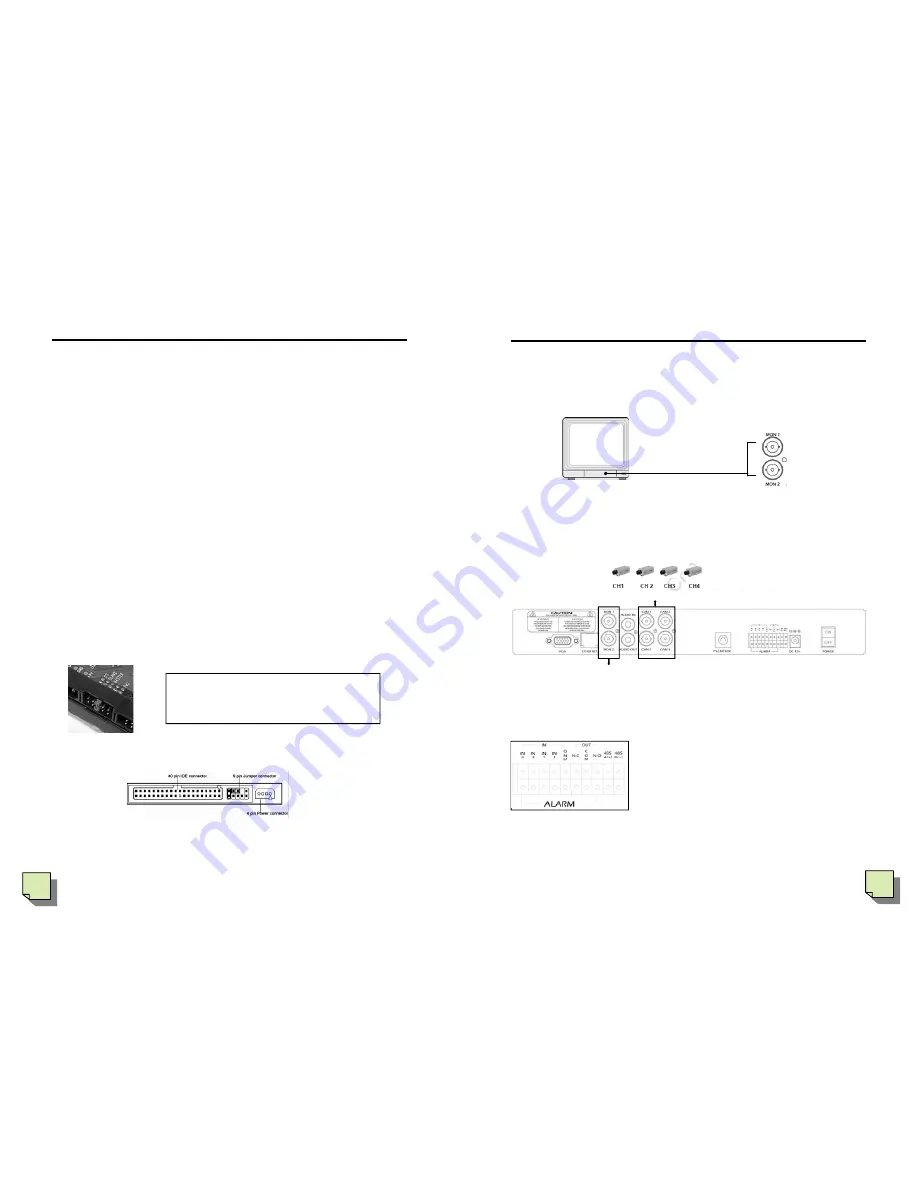
1) Hard Disk Drive Installation
(A) First, confirm that hard disk’s jumper is on “Master”.
(B) Connect hard disk’s IDE cable and power on cable
(C) Close
<Back side of hard disk drive>
17
2) Monitor connection
Monitor connection is important as you would watch every situation though
monitor. Connect monitor input to MON 1 and MON 2 by cable.
3) camera connection
Connect camera input to switch, then connect from CAM1 to CAM4 in order.
4) Alarm Input
For effectiveness, Every Ground is made to be one.
You can install connect 8 alarm input from 1 to 8.
Ground should be connected with 8 lines and each
input parts should be connected Ground. Each sen-
sor should be power on to power input( depending
on situation) and should be connected to each alarm.
In alarm setting option in menu, you can install in
these 3 modes.(1) Normal-Close (2) Normal-Open
(3) Disable
IV. How to use
Connect 2 monitor input and
monitor output.
DVR
video output
Monitor input
VIDEO IN
Camera input
Video Output
Содержание GN-708VN
Страница 1: ...English USER S MANUAL...


