GAMATRONIC,
A
S
OLAR
E
DGE
D
IVISION
Centric Installation Guide, rel. 4.7
13
√
Operation
Requirement
Reference
Site Preparation - Electrical
Verify that appropriate sized circuit breakers are
present on the electrical boards supplying the
Centric. Read Chapter
8 in this Installation Guide.
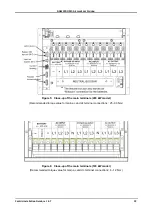
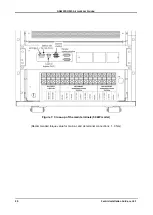
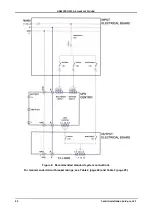
Refer to Figure 8 or Figure 9. Refer to Table 2 and
Table 3.
Meet local code and Gamatronic
recommendations.
3.2.3 Step 1
Verify that the cables between the electrical board
and the UPS, and between the UPS and its loads,
and also the ground/PE cables, are of appropriate
sized input and output power. Refer to Figure 8 or
Figure 9, and see Table 2 for amperage of rectifier
and bypass input lines.
Meet local code and Gamatronic
recommendations.
3.2.3 Step 2
Verify ac input voltages.
Phase-to-Phase: 3x400 Vac,
-20 % / +15 %
Phase-to-Neutral: 230 Vac,
-20 % / +15 %
3.2.3 Step 3
Verify the voltage between neutral and ground.
0
–2 Vac
3.2.3 Step 4
Verify dc voltage at battery cabinet switch.
+360 V and
– 360 V
3.2.3 Step 5
Verify that neutral is always connected.
Neutral connection will always be
unbroken during UPS operation.
Verify that the circuit breakers on the electrical
board for the UPS ac input, bypass input and
output lines are in the "OFF" position.
Circuit breakers for ac input and
output are "OFF".
Attach ac input, bypass ac input, and output cables
to the Centric (refer to Figure 8 or Figure 9).
Ac input, bypass, and output
cables are attached.
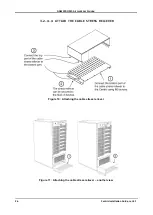
Attach the cable stress reliever
Cable stress reliever attached.
Assemble and connect the batteries within the
battery cabinet, verify proper voltage.
Batteries are assembled and
ready for operation or for
charging.
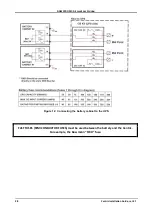
Verify that the connection of the battery to the UPS
is according to the diagram and instructions in
section
FAST FUSES (SEMICONDUCTOR FUSES)
must be used between the battery and the
Centric.
For example, the Bussmann
“FWH” fuse.
Batteries are connected according
to recommendations and with
proper fuse values.
Verify that there is a switch or other means to
easily and safely disconnect the battery cabinet
from the UPS in the event of an emergency or for
maintenance.
The batteries can be easily and
quickly disconnected from the
UPS when necessary.
With the battery circuit breaker "OFF", connect the
battery cable to the UPS. Leave the battery circuit
breaker "OFF".
Batteries are connected and OFF.
Locate the cable for the LCD display screen
– it
should be projecting out from the top front of the
UPS near the mounting post of the LCD screen.
Cable is ready.
Attach the LCD display screen to the top front of
the UPS, then connect the cable to its right side.
LCD screen is attached and its
cable connected.
Power-up the system.
LCD screen is on.
Perform the initial configuration.
Initial configuration completed.
Complete first-time startup.
First-time startup completed.
If you are using
lithium-ion
batteries, verify that
the systems is an LI system, then verify that the
battery setup parameters (Setup > Battery) are
appropriate for the batteries you have chosen.
Compare the values of the battery
setup parameters against the
battery manufacturer’s data sheet.
User’s Guide,
“Setup > Battery”
Perform post-startup tests.
Tests successfully completed.
Comments on site preparation
–
electrical: __________________________________________
_______________________________________________________________________________
_______________________________________________________________________________


