background image

Switching on Galileosky 5.0, 5.1 Devices for the First Time 
version 6 dated from June 19, 2018 

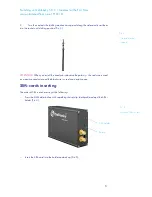
antenna  plug.  The  GLONASS/GPS  antenna  plug  of  the  tracking  device  provides  the 
necessary voltage for operation. 


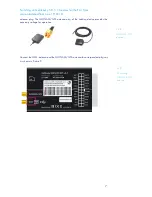
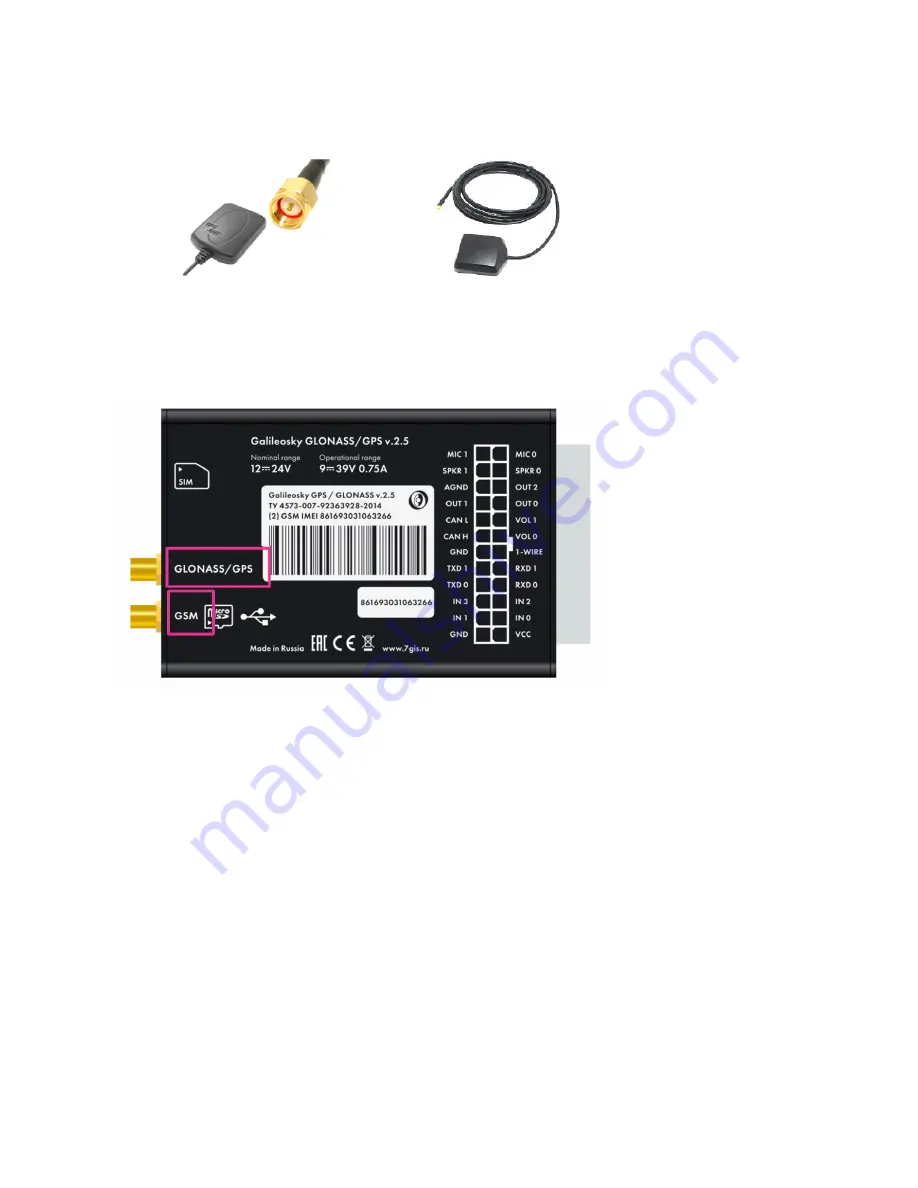
Connect the GSM-antenna and the GLONASS/GPS-antenna to correspondent plugs as 
it is shown in Picture 9. 


Pic. 8 

GLONASS/GPS-

antennas


Pic. 9 

Connecting 

GLONASS/GPS-

antenna


Содержание v 5.0

Страница 1: ...Switching on Galileosky 5 0 5 1 Devices for the First Time User Manual www galileosky com ...

Страница 2: ...ed from June 19 2018 2 Contents Necessary Tools Devices Materials 3 Preparing of Galileosky Device to Switch on 4 Preparing of a tracking device socket unit 4 SIM cards inserting 5 Preparing antennas 6 Preparing of Device via the Configurator 8 Monitoring Software Setting 9 ...

Страница 3: ... Tools Devices Materials Before connecting the Galileosky Tracking device hereinafter tracking device device you should have 1 Power supply 12V and more not less than 1А 2 SIM card with GPRS и SMS activated 3 Windows based computer with installed Galileosky devices configuration software the Configurator ...

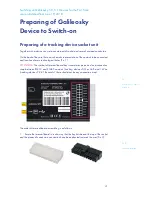
Страница 4: ...and location of main technological holes Pic 1 ATTENTION The symbol of terminal board key is sometimes perceived as a connection strap between RS232 and RS485 contacts tracking device v5 0 or Vol0 and 1 Wire tracking device v2 2 8 Be careful there should not be any connection strap The order of terminal board assembling is as follows 1 Rotate the terminal board in such a way that the key has been ...

Страница 5: ...n you install the conductors observe the polarity the red wire is used as a positive conductor and the black wire is used as a negative one SIM cards inserting The order of SIM cards inserting is the following Press the SIM holder button with something sharp clip toothpick and eject the SIM holder Pic 4 Insert the SIM card into the holder contacts up Pic 5 Pic 3 Crimped terminal conductor Pic 4 Ej...

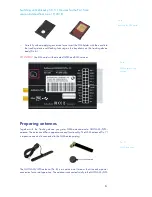
Страница 6: ...tivated GPRS and SMS services Preparing antennas Together with the Tracking device you get a GSM antenna and a GLONASS GPS antenna The antennas differ in appearance and functionality The GSM antenna Pic 7 is a passive one and is connected to the GSM antenna plug The GLONASS GPS antenna Pic 8 is an active one It means that it needs a power connection for normal operation The antenna is connected st...

Страница 7: ...19 2018 7 antenna plug The GLONASS GPS antenna plug of the tracking device provides the necessary voltage for operation Connect the GSM antenna and the GLONASS GPS antenna to correspondent plugs as it is shown in Picture 9 Pic 8 GLONASS GPS antennas Pic 9 Connecting GLONASS GPS antenna ...

Страница 8: ...computer with administrator rights Authorize the Configurator to work through the Internet in operating system settings After installation of the Configurator you can start device settings Apply the voltage from 12V to the tracking device and connect it to the computer via USB cable ATTENTION The power is not fed through USB interface The device must be connected to the external power supply Start...

Страница 9: ... object creation section Specify the name of the object any type of the object GALILEOSKY v 5 0 in unique ID field enter the IMEI of the device Initial setup is completed Go to the Monitoring tab and check the monitoring object state Pic 12 In case of any failure it is possible to view the information about the operation of the device in the Troubleshooting tab of the Configurator To execute the t...

Страница 10: ...g devices determine the mobile object location recording the time and route as points with geographical coordinates and send the data to the server to be further processed and sent to the traffic controller panel In addition a number of other vehicle parameters are recorded the state of analog and discrete inputs of the tracking device and the state of digital interfaces The tracking devices can b...

Отзывы: