background image

Draining the cooking liquid from the cooking
basin:
Proceed as follows:

–  If you do not have a permanently fitted water 

connection, place a vessel (e.g. a 10 l bucket) 
under the drain valve of the additionally installed 
drain installation set AG 060-000.

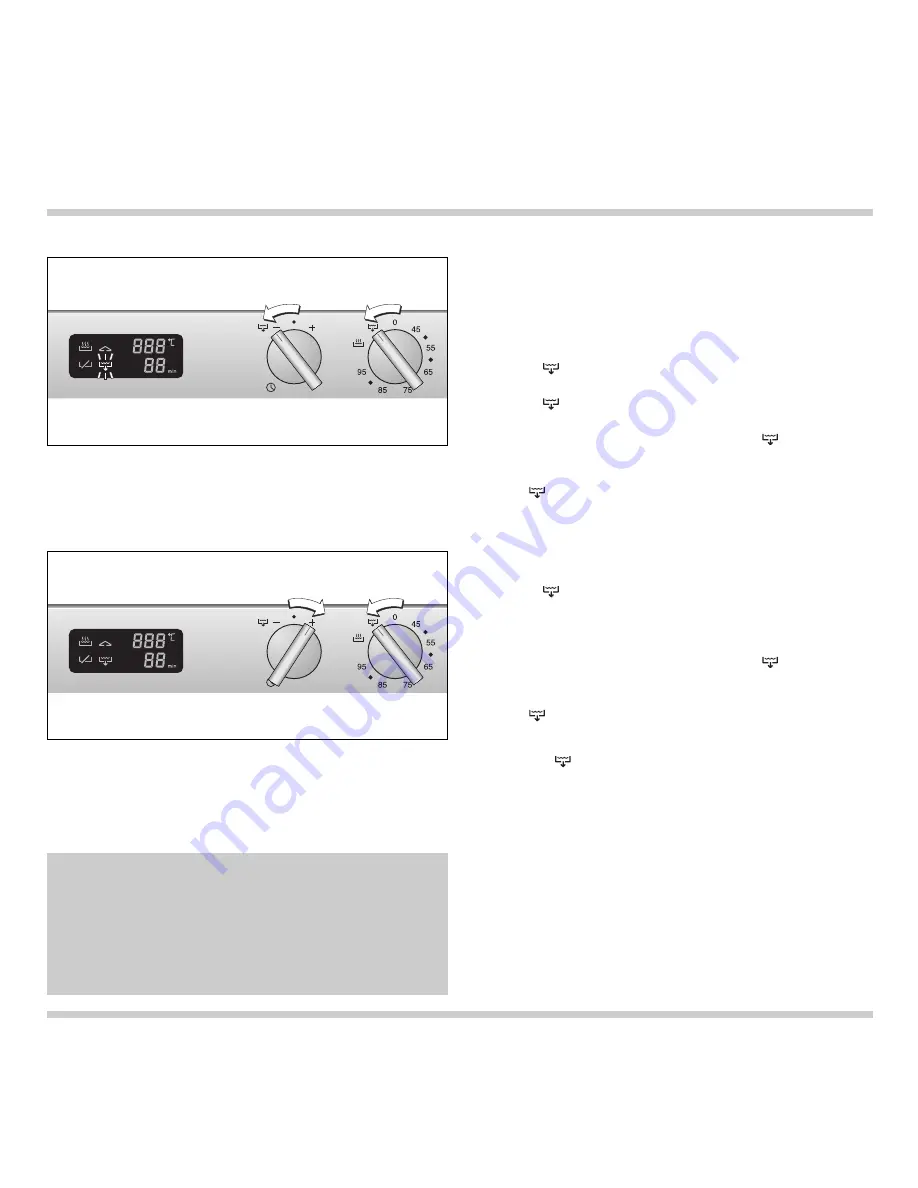
–  Turn the “Temperature" control knob to the left 

to the 

(Drain valve) position.

–  Turn the “Short time" control knob to the left 

to the 

position and hold the knob in this 

position (Fig. 14). 

–  An audible signal is sounded. The 

symbol 

(Drain valve) flashes on the display after a few 
seconds. The drain valve is opened.

–  The 

(Drain valve) symbol lights up 

permanently in the display when the drain valve 
is open.

Closing the drain valve:

–  Turn the “Temperature" control knob to the left 

to the 

(Drain valve) position.

–  Turn the “Short time" control knob to the right to 

the 

+

position and hold the knob in this position 

(Fig. 15).

–  An audible signal is sounded. The 

symbol 

(Drain valve) flashes on the display after a few 
seconds. The drain valve is closed.

–  The 

symbol (Drain valve) goes off as soon as 

the drain valve has been closed.

Note:

The 

(Drain valve) symbol flashes on the

display if the drain valve is not completely open or
closed.

If you do not have a permanently installed 
drainage connection, place a temperature-resistant
receptacle of a corresponding size (at least 10 l)
under the drain valve and install the drain
installation set AG 060-000.

10

Note:

Allow the water or the cooking liquid to cool down
before draining it: This avoids steaming in the
base cabinet and scalding. Pay attention  to
regular descaling if the water is highly limey.
Otherwise, discoloration and heat build-ups may
be the result.

Fig. 14

Fig. 15

Содержание VK 230

Страница 1: ...Operation and assembly instructions VK 230 Steam cooker 0 95 65 85 75 55 45...

Страница 2: ......

Страница 3: ...witching on off Page 7 Operation with the timer Page 8 Hooking in the special handle Page 8 Operating the child lock Page 9 Holiday protection Page 9 Draining cooking liquid out of the cooking basin P...

Страница 4: ...following page you will find important notes on safety and operation These will serve to ensure your personal safety and the lasting value of your appliance You will find notes on Page 3 that you ough...

Страница 5: ...enance operation To do this remove the mains plug or switch off the corresponding fuse Repairs must be carried out by authorised specialists thus ensuring electrical safety No warranty claims can be l...

Страница 6: ...y The appliance has a safety deactivation Heating up of the appliance is switched off after 4 hours if it is not operated by way of the Temperature control knob during this time Dashes are shown on th...

Страница 7: ...e appliance comes with the following accessories Fig 4 glass cover with button handle unperforated cooking insert GE 020 010 perforated cooking insert GE 020 020 handle for the cooking inserts You can...

Страница 8: ...temperature allows you to melt a coating for example to poach meat or to boil noodles The appliance is suitable for use with water or cooking liquid only Do not use the appliance for deep frying Only...

Страница 9: ...pliance is ready for operation The time needed for the boiling point adjustment depends on the filled quantity and the water temperature Boiling point adjustment takes between 3 and 7 minutes Switchin...

Страница 10: ...the time has elapsed The automatic signal goes off as soon as you turn a control knob Note you can use the short time reminder even when the appliance is switched off Hooking the special handle into t...

Страница 11: ...knob to the left to the minus position and hold the knob in this position Turn the Temperature control knob to any temperature on the right Turn the Timer control knob to the 0 position Turn the Tempe...

Страница 12: ...Drain valve position Turn the Short time control knob to the right to the position and hold the knob in this position Fig 15 An audible signal is sounded The symbol Drain valve flashes on the display...

Страница 13: ...h a soft dry cloth Clean the appliance after every use Empty and clean the steam cooker after every use Soiling salt and lime deposits can cause corrosion Remove the leftovers strainer Clean the cooki...

Страница 14: ...appliance from the mains remove the plug or the fuse What to do if The solution the appliance does not heat up and appears The child lock has been activated Switch off on the display the child lock th...

Страница 15: ...ch back to the required temperature 85 95 C as soon as the Heating symbol has gone off Cooking Fill the cooking basin with water or another cooking liquid no oil up to the foaming edge Turn the Temper...

Страница 16: ...and wine Ocean perch fillet 1 unperforated 3 fillets 10 12 Pike fillet 1 unperforated 1 kg 0 5 l 15 20 water and ingredients Mussels 1 perforated in the perforated insert 10 15 unperforated with juic...

Страница 17: ...10 20 Yeast dumplings 1 unperforated 8 dumplings 15 20 1 8 l milk butter and sugar Rice pudding 1 unperforated 250 g 0 8 l milk 25 30 Note the cooking times specified here are rough guide values only...

Страница 18: ...eradish from a jar 1 leek app 200 g 400 g carrots 1 liter of chicken stock 1 2 bunch parsley 1 tablespoon cr me fra che 1 onion A few drops of lemon juice Salt 1 teaspoon mustard Pepper Preparation Ri...

Страница 19: ...nd colour Prepare the food without fat If possible always fit the cover The steam condenses on the cover and drips back onto the food Steam and energy losses are prevented avoided by a well sealing co...

Страница 20: ...fryer Possible damage caused by failure to observe these instructions cannot be recognised Connection type Y if damaged the mains cable must be replaced by a special mains connecting cable The mains c...

Страница 21: ...arking on the worktop Fig 17 Lower the appliance into the worktop Make sure that the engaging lugs on the appliance lie exactly on the clamping springs Press the appliance firmly into the worktop The...

Страница 22: ...ction using our drain installation set AG 050 000 is recommended This requires a drain connection in the base cabinet A non return valve must be installed It can be connected permanently Fig 19 or wit...

Страница 23: ...e Fig 21 A non return valve must be installed During installation pay attention to a constant downward flow of the connecting pipe If no drain connection is available the drain installation set AG 060...

Страница 24: ...GAGGENAU HAUSGER TE GMBH CARL WERY STR 34 D 81739 M NCHEN Y 089 45 90 03 FAX 089 45 90 23 47 www gaggenau com 9000271659 EB 8706 en...

Отзывы: