G-SATA Installation Guide
Page 9
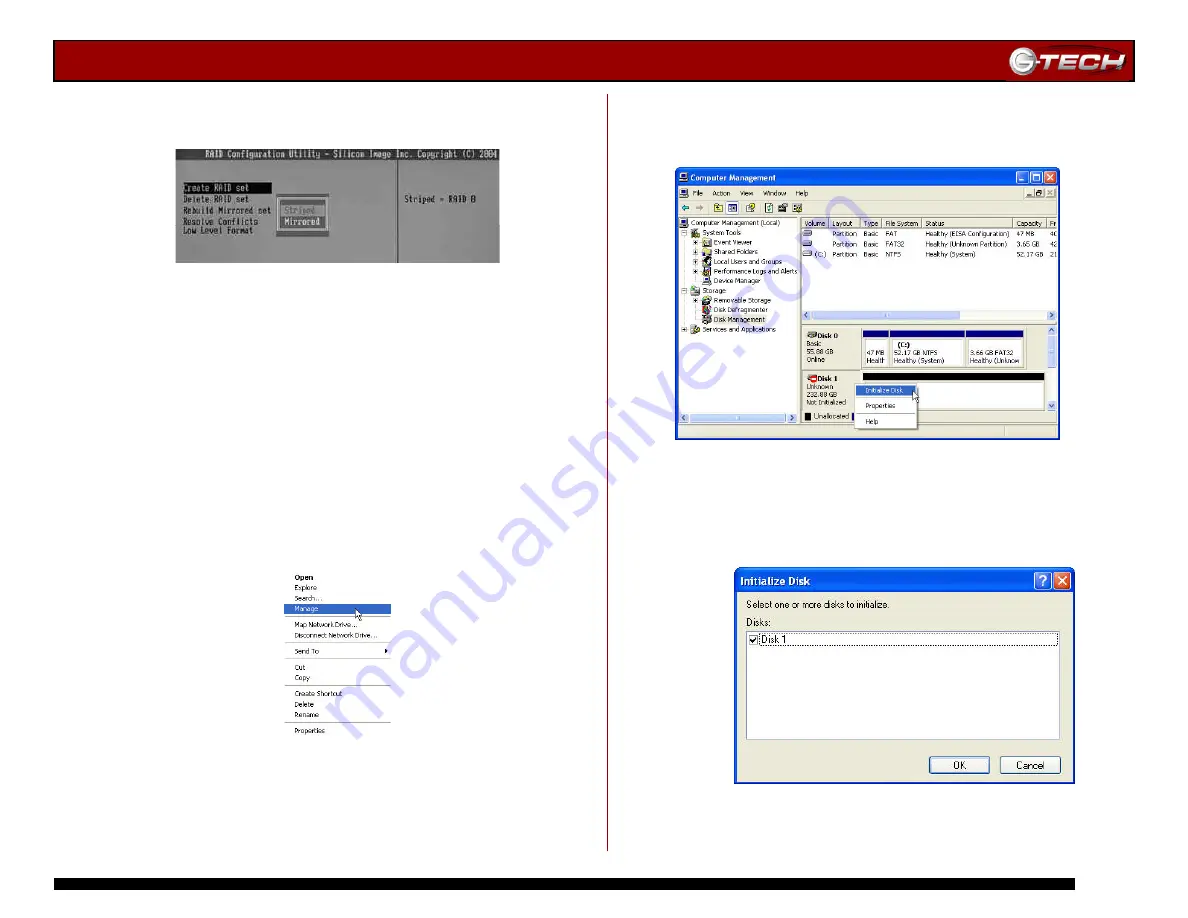
4. Highlight
Create RAID set,
press <Enter>
and then
select
Striped
and press <Enter>.
5. Select
Auto configuration.
When prompted, press <Y>
to continue. Press <Ctrl+E> to exit the RAID Configuration
Utility. Press <Y> to confirm.
6. Reboot your computer.
Now that the G-SATA PCI adapter is configured for RAID 0
operation, the system must be initialized for use.
1. Open the
Disk Management
utility by
right-clicking on
the My Computer icon on the desktop and selecting
“
Manage
” from the drop down menu as shown on the
following page.
2. The
Computer Management
console will appear as shown
below. Click on “
Disk Management
” in the left-hand panel.
G-SATA is identified as Disk 1 in this example.
Right click on
Disk 1
and select
Initialize Disk
from the
pull-down menu as shown. The window shown on the next
page will appear.
3. Click on the <OK> button to continue.
Содержание G-SATA
Страница 2: ...G SATA Installation Guide Page 2 ...
Страница 3: ...G SATA Installation Guide Page 3 ...


