background image

5


BATTERIES 

 730 REV 09 DATE REV: 09/02/14 

42 

POWER CHAIR: EXPLORER MAGELLAN 

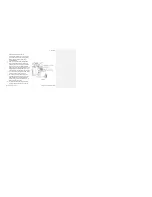
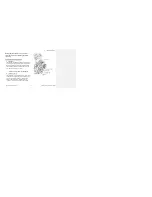
inside of the battery compartment. 

i) 

Get the battery retention plate and orient it so 

that the release levers are on the top and the 

battery charger is showing at the rear of 

Explorer Magellan.  

j) 

Slide the L-slot in the battery retention plate 

over the bottom bushings in the battery tray 

wall, and push it down to fully seat the bottom 

bushings in their slots. The battery retention 

plate is designed to be a very tight fit to reduce 

rattling during Explorer Magellan use. Be firm 

with the plate as you place it over the bushings. 

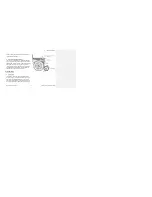
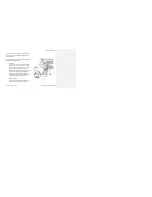
k)  Then, rotate the top of the plate forward, until it 

is almost vertical as shown in Figure 5.  

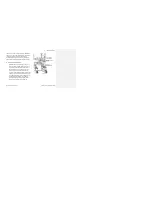
l) 

Push inward on the two release levers and 

rotate the plate until it is vertical. Let go of the 

release levers and ensure that the buttons 

protrude through the chassis holes to lock the 

battery retention plat in place.  

m)  Try to pull the battery retention plate towards 

the rear of the wheelchair to ensure that it is 


Figure 5 

Содержание EXPLORER MAGELLAN

Страница 1: ...730 REV09 REV DATE 09 02 2014 USER MANUAL...

Страница 2: ...l and Magnetic Interference 18 Electro Magnetic Interference from Radio Wave Sources 18 Power Wheel Chair Electromagnetic Interference 20 4 Movement and Controls 22 5 Handling 27 6 Batteries 34 Batter...

Страница 3: ...30 REV 09 DATE REV 09 02 14 3 POWER CHAIR EXPLORER MAGELLAN Seat Adjustments 51 Free Wheel 56 Front Riggings 59 Anchor Brackets 63 8 Cleaning Instructions 64 9 Limited warranty 65 Limitations and Excl...

Страница 4: ...ut first reading and understanding this instruction booklet If you are unable to understand these instructions contact a healthcare professional dealer or technical personnel before attempting to inst...

Страница 5: ...gerous if used improperly or under the wrong conditions Please always follow the safety precautions listed below Safety requires constant attention and it is very important to learn and always use saf...

Страница 6: ...s wheelchair on public roads or highways hilly or rough terrain or wet or icy surfaces Warning Do not attempt to go up go down or traverse ramps of more than 9 degrees 15 grade or one foot rise in six...

Страница 7: ...you are reaching as this could cause the wheelchair to shift or tip Warning Do not tow or piggyback passengers or heavy packages This will compromise the safety and performance of Explorer Magellan W...

Страница 8: ...e piece footboard Fixed headrest with foam pad Composite footplates Heel loops front and rear transit hooks optional Range per charge 13 4 miles 21 6km Shroud colors black blue green red Seat Width 16...

Страница 9: ...rforming as it should please contact your Future Mobility Healthcare dealer as soon as possible They will quickly be able to diagnose the problem and perform any service or repairs necessary Do it you...

Страница 10: ...ned to prevent battery over charging No tools required Check joystick Check the operation of the integrated joystick control module every week With the power turned OFF check that the joystick is not...

Страница 11: ...on your Explorer Magellan every month Both airless and pneumatic tires should be checked for wear and to confirm mechanical integrity Pneumatic tires should be checked for proper pressure 30 psi is r...

Страница 12: ...mature wear of components The soft cloth may be dry or dampened with a mild soap and water solution Do not use abrasives on your Explorer Magellan Tools required soft cloth mild soap water Check arms...

Страница 13: ...be replaced Foam If the PRISM Back foam becomes contaminated due to incontinence the foam pad CAN be replaced independently Foam can be purchased separately by ordering through Future Mobility Healthc...

Страница 14: ...t is important that you do not allow any tools or conductive material to directly connect the two terminals of a battery Do not wear watches or jewelry when working on batteries If you are not confide...

Страница 15: ...er plug from wall outlet when charging cycle is complete stow cable and turn the chair on again Explorer Magellan will not drive 1 Controller shows that unit is powered but Explorer Magellan will not...

Страница 16: ...4 If the Explorer Magellan can no longer drive and the battery charger lights indicate proper charging the connection has been secured It is possible to use a tie wrap to hold the charger cable in pl...

Страница 17: ...1 GENERAL 730 REV 09 DATE REV 09 02 14 17 POWER CHAIR EXPLORER MAGELLAN caught on the battery retention bushings Clear any snags confirm the connections push the batteries fully forward and try again...

Страница 18: ...y can be measured in volts per meter V m Each powered wheelchair can resist EMI up to certain intensity This is called its immunity level The higher the immunity level the greater the protection At th...

Страница 19: ...are on even when not being used Medium range mobile transceivers are those that are used in police cars fire trucks ambulances and taxis These usually have the antenna mounted on the outside of the ve...

Страница 20: ...and braking Therefore the warnings that follow are recommended to prevent possible interference with the control system of the powered wheelchair EMI Warnings Electromagnetic interference EMI from sou...

Страница 21: ...or TV stations and try to avoid coming close to them Warning If unintended movement or brake release occurs turn the powered wheelchair off as soon as it is safe to do so Warning Be aware that adding...

Страница 22: ...nt of Explorer Magellan under the seat The freewheeling levers are turned by hand Energy is supplied by two Group 22NF batteries which are individually packaged and accessed from the rear of the chair...

Страница 23: ...23 POWER CHAIR EXPLORER MAGELLAN farther forward the joystick is moved the faster Explorer Magellan will move The maximum speed possible is approximately 7 km h Moving the joystick back will cause th...

Страница 24: ...lick from each motor Work with your mobility device provider to ensure that speeds and controller responses are programmed to your driving abilities and style User Interface Explorer Magellan s contro...

Страница 25: ...S 730 REV 09 DATE REV 09 02 14 25 POWER CHAIR EXPLORER MAGELLAN VR2 standard joystick controller Figure 1 Visit http www futuremobility ca explorer magellan p 14 html to refer to VR2 operations manual...

Страница 26: ...09 DATE REV 09 02 14 26 POWER CHAIR EXPLORER MAGELLAN R NET Optional joystick controller with LCD screen Figure 2 Visit http www futuremobility ca explorer magellan p 14 html to refer to R NET operati...

Страница 27: ...ring to or from the chair will change the weight distribution and center of gravity of both yourself and Explorer Magellan Transfer activities Transferring into or out of a wheelchair is a very diffic...

Страница 28: ...le level surface is NOT in the freewheeling mode and that the wheelchair power is off before transfer Remember the freewheeling mode disengages the motors and parking brakes allowing the wheelchair to...

Страница 29: ...o move forward in the seat Do not attempt to retrieve objects from the floor if you must reach down between your knees Do not shift your weight in the direction that you are reaching and or bending as...

Страница 30: ...d well towards the back of the seat Please descend slowly and steadily allowing Explorer Magellan s controller to maintain a slow safe speed Curbs and Steps Curbs steps and stairs are dangerous obstac...

Страница 31: ...HANDLING 730 REV 09 DATE REV 09 02 14 31 POWER CHAIR EXPLORER MAGELLAN available do not drive up or down the steps Avoid the steps by utilizing the designated elevators now required in most locations...

Страница 32: ...es and the major drive components of Explorer Magellan Warning Explorer Magellan is not designed to negotiate steps Personal injury and damage to property will result Warning Do not attempt to drive o...

Страница 33: ...ge the batteries fully before use Nightly charging is encouraged 2 Ensure that the drive wheels are ENGAGED by turning the free wheel levers so they point towards DRIVE 3 Adjust the speed control to l...

Страница 34: ...same driving conditions The result is a decrease in the distance the wheelchair can travel before batteries need to be charged which can often be misinterpreted as a problem with the wheelchair contro...

Страница 35: ...after every discharge Leaving batteries partially discharged for several days is not recommended as this could limit the amount of future charge they are capable of holding 5 It is always best to allo...

Страница 36: ...ed orange light indicates that charging is underway When the charge is complete disconnect the charger from the wall outlet and stow the cable Explorer Magellan is now ready for use The charger includ...

Страница 37: ...face shield are also recommended when working with batteries Warning ALWAYS use the charger supplied with Explorer Magellan Other types of chargers may damage the batteries Warning DO NOT remove the...

Страница 38: ...you do not allow any tools or conductive material to directly connect the two terminals of a battery If you are not confident in your ability to attach the lids to the batteries ask your dealer for as...

Страница 39: ...ire to the positive terminal of the battery and attach the terminal on the black wire to the negative terminal of the battery The terminals should be pushed down as far as possible on the posts d Orie...

Страница 40: ...ck connector on it This will be the Front Battery Assembly Installing the batteries in Explorer Magellan a Using proper body positioning and lifting techniques place the Front Battery Assembly on the...

Страница 41: ...een the front seat posts It will be inserted into the controller connector a little later f Returning to the rear of the wheelchair use good body position and lifting techniques to place the Rear batt...

Страница 42: ...bushings in their slots The battery retention plate is designed to be a very tight fit to reduce rattling during Explorer Magellan use Be firm with the plate as you place it over the bushings k Then r...

Страница 43: ...hat the power cable is properly stowed o Move to the front of the wheelchair and firmly insert the black connector into the socket marked with a battery symbol on the controller connector This slot is...

Страница 44: ...ateral adjustment of the arm pad is achieved by placing it in narrow standard or wide settings The Concepts arm pads can also be adjusted in the fore and aft direction Before completely tightening the...

Страница 45: ...in the spring button at the front of the arm and lifting the arm upwards until the desired height setting is reached The fabric side pouch has been removed in the photo for clarity No tools are requir...

Страница 46: ...to the desired position and tighten the locking bolt If a greater adjustment range is required remove the locking bolt reposition it in a different hole under the arm rail and tighten the bolt when th...

Страница 47: ...an B Back Angle Adjustment Style i Manual Recline Angle all backs The angle of the back may be adjusted through a range of 5 forward to 40 back with a gas spring assist To adjust the angle move the re...

Страница 48: ...r Magellan move the back to the desired angle and securely tighten the handle NOTE In order to operate in the limited space at the rear of Explorer Magellan the handle can be used somewhat like a ratc...

Страница 49: ...on of the PRISM back can be changed by using a 3 16 Allen key Figure 10 shows Three Adjustment Cap Screws which can be loosened and then adjusted to suit the back height that the end user requires The...

Страница 50: ...he four nuts at the back of the assembly b Slide the side canes to the appropriate width positions Be sure to set the width symmetrically about the center of the wheelchair c When the overall width me...

Страница 51: ...ove the push handles vertically until the appropriate hole is aligned c Reinstall the bolts washers and nuts and secure NOTE It is also possible to install the push handles so they point inward toward...

Страница 52: ...ur bolts under the seat frame must be loosened with a 1 2 wrench or socket to allow repositioning Tighten the bolts to 150 in lbs of torque when proper location is determined For 17 seat depth the bac...

Страница 53: ...do not remove the bolts labeled as A in Figure 13 and A in Figure 14 obscured in picture but access hole is shown A 1 4 Allen key or bit ratchet and ratchet extension is required This will allow the v...

Страница 54: ...desired setting and reinstall the 1 4 20 bolts and split washers tightening to 150 in lbs of torque iii Front seat support To keep the same angle and just raise or lower the seat height the same amou...

Страница 55: ...ing Reinstall the bolts flat washers and nuts and tighten This connection needs to be firm but not crazy tight crazy tight can collapse the square tube iv Seat width adjustment Remove the seat pan cov...

Страница 56: ...wered wheelchair or moving it into a vehicle for transport it is sometimes useful to be able to roll the wheelchair without the use of the motors Disengaging the motors is known as a freewheel conditi...

Страница 57: ...USTMENTS 730 REV 09 DATE REV 09 02 14 57 POWER CHAIR EXPLORER MAGELLAN wheel lever so it points outward towards the wheel as shown in Fig 16 Tools required None The free wheel levers are turned by han...

Страница 58: ...Freewheeling must NOT be used with an occupied wheelchair or on a slope Warning Always turn the wheelchair controller power off before engaging or disengaging the motors with the freewheel levers Warn...

Страница 59: ...The distance between each hole on the vertical footboard support tubes is 1 2 Tighten the bolts sufficiently to provide the footboard with enough friction for it to remain upright when flipped back fo...

Страница 60: ...in place The angle of the footrests is not adjustable To swingaway the footrest assembly push the release lever B in Figure towards the middle of Explorer Magellan This disengages the locking mechanis...

Страница 61: ...wrench to remove the four 5 16 18 bolts and split lock washers underneath the legrest adapters at the front of the seat frame 2 Slide the legrest adapters to the appropriate width positions The legres...

Страница 62: ...1 Use the 1 2 wrench to remove the four 5 16 18 bolts and split lock washers underneath the footrest brackets at side of Explorer Magellan 2 Slide the footrest brackets to the appropriate fore aft po...

Страница 63: ...t and rear of the Explorer Magellan chair as shown below Note There should be a total of 4 four anchor brackets 2 brackets in the front and 2 brackets in the back of the chair Figure 21 Figure 22 2 1...

Страница 64: ...leeching from the cover and dying the foam is normal and cannot be washed out Frame Armrest Footrests And Other Components Spray the frame and components with multi purpose disinfecting detergent scr...

Страница 65: ...aterial and manufacturing as listed below Warranty Period Orion Explorer Magellan Power Wheelchair 6 months 18 months 2 years 5 years a Base seat frame and drive and caster wheel hubs not tires b Cont...

Страница 66: ...ized distributor If within the warranty period the product or component is proven to FMHI satisfaction to be defective such product or component shall be repaired or replaced at FMHI option FMHI sole...

Страница 67: ...re not covered by this warranty and solely FMHI shall determine that evaluation Also the warranty shall not apply to products modified without FMHI written consent nor shall it apply if components not...

Страница 68: ...whom you acquired your Orion Explorer Magellan In the event you do not receive satisfactory service please communicate directly with FMHI The contact information for FMHI is given at the end of this d...

Страница 69: ...9 POWER CHAIR EXPLORER MAGELLAN Please fill in the information for your dealer for future reference Dealer Information Name of Dealership Address Contact Name Phone Fax Email Product Orion Explorer Ma...

Страница 70: ......

Страница 71: ......

Страница 72: ......

Отзывы: