background image

AIS 


10-4 

10.4 Sleeping 

Targets 

10.4.1  Sleeping specific AIS target 

You may “sleep” an AIS target as below when the screen becomes filled with targets. Note 
that targets that have been activated automatically cannot be “slept.” 
 
1.  Use the trackball to place the cursor on an activated AIS target symbol. 
2.  Press the [F2] key to open the AIS(1) menu. 
3.  Press the [2] key (Sleep Target) to sleep the target. 
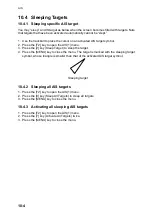
4.  Press the [MENU] key to close the menu. The target is marked with the sleeping target 

symbol, whose triangle is smaller than that of the activated AIS target symbol. 


Sleeping target 


10.4.2 Sleeping 

all 

AIS 

targets 

1.  Press the [F2] key to open the AIS(1) menu. 
2.  Press the [8] key (Sleep All Targets) to sleep all targets. 
3.  Press the [MENU] key to close the menu. 
 

10.4.3  Activating all sleeping AIS targets 

1.  Press the [F2] key to open the AIS(1) menu. 
2.  Press the [7] key (Activate All Targets) twice. 
3.  Press the [MENU] key to close the menu. 


Содержание RP-180

Страница 1: ...VIDEO PLOTTER RP 180...

Страница 2: ...always be checked against nautical charts as well as other aids to navigation Handle chart memory cards carefully The chart and memory cards are weak against electrostatic discharge Handle them with c...

Страница 3: ...4 Other Ship s Tracks and Plotting Interval 3 4 3 5 Erasing Own Ship s Track Other Ship s Track 3 5 3 6 Own Ship Target Track Color 3 6 4 MARKS LINES 4 1 4 1 Displaying Marks Lines 4 1 4 2 Entering M...

Страница 4: ...Turning AIS Feature On Off 10 2 10 3 Activating Targets 10 3 10 4 Sleeping Targets 10 4 10 5 Displaying Target Data 10 5 10 6 Lost Target 10 7 10 7 Messages 10 7 10 8 History Display 10 9 10 9 AIS Sym...

Страница 5: ...lly read and follow the recommended procedures for operation and maintenance We would appreciate hearing from you the end user about whether we are achieving our purposes Thank you for considering and...

Страница 6: ...180 provides navigation data about vessels which carry an AIS transponder 10 navigation lines may be stored and each line may contain up to 30 waypoints 100 waypoints are available The user may enter...

Страница 7: ...Card Slot Controls used by the video plotter MODE Chooses presentation mode SHIFT ZOOM Offcenters the display momentary press zoom feature long press MARK Inscribes mark Numeric keys Enter alphanumeri...

Страница 8: ...lot Disp 4 Waypoint 5 Route 6 Destination Set 7 Plot Interval 8 Memory Card 9 Coastline Mark Disp 0 AIS Miscellaneous1 VIDEO PLOT AIS menu 3 Press the 1 2 or 3 key to choose the mode desired 4 Press t...

Страница 9: ...on Mode Five presentation modes are available by the MODE key head up head up true bearing course up north up and true motion North up head up true bearing course up and true motion require a heading...

Страница 10: ...ble on the 72 nm range or higher To offcenter the radar picture 1 Place the cursor at a position where you wish to move the sweep origin by operating the trackball 2 Press the SHIFT ZOOM key momentari...

Страница 11: ...1 OPERATIONAL OVERVIEW 1 6 1 6 Choosing Chart Scale The chart scale can be selected with the RANGE and RANGE key A larger range shrinks the picture a smaller one enlarges it...

Страница 12: ...the connector free of foreign material Do not drop the cards 2 1 Displaying Charts 2 1 1 Inserting chart cards 1 Open the card slot cover at the left hand side of the display 2 Insert a chart card lab...

Страница 13: ...overenlarged Chart icons 2 1 3 Ejecting chart cards Chart cards may be ejected with the radar turned on or off 1 Press the EJECT button on the card slot 3 Remove the chart card 2 1 4 Troubleshooting C...

Страница 14: ...t Turns waypoint display on off Grid Turns grid on off Coastline Turns coastline on off Land Density Fills in On or hollows Off land Note that land will be hollow if the wrong chart scale is used rega...

Страница 15: ...a l B r o l o c o h c E w o l l e Y s t n e m e l e t r a h c f o r o l o C d n a L Green d i r G Green s k r a M Green r u o t n o C Green n o i t a m r o f n i t r a h C s t n i o p y a W N O d i r...

Страница 16: ...twice to choose Mark 3 Press the 5 key twice to choose Position Correction Position Correction 1 2 Position Corr No Yes 3 Delta L L Entry Delta L L 00 000 S 00 000 W Position Correction menu 4 Press...

Страница 17: ...2 Press the 4 key to choose Manu and press the ENTER SELECT key 3 Press the 5 key to choose Manual Entry and press the ENTER SELECT key The menu disappears and the prompt Rotate chart data by using V...

Страница 18: ...Interval 1 2 Own Track Off On 3 Plot Mode Time Dist 4 Plot Time Time 00M30S 5 Plot Distance Dist 0 02nm 6 Save Own Track Yes No 7 Other Track Off On 8 Set Other Plot Intvl Time 00M30S 9 Save Other Tra...

Страница 19: ...ry 3 2 1 Stopping track plotting 1 Press MENU 1 1 7 7 to display the Plot Interval menu 2 Press the 6 key to choose No from the Save Own Track field 3 Press the ENTER SELECT key The HOLD icon appears...

Страница 20: ...s a trade off between smooth reconstruction of the track and plot storage time The shorter the interval the smoother the reconstruction but storage time is reduced The following figure compares plot i...

Страница 21: ...ed with the radar The plotting interval for other ships tracks can be set independently of that for own ship Also plotting of other ships tracks may be suspended to conserve track memory 1 Press MENU...

Страница 22: ...Memory menu Delete Memory 1 2 Mark No Display All 3 Own Track No 30 50 80 All 4 Target Track No 30 50 80 All 5 Own Track Color All R Y G C M B W 6 Target Track Color All R Y G C M B W Mark in use 3 2...

Страница 23: ...ot Color menu 1 Press the MENU key 1 1 7 7 to open the Plot Interval menu 2 Press the 0 key twice to choose Plot Color Plot Color 1 2 Own Ship Color R Y G C M B W 3 Target No 01 4 Target Plot Color R...

Страница 24: ...Method Cursor L L OS Position 00 00 000 N 000 00 000 E 5 Position Correction Mark in use 7 3000 1 Mark Selection 01 01 03 05 07 09 11 13 15 16 Nav Line 17 Coastline __ 18 Depth Contour 19 Prohibited A...

Страница 25: ...6 07 08 09 10 X 11 12 13 14 15 16 17 18 Prohibited Area 19 Cable 20 Erase Mark 2 MOB 3 Display On Off 4 Mark Color R Y G C M B W 5 Position Correction For the IMO type radar the choices are RED PNK pi...

Страница 26: ...arks at cursor position 1 Choose Cursor at step 6 in Choosing mark entry method above 2 Place cursor on location where to inscribe a mark 3 Press the MARK key 4 To enter a line repeat steps 2 and 3 5...

Страница 27: ...ine press the 1 key key in line number type shown on the Mark menu press the ENTER SELECT key and the repeat steps 2 and 3 To inscribe more than two of the same type of line after completing a line pr...

Страница 28: ...on mark or line point to erase 7 Press the MARK key 8 Press the MENU key to close the menu 4 3 2 Erasing marks from the radar display 1 Press the MENU key 2 Press the 8 key twice to display the Mark...

Страница 29: ...ion Range and bearing MOB mark M Inscribe MOB mark immediately when man is overboard MOB concept 1 Press the MENU key 2 Press the 8 key twice 3 Press the 2 key to choose 2 MOB The MOB mark M is inscri...

Страница 30: ...he cursor on the other target 8 Press the MARK key to close the menu The orange origin mark appears Check cursor position display at the screen top to find range and bearing from the origin mark to ow...

Страница 31: ......

Страница 32: ...the waypoint list You can store 98 waypoints numbered 01 98 Waypoints 00 and 99 are special waypoints Waypoint 00 marks own ship s position when destination is selected and waypoint 99 is for waypoint...

Страница 33: ...own below WPT No 3 Place the cursor on the location desired for a waypoint 4 Press the 2 key Cursor twice and a waypoint mark with waypoint number inside is inscribed at the cursor location 5 Press th...

Страница 34: ...rsor Numerics can be directly entered with the numeric keys A wrong character can be erased with the CANCEL CLEAR key b Press the ENTER SELECT key c Repeat a and b to complete the comment d Choose OK...

Страница 35: ...NT 04 WAYPOINT 05 WAYPOINT 06 FORWARD REVERSE Sample route 5 4 1 Creating routes with the cursor 1 Press the MENU key 2 Press the 1 key twice to show the Video Plot AIS menu 3 Press the 5 key twice to...

Страница 36: ...tomatic calculation of time to go to waypoints 5 Press the ENTER SELECT key 6 Choose route number with the trackball 7 Press the ENTER SELECT key The screen for selection of waypoint number appears Re...

Страница 37: ...e screen for selection of route points appears WPT Skip Distance TTG 1 08 YES 0 00 nm 0 0H 2 11 NO 135 67 nm 75 7H 3 15 YES 185 07 nm 125 6H 4 18 NO 185 07 nm 125 6H 5 22 NO 234 60 nm 345 6H 6 NO nm H...

Страница 38: ...Press the MENU key 2 Press the 1 key twice to show the Video Plot AIS menu 3 Press the 5 key twice to choose Route 4 Choose route number with the trackball 5 Press the key to display the route the key...

Страница 39: ...ENTER SELECT key 6 Use the trackball to choose route waypoint to delete 7 Press the CANCEL CLEAR key 8 Press the ENTER SELECT key The route data changes to reflect deletion 9 Press the MENU key to fi...

Страница 40: ...n 6 1 1 Navigating to a waypoint 1 Press the MENU key 2 Press the 1 key twice to show the Video Plot AIS menu 3 Press the 6 key twice to choose Destination Set 1 2 Destination Set Cancel 3 Mode Cursor...

Страница 41: ...s 6 and 7 10 Press the ENTER SELECT key Current position is marked as 00 and a dashed line connects between it and all waypoints This line shows the ideal course between waypoints 11 Press the MENU ke...

Страница 42: ...nos If not appears at that location 5 Press the 2 key to choose the direction in which to traverse the route Forward or Reverse 6 Press the ENTER SELECT key 7 Use the trackball to select a route You...

Страница 43: ...as destination 6 3 Skipping Route Waypoints A route waypoint may be deselected temporarily from the route list Using the following figure as an example you would want to temporarily deselect route way...

Страница 44: ...H Route No 01 Move cursor and enter WPT no Skip No skip Delete CLR Conclude ENT Escape MENU Display Yes to skip waypoint Route contents route no 1 5 Use the trackball to choose route point to skip wi...

Страница 45: ...6 NAVIGATION 6 6 This page intentionally left blank...

Страница 46: ...er of the display To silence the buzzer press the AUDIO OFF key 7 1 Arrival Alarm Anchor Watch Alarm The Arrival alarm alerts you when own ship nears a waypoint by the distance set The Anchor Watch al...

Страница 47: ...Alarm Set 1 2 Arrival Anchor Arrival Anchor Off Alarm Range 1 000 nm 3 XTE Border XTE Border Off Alarm Range 1 000 nm Alarm triggered XXXXXXXX XXXXXXXX Set destination waypoint Shows which alarm is s...

Страница 48: ...Alarm Destination waypoint Own ship position Alarm setting Intended course XTE ALARM BORDER ALARM XTE alarm border alarm concept 1 Press MENU 1 1 0 0 2 2 to display the Alarm Set menu 2 Press the 3 k...

Страница 49: ...7 ALARMS 7 4 This page intentionally left blank...

Страница 50: ...you must perform on new cards before you can use them with this unit You have to initialize them only once You can format cards you ve used before however in which case all prior information on them i...

Страница 51: ...ck Targets 6 Mark RadarMap 7 Initial Setting 8 Delete Card Data 9 Format 0 Save Data menu 5 Press the 9 key twice to choose Format 6 As the screen prompts press the ENTER SELECT key to format the card...

Страница 52: ...ey twice to display the Save Data menu 4 Choose item to save by pressing appropriate numeric key twice 2 marks lines 3 routes waypoints 4 own ship s track 5 other ship s tracks 6 marks or 7 initial se...

Страница 53: ...r You may cancel an entire line of data with the CANCEL CLEAR key c Choose the character U with the trackball and press the ENTER SELECT key d Enter the remaining characters e Choose OK 7 Press the EN...

Страница 54: ...3 key twice to choose Display Card Data Display Card Data L SLOT Disp u01 1234567890123456 2004 03 27 YES 7890123456789012 MARK 44 NO 02 Aimee 2004 03 27 NO WPT 13 03 10 TOTAL NO OF FILES 2 Move curs...

Страница 55: ...isplay the Memory Card menu 3 Press the 4 key twice to choose Play Back Data Play Back Data 1 2 MarklLine 3 WPTlRoute 4 Track Own Ship 5 Track Targets 6 Mark RadarMap 7 Initial Setting 8 9 0 Play Back...

Страница 56: ...the 8 key twice to choose Delete Card Data Delete Card Data L SLOT Date Pts u01 1234567890123456 2004 04 10 1234 MARK 02 Aimee 2004 03 27 1234 WPT 03 04 05 06 10 TOTAL NO OF FILES 02 Move cursor by us...

Страница 57: ...8 MEMORY CARD OPERATIONS 8 8 This page intentionally left blank...

Страница 58: ...Pos Sensor Navaid Manual 3 Own Ship Pos 00 00 000 N 000 00 000 E 4 Display All Card Data 5 Delete Data 6 All Delete N E S W Miscellaneous2 menu 5 Press the 3 key to choose Own Ship Pos 6 Key in latitu...

Страница 59: ...Initial Setting menu Initial Setting 1 2 Smoothing 00 0 15 Initial setting menu 2 Press the 2 key to choose Smoothing 3 Key in smoothing factor in two digits 4 Press the ENTER SELECT key to register y...

Страница 60: ...2 5 to choose item to change brilliance 3 Use the VRM control to adjust brilliance Watch the bar graph to judge brilliance level The range of the bar graph is 10 to 100 4 Press the ENTER SELECT key to...

Страница 61: ...o choose Miscellaneous2 5 Press the 5 key twice to choose Delete Data 6 Press the ENTER SELECT key 7 Press the MENU key to finish 9 6 Restoring Default Settings 1 Press the MENU key 2 Press the 1 key...

Страница 62: ...e Plotter Color menu PLOTTER COLOR 1 2 MARK R Y G C M B W 3 GRID R Y G C M B W 4 LAND R Y G C M B W 5 CONTOUR R Y G C M B W Plotter Color menu 2 Press appropriate numeric key to choose marker and colo...

Страница 63: ...ow the Video Plot AIS menu 3 Press the 0 key twice to choose AIS Miscellaneous1 5 Press the 4 key twice to choose Apportion Memory Apportion Memory 1 2 Track Memory 40000 pts MAX 40000PTS Current Appo...

Страница 64: ...be programmed to open the AIS 1 menu 1 Press the STBY TX key to set the radar in stand by 2 Press the MENU key 3 Press the 6 key twice to open the FUNC menu 4 Press the 7 key twice to open the F2 SET...

Страница 65: ...DISP is selected AIS equipped ships are marked on the display at their current position with the appropriate AIS symbol as shown below Activated target Sleeping target Dangerous target Lost target Ta...

Страница 66: ...target 1 Length adjustable on the PLOT menu 1 with 4 VECTOR TIME 2 Vector shows STW speed thru water and CSE course when water tracking mode is selected at the radar 3 If there is no heading data the...

Страница 67: ...y Sleep Target to sleep the target 4 Press the MENU key to close the menu The target is marked with the sleeping target symbol whose triangle is smaller than that of the activated AIS target symbol Sl...

Страница 68: ...ground Speed over ground CPA TCPA CSE course when water tracking mode is selected at radar STW speed thru water when water tracking mode is selected at radar AIS target vector orientation TRUE or REL...

Страница 69: ...os Acc High Nav State at anchor MMSI NO 107374182 IMO NO 12354876 Ship Length 187m Ship Width 28m Ship Draft 12 2m Destination Osaka ETA 01 Feb 12 59 Fusion 02 Type of Ship Cargo Type Fishing Ship s n...

Страница 70: ...ds on other ship s speed For example the AIS data is transmitted every 10 seconds on a ship speed of 0 14 kt and every two seconds on the ship speed of more than 23 knots For details see the owner s m...

Страница 71: ...30 2004 Time 10 32 41 Message STORM WARNING VICINITY OF 35 N 135 W 1 1 1 1 Safety related message 4 Key in the same number entered at step 3 5 Press the ENTER SELECT key to display the message 6 Pres...

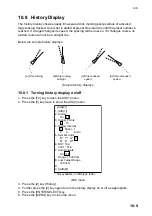
Страница 72: ...educed speed d Ship increased speed Sample history displays 10 8 1 Turning history display on off 1 Press the F2 key to open the AIS 1 menu 2 Press the 0 key twice to show the AIS 2 menu AIS 2 1 AIS 1...

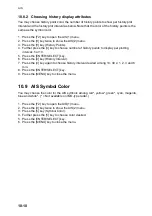
Страница 73: ...o display per plotting interval 5 or 10 5 Press the ENTER SELECT key 6 Press the 4 key History Interval 7 Press the 4 key again to choose history interval desired among 10 30 s 1 2 3 and 6 min 8 Press...

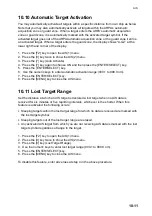
Страница 74: ...Use the numeric keys to enter automatic activation range 000 1 to 999 9 nm 7 Press the ENTER SELECT key 8 Press the MENU key to close the AIS menu 10 11 Lost Target Range Set the distance at which an...

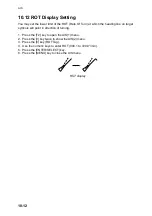
Страница 75: ...ine on target symbols will point in direction of turning 1 Press the F2 key to open the AIS 1 menu 2 Press the 0 key twice to show the AIS 2 menu 3 Press the 6 key ROT Tag 4 Use the numeric keys to en...

Страница 76: ...rmation will be used to determine which ARPA targets to convert Posn Range between AIS target and ARPA target Rng Enter the range difference from own ship to AIS target and ARPA target Brg Enter the b...

Страница 77: ...ving AIS data A WT This message appears when the water tracking mode is set at the radar and STW and CSE are not available In this case the speed and course vector on the AIS symbol disappears and SOG...

Страница 78: ...ON BT S WT Not available on IMO spec A CPA LOG WT data of VBW VTG BT data of VBW and gyro calculation A WT A CPA A WT A CPA LOG VTG VTG VTG VTG VTG VTG A CPA LOG A CPA See Note 2 See Note 2 See Note...

Страница 79: ...15 AIS Alarm Message The AIS 3 menu provides AIS alarm message information AIALR sentence from the AIS transponder When an AIS alarm message is received A ALM appears at the bottom right hand corner o...

Страница 80: ...on the RP Board contact your dealer Battery Type Code No Memory Card Battery CR2025 000 141 093 Battery on RP Board CR2450 F2ST2L 000 144 941 Replacement of memory card battery Follow the instructions...

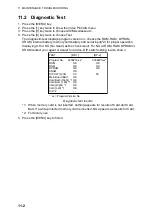
Страница 81: ...r NG No Good as the check result For NG at ROM RAM DPRAM or SRAM contact your agent or dealer for advice DIP switch setting is also shown TEST RP 1 RP 2 Program No 0359219 xx 0359220 xx ROM OK OK RAM...

Страница 82: ...rd 03 134 9106 1 100 235 230 Pan Head Screw M3x8 C2700W 5 000 881 404 Toroidal Core TFC 25 15 12A 1 000 145 474 Cable Tie CV 150N 1 000 570 325 Clamp CK 05H 1 000 570 247 Shrink Tubing 3x0 25 0 1m 1 0...

Страница 83: ...ff all equipment connected to the radar 3 Open the card slot cover at the left front of the display unit 4 Attach label as shown below Label M card 03 134 9106 C A R D S L O T Attachment of labels 5 U...

Страница 84: ...Cable Assy 03S9456 J3 P4 FRONT PANEL Cable Tie CV 150 Toroidal Core TFC 25 15 12 RP Board SPU chassis SPU BOARD 03P9230 J3 J106 A B Square Bushing Chassis J3 RP Board 14P0390A Toroidal Core Exploded V...

Страница 85: ...ed view of A Solder Display unit top view 20 mm 1 Cut shrink tubing in 20 mm lengths and slip onto each wire 3 Heat shrink tubing with soldering iron Shrink tubing 2 Solder connector to signal cable S...

Страница 86: ...ES TEST 1 Program No 03591521XX 2 ROM Check OK EPA OK 3 RAM Check OK 4 Antenna Rotation rpm 5 TX Trigger Frequency 3000Hz 6 Video Level 000 7 Video Signal OK ARP TEST 1 Program No 18590411XX 18590421X...

Страница 87: ...n the floppy drive of the PC Execute file FR1500M3 bat for version update TARGET POWER ON appears on the screen of the PC c Turn on the radar Updating begins Finished Version up appears on the screen...

Страница 88: ...used Baud rate 38400 Data bits 8 D7 0 Parity none Stop bits 1 D0 D1 D2 D3 D4 D5 D6 D7 Start bit Stop bit Data bits Data sentences ALR Set alarm state AIALR hhmmss ss xxx A A c c hh CR LF 6 5 4 3 2 1...

Страница 89: ...IS channel Number 5 Encapsulated ITU R M 1371 radio message 6 Number of fill bits 0 to 5 7 Checksum VDO UAIS VHF Data link Own vessel report AIVDO x x x x s s x hh CR LF 7 6 5 4 3 2 1 1 Total number o...

Страница 90: ...APPENDIX AP 3 Schematic diagram Load requirements as listener 2 2 Kohms...

Страница 91: ...nary message addressed AIVDM message 6 source ID destination ID binary data text telegram binary message broadcast AIVDM message 8 source ID binary data text telegram 4 Data displayed in the own ship...

Страница 92: ...Time Dist 4 Plot Time 1 s 60 min 10 s 5 Plot Distance 0 01nm 9 99nm 0 02nm 6 Save Own Track Yes No 7 Other Track 1 Off On 8 Set Other Plot Intvl 1 1 s 60 min 10 s 9 Save Other Track 1 Yes No 0 Plot Co...

Страница 93: ...XTE Border Off Alarm Range 0 001 9 999nm 0 5nm Alarm Range 0 001 9 999nm 0 25nm 1 2 Mark No Display All 3 Own Track No 30 50 80 All 4 Target Track No 30 50 80 All 5 Own Track Color All Red Yellow Gree...

Страница 94: ...orr No Yes 3 Delta L L Entry 4 Variation Off Manu Auto 5 Manual Entry 1 Mark Selection 01 20 03 2 MOB 3 Display On Off 4 Mark Color IMO spec Red Pink Purple Orange Non IMO type Red Yellow Green Cyan M...

Страница 95: ...Safety Related Message Addressed 3 Safety Related Message Broadcast 4 Binary Message Addressed 5 Binary Message Broadcast 6 Auto Display On Off 1 2 History On Off 3 History Points 5 10 4 History Inte...

Страница 96: ...arged Data reliability is low Chart properly displayed full accuracy Chart offset applied Voltage of battery on circuit board or memory card is low Track recording plotting suspended H Alarm setting v...

Страница 97: ...APPENDIX AP 10 This page intentionally left blank...

Страница 98: ...s 3 000 for radar map 40 000 for track mark 20 000 for other ship track Plot Interval Own ship 1 60 s or 0 01 nm 9 99 nm Other ship 1 60 s 1 8 Mark Type Own ship MOB square circle line 1 9 Courseline...

Страница 99: ...4 Default settings 9 4 Display choosing 1 2 offcentering 1 3 shifting 1 3 zoom 1 3 M Marks choosing entry method 4 3 color 4 7 entering at cursor position combination video plotter displays 4 4 enter...

Страница 100: ...turning display of on off 5 7 S Shifting the display 1 3 Ship s position input 9 1 Smoothing 9 2 T Track color 3 6 display other ship s 3 4 displaying own ship s 3 1 erasing 3 5 plotting interval own...

Отзывы:

Похожие инструкции для RP-180