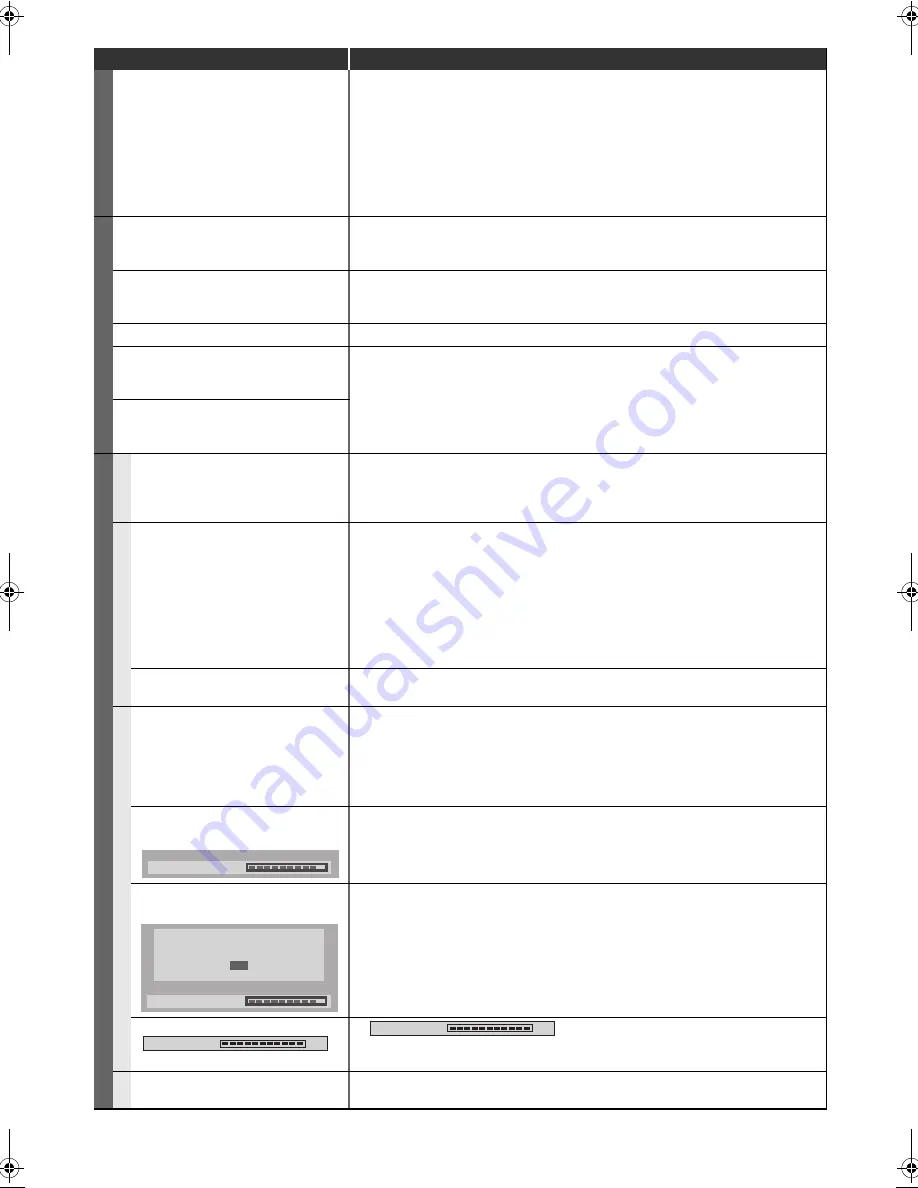
background image

78

EN

Symptom

Remedy

GENERAL

No image from HDMI connection.

• Check the HDMI connection. (Check the status of the HDMI related indications.)
• Check whether the connected monitor device or other device supports HDCP. 

(This unit will not output a video signal unless the other device supports HDCP.)

• Check the setting of HDMI.
• Check whether the output format of this unit (HDMI FORMAT) matches the 

supported input format of other connected device.

• If the unit is connected to the unauthorised display device with an HDMI cable, 

the audio and video signals may not be output when playing back a commercial 
DVD-video.

CHANNEL

TV channels cannot be changed.

• Check if the connections are made securely and correctly.
• Check if the cables are damaged.
• Try “Channel” setting by following the steps on pages 21-23.

Some settings are lost even though you 
followed the procedure correctly.

• If you unplug the AC mains cable while the warning message, “Saving settings. 

Please wait.”, is displayed, some settings may be lost. Do not unplug the AC 
mains cable while the message is displayed (It will take about 1 minute.).

Only specific channels do not appear.

• The channels may be set to be skipped. (See pages 22, 25.)

Though auto tuning was completed, 
you cannot watch the DVB and 
analogue channels.

• Confirm whether an antenna cable is connected correctly and try to tune again. 

(See pages 21-23.)

• If you move the unit to a different area, you will need to perform auto tuning 

again.

The TV channel which you have been 
able to watch before has disappeared 
and “No signal” is displayed.

RECORDIN

G

GE

NERAL

The image from the external device 
cannot be displayed.

• Try pressing 

[INPUT SELECT]

 repeatedly to select the external input channel, 

then press 

[PROG.

G \ H

]

 repeatedly to select your desired channel.

• Turn on all connected devices.
• Check if the connections are made securely and correctly.

HDD / D

V

D

Recording is impossible.

• It is prohibited to make a recording from 2 minutes before the programmed start 

time of a timer recording.

• This unit cannot record programmes that contain copy protection signal. This is 

not a malfunction.

• The space of the recording media may be used up. Try deleting unnecessary 

titles, or exchange it with the recordable media.

• The maximum number of titles or chapters has exceeded. Delete the 

unnecessary titles to make enough space or insert a new recordable media.

• Check if the connections are made securely and correctly.

Timer recording cannot be 
performed.

• The internal clock of the unit may have been stopped due to a power failure that 

lasted for more than 30 seconds. Reset the clock. (See page 71.)

DV

D

Recording is impossible.

• Check if the disc is CPRM compatible. Copy-once programmes can only be 

copied onto the disc which is CPRM compatible.

• Check if the disc is protected or finalised. Undo the protection or the finalisation.
• Video mode DVD-RW once formatted in other unit cannot be recorded in this 

unit unless formatted in this unit.

• Check if the connections are made securely and correctly.

“Repairing” appears on the TV 
screen.

• If there is a power failure or unplugging during recording, finalising, formatting or 

editing (even after “Repairing” disappears), a repairing process will begin 
automatically just after turning the unit on again.

• It may take several minutes up to about several hours.

In a case you intend to cancel the 
repairing process.

• If you intend to cancel the repairing process, press 

[OPEN

\

CLOSE

A

] on the 

front panel, then select “Yes” and press 

[ENTER

\

OK]

. After that, press 

[OPEN

\

CLOSE EJECT

A

]

 to take out the disc. The disc cancelled during the 

repairing process MAY NOT work.

The indication 

” 

does not disappear.

• “

” may remain on screen for the maximum of 

20 seconds even after it reached 100%. This is not a malfunction.

VC

R

Recording does not start 
immediately after pressing 

[REC]

.

• Make sure the videotape has a recorded tab when you record to a videotape. If 

needed, cover the hole with cellophane tape.

Repairing

Do you want to cancel a repairing 

process? When selecting “Yes”, 

the disc may not be usable.

No

Yes

Repairing

100%

Writing to Disc 

100%

Writing to Disc 

90_Others.fm  Page 78  Wednesday, April 14, 2010  9:15 AM

Содержание TD6D-D4413DB

Страница 1: ...Others Function Setup Recording VCR Functions Basic Setup TV View Operation For Customer Use Carefully read the Model No and Serial No located at the back of the unit and enter the information below R...

Страница 2: ...s a Power Saving Mode ECO for standby 10 Do not place any combustible objects on the device candles etc 11 Before moving the unit be sure to remove any discs and unplug the mains cable from the AC out...

Страница 3: ...ty with this 480p or 576p product please contact our customer service centre A NOTE ABOUT RECYCLING This product s packaging materials are recyclable and can be reused Please dispose of any materials...

Страница 4: ...atically cleans video heads as you insert or remove a cassette so you can see a clear picture Playback picture may become blurred or interrupted while the TV programme reception is clear Dirt accumula...

Страница 5: ...recorded in a USB device E Page 48 Chasing playback during recording and simultaneous playback and recording E Page 53 Pausing a TV broadcast to resume later Pause TV E Page 53 Playing back MP3 JPEG...

Страница 6: ...33 Timer Recording EPG 36 Satellite Link 37 Settings for External Equipment 38 Information on DV Dubbing 39 DVC to HDD DVD Dubbing 40 Information on Dubbing 41 Setting a Disc to Protect 45 Finalising...

Страница 7: ...mode Available to DVD RW discs in VR mode Available to DVD R discs in video mode Available to audio CDs Available to CD RW R discs and USB device with MP3 files Available to CD RW R discs and USB devi...

Страница 8: ...will be created Playable only on VR mode compatible unit Finalisation recommended Playable on most DVD players Finalisation necessary Title menu will be created Available Features Recording Features R...

Страница 9: ...Super audio CD Only the sound on the CD layer can be heard The sound on the high density super audio CD layer cannot be heard This unit uses the PAL system However it is also possible to play back DV...

Страница 10: ...tton 2 VCR 22 F FWD D button 2 VCR 23 REW E button 2 VCR 24 STOP EJECT C A button VCR 25 STANDBY ON Q button 3 1 Mains cable 2 HDMI OUT jack HDD DVD VCR 3 DIGITAL AUDIO OUT COAXIAL jack HDD DVD VCR 4...

Страница 11: ...CR 22 PROG G H buttons 23 TIMER PROG button 24 C button 25 CLEAR button 26 GUIDE button 27 VARIABLE SKIP P button HDD DVD 28 MENU LIST button HDD DVD 29 ENTER OK button 30 RETURN BACK button 31 FWD D...

Страница 12: ...maximum operable range as follows Remote control operation may become unreliable if the remote control sensor of the unit is being exposed by the strong sunlight or fluorescent light Remote controls f...

Страница 13: ...us 8 Indicates the component in use HDD DVD USB device Note For some descriptions on this manual only one disc type is indicated as an example Press DISPLAY repeatedly while the display menu is displa...

Страница 14: ...ry with MP3 JPEG is plugged 1 Playback E Page 68 2 Display E Page 70 3 Video E Page 71 4 Recording E Pages 30 31 38 45 5 Clock E Page 71 6 Channel E Pages 21 26 7 DivX E Pages 49 72 8 HDMI E Page 72 9...

Страница 15: ...ogramme Play E Page 56 CD RW R with MP3 JPEG Kodak Picture CD files 3 Music MP3 files E Page 55 4 Photo JPEG files E Pages 55 56 5 Slide Show JPEG Kodak Picture CD files E Page 56 1 Music MP3 files E...

Страница 16: ...ideo resolution 576p is selected Appears when HDMI video resolution 720p is selected Appears when HDMI video resolution 1080i is selected Appears when HDMI video resolution 1080p is selected DB DTV 4...

Страница 17: ...set to Component Progressive or Component Interlace Refer to B Video Out Default SCART RGB on page 71 Component connection provides the better quality picture Connect the COMPONENT VIDEO OUT jacks of...

Страница 18: ...ible that some devices with an HDMI input may not operate properly with this unit When using an HDCP incompatible display device the image will not be viewed properly Among the devices that support HD...

Страница 19: ...bilities of your receiver the receiver will produce a strong distorted sound or no sound at all Connecting multi channel Dolby Digital decoder allows you to enjoy the Multi channel Dolby Digital surro...

Страница 20: ...d follow to A Clock Setting on page 71 Note After Initial Setting if you need to unplug the mains cable make sure to turn off the power first and leave it in standby mode for at least 1 minute before...

Страница 21: ...UP Select General Setting using K L then press ENTER OK 2 Select Channel using K L then press ENTER OK 3 Select ANALOG Channel Setup using K L then press ENTER OK 4 Select Auto Tuning using K L then p...

Страница 22: ...e another channel repeat steps 5 to 10 11 Press SETUP to exit You can set the unit to skip channels You can no longer receive or watch when you access channels using PROG G H 1 Follow steps 1 to 4 in...

Страница 23: ...selected the unit will search for the channels which have not been stored in channels memory 4 Press SETUP to activate the setting This unit has Service Update function which searches and stores newl...

Страница 24: ...ows a list of all the memorised DVB channels If the favourite group does not have any channels the group will be skipped 3 Select the DVB channel using K L then press ENTER OK 4 Press RETURN BACK to e...

Страница 25: ...Press RETURN BACK to exit Once you turn off the unit Pincode will be required to view the locked channels To set the Pincode refer to A Adult Lock Default OFF on page 73 Note You need to set the Pinc...

Страница 26: ...V2 DV AV3 Signal Information is also not available while the Pincode input field for locked DVB channel is displayed If a broadcaster provides a DVB Teletext service you can enjoy it The DVB Teletext...

Страница 27: ...AV3 press GUIDE You can also call up EPG by following steps 1 In stop mode press SETUP Select Timer Programming using K L then press ENTER OK 2 Select EPG using K L then press ENTER OK Select the chan...

Страница 28: ...ding a TV broadcast or an external input you can display copy control information on the screen CPRM is a scrambling copy protection system for the protection of copy once broadcast programmes This un...

Страница 29: ...tually the HDD may not be used at all If you notice these symptoms of a failing HDD promptly dub the data to a DVD disc When an HDD fails recovery of recorded content data may be impossible About the...

Страница 30: ...e For HDD and VR mode DVD RW disc the image will be recorded in whichever the ratio that the programme you record is broadcasted with regardless of the Aspect Ratio Video mode setting The unit inserts...

Страница 31: ...TER OK 4 Select Stereo or Bilingual using K L then press ENTER OK 5 Press SETUP to exit Note If you select Stereo The audio will be recorded as stereo audio If you select Bilingual The audio will be r...

Страница 32: ...atedly until the desired length appears To cancel One touch Timer Recording within the specified time press STOP C 8 Press STOP C to stop the recording This operation may take a few moments to complet...

Страница 33: ...isplayed instead of STTL Select VPS PDC to ON or OFF using K L Refer to VPS Video Programme System PDC Programme Delivery Control on page 34 When DVB channel is selected STTL will be displayed instead...

Страница 34: ...timer recording is between 0 00 and 3 59 on a given day the VPS PDC function will operate from 20 00 on the previous day to 4 00 on the next day If the starting time of the VPS PDC timer recording is...

Страница 35: ...gress will be stopped Playback of DVD CD is prohibited from 2 minutes before the programmed starting time when the recording media is DVD If it comes to 2 minutes before the programmed starting time d...

Страница 36: ...N to display Weekly Mode 2 Select a desired programme using K L 0 1 then press ENTER OK or BLUE 3 Set End REC To Speed and STTL using K L 0 1 then press ENTER OK Note EPG timer recording will stop if...

Страница 37: ...satellite link standby mode To cancel the satellite link function in the satellite link standby mode Press STANDBY ON Q or SAT LINK to turn on the unit To cancel the satellite link function while the...

Страница 38: ...start recording 5 Press the PLAY B button on the external equipment 6 Press STOP C HDD DVD or STOP EJECT C A VCR on the unit to stop recording Note During recording recording will be paused when a si...

Страница 39: ...ted press ENTER OK to display DV Audio menu Select the audio you want to output using K L then press ENTER OK Select Stereo1 to dub the stereo sound Select Stereo2 to dub the sound that was added afte...

Страница 40: ...t the output signal to DVC For the proper operation connect DVC to the unit directly Do not connect this unit and DVC via any other unit Do not connect more than one DVC The unit can only accept DVC O...

Страница 41: ...ording speed the unit calculates how much time is available on the disc and selects the best recording speed available automatically The recording may be cut short when the available recording space o...

Страница 42: ...f you are playing back an HDD HDD to DVD dubbing will start right away If you are playing back a DVD DVD to HDD dubbing will start right away HDD to DVD only During playback of the title you want to d...

Страница 43: ...using K L then press ENTER OK Dubbing of the selected title will start To stop the dubbing in progress Press STOP C on the front panel Press STOP C for 2 seconds on the remote control 1 In stop mode p...

Страница 44: ...es when timer recording starts the next display will appear Dubbing will start It may take awhile to prepare for the dubbing To stop the dubbing in progress Press STOP C on the front panel Press STOP...

Страница 45: ...g the mains cable during finalisation Insert a recordable disc before finalising 1 In stop mode press SETUP 2 Select DVD Menu using K L then press ENTER OK 3 Select Finalise using K L then press ENTER...

Страница 46: ...play from the resume points 8 Press STOP C to stop playback To eject the disc press OPEN CLOSE EJECT A to open the disc tray then remove the disc Press OPEN CLOSE EJECT A to close the disc tray befor...

Страница 47: ...Playback will start from the selected track and continue with each one after JPEG files are shown with the icon The unit can recognise up to 255 folders and up to 99 tracks 999 files Letters of a file...

Страница 48: ...desired track to be played back then press PLAY B or ENTER OK An image will be played back from the selected track and go to the next one in turn 3 Press STOP C to stop playback Note After a track is...

Страница 49: ...At step 5 select Deactivation using K L then press ENTER OK Confirmation screen will appear Select Yes using K L then press ENTER OK This unit is deactivated You can get the new registration code and...

Страница 50: ...ore information for DivX please visit http www divx com You cannot play back the DivX VOD files obtained with different registration codes on this unit Press TOP MENU and select other files that can b...

Страница 51: ...yback menu To set the time amount refer to H Variable Skip Replay on page 70 During playback press VARIABLE SKIPP if you want to skip forward Press VARIABLE REPLAYO if you want to skip backward 1 Duri...

Страница 52: ...press ENTER OK Zoom playback will start Note To cancel the zoom function select x1 0 using K L then press ENTER OK If selecting a smaller factor than that currently selected the zoom area is not displ...

Страница 53: ...nd press or the first press when the unit is in HDD recording mode the image will be paused while the recording continues It is as if you have paused the live TV broadcast 2 When you come back press T...

Страница 54: ...display menu If the display menu is already shown skip to step 2 2 Select the icon using 0 1 then press ENTER OK for the track number is highlighted 3 Enter the desired track number to search for usin...

Страница 55: ...d when you stop playback Point B for the repeat A B playback should be set within the same title or track as point B You cannot select Group during the random playback of MP3 and JPEG files Chapter Tr...

Страница 56: ...ny time during playback 1 During playback press DISPLAY to bring up the display menu Or press SUBTITLE during playback and follow from step 3 2 Select the icon using 0 1 to display the selection menu...

Страница 57: ...it is turned off Some DVD videos feature scenes shot from two or more angles The disc case is usually marked with an angle icon if the disc has multi angle scenes 1 During playback press DISPLAY to br...

Страница 58: ...re displayed here 8 Title name editable If you do not name the title the recorded date time channel and the recording speed are displayed here 9 Progress bar Indicating the progress of the playback 10...

Страница 59: ...aws of the United States and other countries and may subject you to civil and criminal liability Note A Playlist is not available for DVD R or video mode DVD RW discs It is not possible to edit a disc...

Страница 60: ...ct Edit Title Name using K L then press ENTER OK A window for entering the title name will appear 5 To enter the title name refer to Guide to Editing Title Names on page 60 When you finish entering th...

Страница 61: ...al at once You can also clear all the chapter marks at once You can only specify the interval of chapter marks that last for more than 5 minutes Press DVD first 1 Follow the steps 1 to 3 in Editing Ti...

Страница 62: ...K L then press ENTER OK The two titles will combine into a single title e g VR mode DVD RW Playlist 5 Press RETURN BACK to exit For DVD writing onto the disc starts It may take awhile to write the dat...

Страница 63: ...4 Select Delete using K L then press ENTER OK 5 Select Yes using K L then press ENTER OK Are you sure will appear Select Yes using K L and then press ENTER OK The part of the title is deleted 6 Press...

Страница 64: ...o PCM or to output MPEG signals DTS OFF Set whether DTS signal is output or not MP3 Surround Stream Set the type of MP3 signal to output Disc Menu Language E Page 69 Bulgarian Czech French German Hung...

Страница 65: ...eo Out E Page 71 Component Progressive Component Interlace Sets the video output mode Recording Auto Chapter E Page 30 OFF 5 minutes 15 minutes 30 minutes 60 minutes Insert chapter marks periodically...

Страница 66: ...he DivX registration code is required when downloading the DivX VOD files from the Internet To learn more about DivX VOD visit www divx com vod Deactivation Code This menu item provides you with the D...

Страница 67: ...res 1 In stop mode press SETUP 2 Select General Setting using K L then press ENTER OK 3 Select a desired setup using K L then press ENTER OK 4 Select a desired item using K L then press ENTER OK e g P...

Страница 68: ...rget your password or you want to clear all settings in Parental Lock enter 4 7 3 7 using the Number buttons at the option window Your password is cleared and parental levels are set to OFF Choose the...

Страница 69: ...ifier decoder is NOT compatible with 96 kHz PCM select 48kHz Sound recorded at 96 kHz is down sampled to 48 kHz 96kHz If your amplifier decoder is compatible with 96 kHz PCM select 96kHz Sound is samp...

Страница 70: ...el display brightness Note The display will not light up when the unit is in standby mode This is a Power Saving mode ECO for standby F Angle Icon Default ON DVD only G Still Mode Default Auto DVD onl...

Страница 71: ...on or select SCART RGB for Scart cable connection Refer to page 17 for more details Only if you select the Component Progressive proceed to step 2 If you select Component Interlace or SCART RGB your s...

Страница 72: ...time signal In this case set the clock manually The unit will also correct the current time automatically at 8 00 and 1 10 if the unit is in standby mode or if you are watching DVB channel Setup A Gen...

Страница 73: ...g using K L then press ENTER OK Select OFF to disable Maturity Lock Once Maturity Lock has been set Pincode will be required in order to view the programme that exceeds the age restriction In order to...

Страница 74: ...g the Number buttons or PROG G H on the remote control There is a tape with a record tab in the unit 1 Insert a recordable videotape 2 Select the recording speed using REC SPEED The desired recording...

Страница 75: ...al recording on a recorded cassette remove its record tab To record on it later cover the hole with cellophane tape This function helps you to dub the contents in the DVC digital video camcorder to VC...

Страница 76: ...mal play back from the Picture Search Still Slow mode press PLAY B Changing the Video Colour System This unit will distinguish the video colour system SECAM PAL or MESECAM automatically according to t...

Страница 77: ...tting When the unit is in standby mode front panel display is off because Power Saving mode is applied to this product When you forget the password for parental lock Please cancel the password and the...

Страница 78: ...s before the programmed start time of a timer recording This unit cannot record programmes that contain copy protection signal This is not a malfunction The space of the recording media may be used up...

Страница 79: ...nnot be played back on this unit unless it is finalised on the device Even if it is finalised the performance of those discs are not guaranteed on this unit The disc may be dirty or flawed Clean the d...

Страница 80: ...orted Incompatible USB device is connected Insert a compatible USB device with supported file format If this does not solve the problem use other type of compatible USB device Region Error Please ejec...

Страница 81: ...r You cannot record on this disc as Control Information is full This disc has no space to write Control Information when recording or deleting contents When editing has been repeatedly performed the c...

Страница 82: ...Kirghiz 5771 Kirundi 6460 Korean 5761 Kurdish 5767 Laothian 5861 Latin 5847 Latvian Lettish 5868 Lingala 5860 Language Code Lithuanian 5866 Macedonian 5957 Malagasy 5953 Malay 5965 Malayalam 5958 Malt...

Страница 83: ...Video recording format Sampling frequency Compression format 13 5 MHz MPEG Audio recording format Sampling frequency Compression format 48 kHz Dolby Digital Tuner Analogue channels L SECAM L BG PAL B...

Страница 84: ...ty This product complies with the requirement of the related directives is in compliance with the related regulations We FUNAI ELECTRIC EUROPE Sp z o o ul In ynierska 1 67 100 Nowa S l Poland declare...

Отзывы: