


44
L i f e B o o k P 7 0 0 0 N o t e b o o k – S e c t i o n F o u r
MICROPHONE JACK
The microphone jack allows you to connect an external
mono microphone. The microphone jack is located on
the front of the system.
(Figure 4-21)
Your microphone
must be equipped with a 1/8”(3.5 mm) mono mini-plug
in order to fit into the microphone jack of your note-
book. In order to connect a microphone follow these
easy steps:
1. Align the connector with the port opening.
2. Push the connector into the port until it is seated.
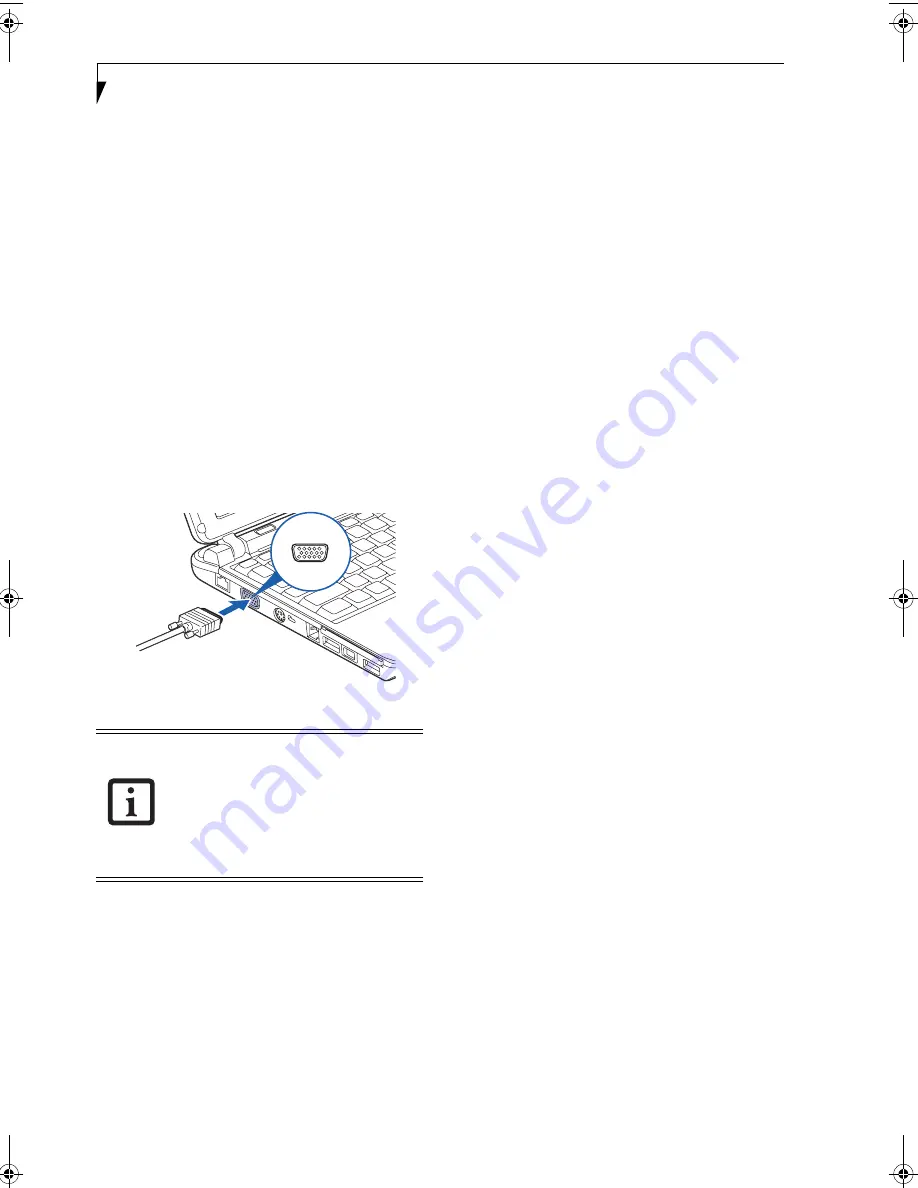
EXTERNAL VIDEO PORT
The external video port allows you to connect an external
monitor or LCD projector. In order to connect a monitor,
follow these easy steps:
1. Open the protective cover on the right side of the
system
(Figure 4-22)
.
2. Align the connector with the port opening.
3. Push the connector into the port until it is seated.
Figure 4-22 Installing the External Monitor Cable
Pressing the [Fn] + [F10] keys allows you
to change your selection of where to send
your display video. Each time you press the
key combination, you will step to the next
choice, starting with the built-in display
panel only, moving to the external monitor
only, finally moving to both the built-in
display panel and an external monitor.
P7120.book Page 44 Monday, October 10, 2005 4:38 PM
Содержание Lifebook P7120
Страница 6: ...L i f e B o o k P 7 0 0 0 N o t e b o o k ...
Страница 7: ...1 Preface ...
Страница 8: ...L i f e B o o k P 7 0 0 0 N o t e b o o k ...
Страница 10: ...2 L i f e B o o k P 7 0 0 0 N o t e b o o k S e c t i o n O n e ...
Страница 11: ...3 2 Getting to Know Your LifeBook Notebook ...
Страница 12: ...4 L i f e B o o k P 7 0 0 0 N o t e b o o k S e c t i o n T w o ...
Страница 28: ...20 L i f e B o o k P 7 0 0 0 N o t e b o o k S e c t i o n T w o ...
Страница 29: ...21 3 Getting Started ...
Страница 30: ...22 L i f e B o o k P 7 0 0 0 N o t e b o o k S e c t i o n T h r e e ...
Страница 37: ...29 4 User Installable Features ...
Страница 38: ...30 L i f e B o o k P 7 0 0 0 N o t e b o o k S e c t i o n F o u r ...
Страница 53: ...45 5 Using the Integrated Wireless LAN Optional Device ...
Страница 54: ...46 L i f e B o o k P 7 0 0 0 N o t e b o o k S e c t i o n F I v e ...
Страница 71: ...63 6 Troubleshooting ...
Страница 72: ...64 L i f e B o o k P 7 0 0 0 N o t e b o o k S e c t i o n S i x ...
Страница 85: ...77 7 Care and Maintenance ...
Страница 86: ...78 L i f e B o o k P 7 0 0 0 N o t e b o o k S e c t i o n S e v e n ...
Страница 90: ...82 L i f e B o o k P 7 0 0 0 N o t e b o o k S e c t i o n S e v e n ...
Страница 91: ...83 8 Specifications ...
Страница 92: ...84 L i f e B o o k P 7 0 0 0 N o t e b o o k S e c t i o n E i g h t ...
Страница 96: ...88 L i f e B o o k P 7 0 0 0 N o t e b o o k S e c t i o n E i g h t ...
Страница 99: ...91 9 Glossary ...
Страница 100: ...92 L i f e B o o k P 7 0 0 0 N o t e b o o k S e c t i o n N i n e ...
Страница 105: ...97 Appendix A Using the Fingerprint Sensor ...
Страница 106: ...98 L i f e B o o k P 7 0 0 0 N o t e b o o k A p p e n d i x ...
Страница 114: ...106 L i f e B o o k P 7 0 0 0 N o t e b o o k A p p e n d i x ...
Страница 119: ......
Страница 120: ......


