24
L i f e B o o k P 7 0 0 0 N o t e b o o k – S e c t i o n T h r e e
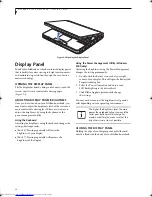
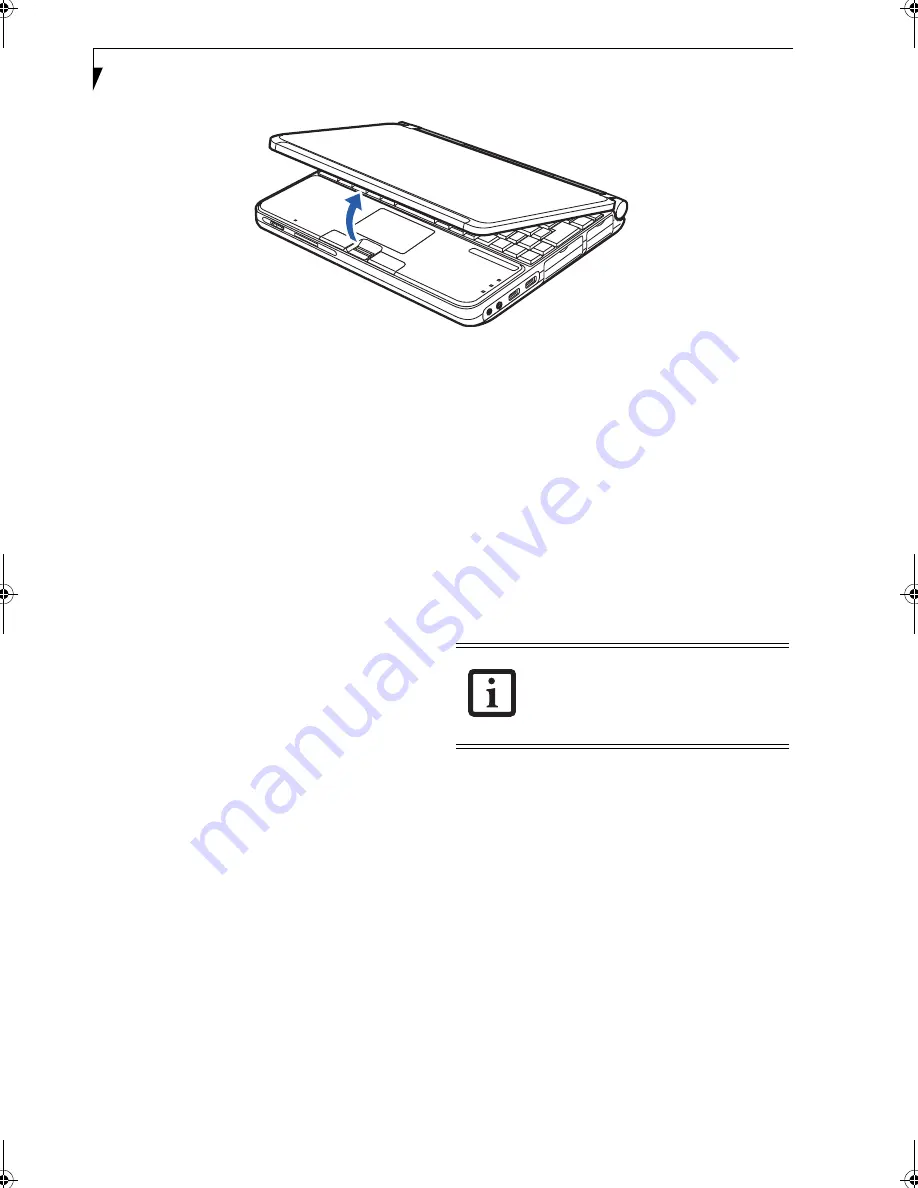
Figure 3-2 Opening the Display Panel
Display Panel
Your Fujitsu LifeBook notebook contains a display panel
that is backlit for easier viewing in bright environments
and maintains top resolution through the use of active-
matrix technology.
OPENING THE DISPLAY PANEL
Lift the display backwards, being careful not to touch the
screen, until it is at a comfortable viewing angle.
(Figure 3-2)
ADJUSTING DISPLAY PANEL BRIGHTNESS
Once you have turned on your LifeBook notebook, you
may want to adjust the brightness level of the screen to a
more comfortable viewing level. There are two ways to
adjust the brightness, by using the keyboard or the
power management utility.
Using the Keyboard
Adjusting the brightness using the keyboard changes the
setting only temporarily.
■
[Fn+F6]: Pressing repeatedly will lower the
brightness of your display.
■
[Fn+F7]: Pressing repeatedly will increase the
brightness of the display.
Using the Power Management Utility (Windows
2000 only)
Adjusting the brightness using the Power Management
changes the setting permanently.
1. Double-click the Battery icon in the lower right
corner of your display. This will open the BatteryAid
Properties dialog box.
2. Select the Power Control tab and adjust your
LCD Backlighting to the desired level.
3. Click
OK
or
Apply
to permanently change
the settings.
You may need to readjust the brightness level periodi-
cally depending on your operating environment.
CLOSING THE DISPLAY PANEL
Holding the edge of your display panel, pull it forward
until it is flush with the body of your LifeBook notebook.
The higher the brightness level, the more
power the notebook will consume and the
faster your batteries will discharge. For
maximum battery life, make sure that the
brightness is set as low as possible.
P7010.book Page 24 Tuesday, April 20, 2004 2:26 PM
Содержание Lifebook P7010
Страница 2: ...L i f e B o o k P 7 0 0 0 N o t e b o o k ...
Страница 6: ...L i f e B o o k P 7 0 0 0 N o t e b o o k ...
Страница 7: ...1 Preface ...
Страница 8: ...L i f e B o o k P 7 0 0 0 N o t e b o o k ...
Страница 10: ...2 L i f e B o o k P 7 0 0 0 N o t e b o o k S e c t i o n O n e ...
Страница 11: ...3 2 Getting to Know Your LifeBook Notebook ...
Страница 12: ...4 L i f e B o o k P 7 0 0 0 N o t e b o o k S e c t i o n T w o ...
Страница 28: ...20 L i f e B o o k P 7 0 0 0 N o t e b o o k S e c t i o n T w o ...
Страница 29: ...21 3 Getting Started ...
Страница 30: ...22 L i f e B o o k P 7 0 0 0 N o t e b o o k S e c t i o n T h r e e ...
Страница 37: ...29 4 User Installable Features ...
Страница 38: ...30 L i f e B o o k P 7 0 0 0 N o t e b o o k S e c t i o n F o u r ...
Страница 55: ...47 5 Using the Integrated Wireless LAN ...
Страница 56: ...48 L i f e B o o k P 7 0 0 0 N o t e b o o k S e c t i o n F I v e ...
Страница 73: ...65 6 Troubleshooting ...
Страница 74: ...66 L i f e B o o k P 7 0 0 0 N o t e b o o k S e c t i o n S i x ...
Страница 88: ...80 L i f e B o o k P 7 0 0 0 N o t e b o o k S e c t i o n S i x ...
Страница 89: ...81 7 Care and Maintenance ...
Страница 90: ...82 L i f e B o o k P 7 0 0 0 N o t e b o o k S e c t i o n S e v e n ...
Страница 94: ...86 L i f e B o o k P 7 0 0 0 N o t e b o o k S e c t i o n S e v e n ...
Страница 95: ...87 8 Specifications ...
Страница 96: ...88 L i f e B o o k P 7 0 0 0 N o t e b o o k S e c t i o n E i g h t ...
Страница 100: ...92 L i f e B o o k P 7 0 0 0 N o t e b o o k S e c t i o n E i g h t ...
Страница 104: ...96 L i f e B o o k P 7 0 0 0 N o t e b o o k S e c t i o n E i g h t ...
Страница 105: ...97 9 Glossary ...
Страница 106: ...98 L i f e B o o k P 7 0 0 0 N o t e b o o k S e c t i o n N i n e ...
Страница 111: ...103 Appendix A Using the Fingerprint Sensor Optional Device ...
Страница 112: ...104 L i f e B o o k P 7 0 0 0 N o t e b o o k A p p e n d i x ...
Страница 120: ...112 L i f e B o o k P 7 0 0 0 N o t e b o o k A p p e n d i x ...

