63
W I r e l e s s L A N U s e r ’ s G u i d e
Broadcom Wireless LAN:
1.
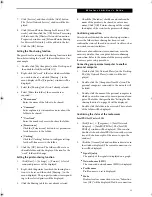
Right-click the Broadcom Wireless Utility icon in
the system tray in the lower right corner of your
screen.
2.
Click [Open Utility]. The [Broadcom Wireless
Configuration Utility] window will be displayed.
3.
Select the [Wireless Networks] tab if it is not
already selected.
4.
Click the [Add] button. The Wireless Network
Properties window will appear.
5.
Enter the information required for connection to
the wireless LAN:
Network name (SSID)
Enter the appropriate network name according to
the "Operating mode" to be used. Enter the desired
network name in less than 33 ASCII characters.
Infrastructure connection:
Assign the appropriate data according to the ID
code of the access point to be accessed. For access
point setting, refer to the manual of the access
point.
Ad hoc connection:
Assign the same network name to all the personal
computers to be connected. Check the box that says
[This is a computer-to-computer (ad hoc) net-
work...]
Data encryption
You are strongly recommended to set a Network
key to encode communications data. If a key is not
set, there is a danger that your data may be used by
unauthorized persons.
a. Check the [Data encryption (WEP enabled)]
checkbox.
For ad hoc connection, remove the check mark
from the [Network Authentication (Shared
mode)] box.
For infrastructure mode, check the [Network
Authentication (Shared mode)] box if the access
point has shared key authentication. If it is of
open system authentication, remove the check
mark from the box.
b. Remove the check mark from the [The key is
provided for me automatically] box.
Network Key
The computer automatically distinguishes
between ASCII characters and hexadecimal char-
acters by the number of characters or digits
entered.
If you wish to use ASCII characters, enter the
network key in a string consisting of five or thir-
teen characters. The characters that can be used
for the Network key are: 0 - 9, A - Z, a - z, _
If you wish to use a hexadecimal number, enter
the network key in a string consisting of 10 or 26
characters. The characters that can be used for
the network key are: 0 - 9, A - F, a - f
For ad hoc connections, enter the same network
key for all computers connected to the network.
For infrastructure connection, enter the value to
match the access point. For information about
the access point, refer to the access point manual.
Type the same value in the [Confirm network
key] box.
Key Index
Set the [Key Index] to “1”. It can be any number
from 1 to 4, but “1” is most typically used.
6.
Click the [OK] button. You will return to the Wire-
less Network Properties window. Confirm that the
name you entered has been added to the [Preferred
Networks] box.
7.
Restart your system for the changes to take effect.
CONNECTION TO THE NETWORK
If there is the administrator of the network, contact the
network administrator for data settings prior to
connecting to the network.
Setting the network
Perform the “Setting TCP/IP” and “Confirming the
computer and work group names” operations for
network connection.
Setting TCP/IP
1.
Click the [Start] -> [Settings] -> [Control Panel].
P O I N T
To change the setting of the IP address, you need to be
logged in from Windows as an administrator.
P5010.book Page 63 Monday, April 7, 2003 6:39 PM
Содержание FPCM11642 - LB T5010 C2D/2.4 13.3 2GB-160GB DVDR WLS CAM W7P
Страница 2: ...L i f e B o o k P 5 0 0 0 N o t e b o o k ...
Страница 6: ...L i f e B o o k P 5 0 0 0 N o t e b o o k ...
Страница 7: ...1 Preface ...
Страница 8: ...L i f e B o o k P 5 0 0 0 N o t e b o o k ...
Страница 10: ...2 L i f e B o o k P 5 0 0 0 N o t e b o o k S e c t i o n O n e ...
Страница 11: ...3 2 Getting to Know Your LifeBook Notebook ...
Страница 12: ...4 L i f e B o o k P 5 0 0 0 N o t e b o o k S e c t i o n T w o ...
Страница 28: ...20 L i f e B o o k P 5 0 0 0 N o t e b o o k S e c t i o n T w o ...
Страница 29: ...21 3 Getting Started ...
Страница 30: ...22 L i f e B o o k P 5 0 0 0 N o t e b o o k S e c t i o n T h r e e ...
Страница 37: ...29 4 User Installable Features ...
Страница 38: ...30 L i f e B o o k P 5 0 0 0 N o t e b o o k S e c t i o n F o u r ...
Страница 56: ...48 L i f e B o o k P 5 0 0 0 N o t e b o o k S e c t i o n F o u r ...
Страница 57: ...49 5 Using the Integrated Wireless LAN Optional device ...
Страница 58: ...50 L i f e B o o k P 5 0 0 0 N o t e b o o k S e c t i o n F I v e ...
Страница 83: ...75 6 Troubleshooting ...
Страница 84: ...76 L i f e B o o k P 5 0 0 0 N o t e b o o k S e c t i o n S i x ...
Страница 98: ...90 L i f e B o o k P 5 0 0 0 N o t e b o o k S e c t i o n S i x ...
Страница 99: ...91 7 Care and Maintenance ...
Страница 100: ...92 L i f e B o o k P 5 0 0 0 N o t e b o o k S e c t i o n S e v e n ...
Страница 104: ...96 L i f e B o o k P 5 0 0 0 N o t e b o o k S e c t i o n S e v e n ...
Страница 105: ...97 8 Specifications ...
Страница 106: ...98 L i f e B o o k P 5 0 0 0 N o t e b o o k S e c t i o n E i g h t ...
Страница 110: ...102 L i f e B o o k P 5 0 0 0 N o t e b o o k S e c t i o n E i g h t ...
Страница 114: ...106 L i f e B o o k P 5 0 0 0 N o t e b o o k S e c t i o n E i g h t ...
Страница 115: ...107 9 Glossary ...
Страница 116: ...108 L i f e B o o k P 5 0 0 0 N o t e b o o k S e c t i o n N i n e ...

