


Removing and installing components during servicing
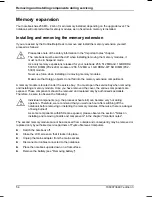
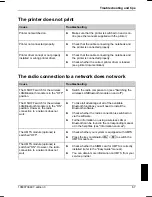
Mounting the cover
►
Place the cover on in the direction of the
arrow (1).
3
2
1
►
Swivel the cover in the direction of the
arrow (2).
►
Fasten the cover with the screws (3).
►
Install the battery again (see "Inserting the battery").
►
Turn the notebook over and place it on a flat surface.
►
Reconnect the cables that you disconnected before.
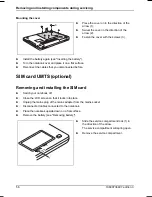
SIM card UMTS (optional)
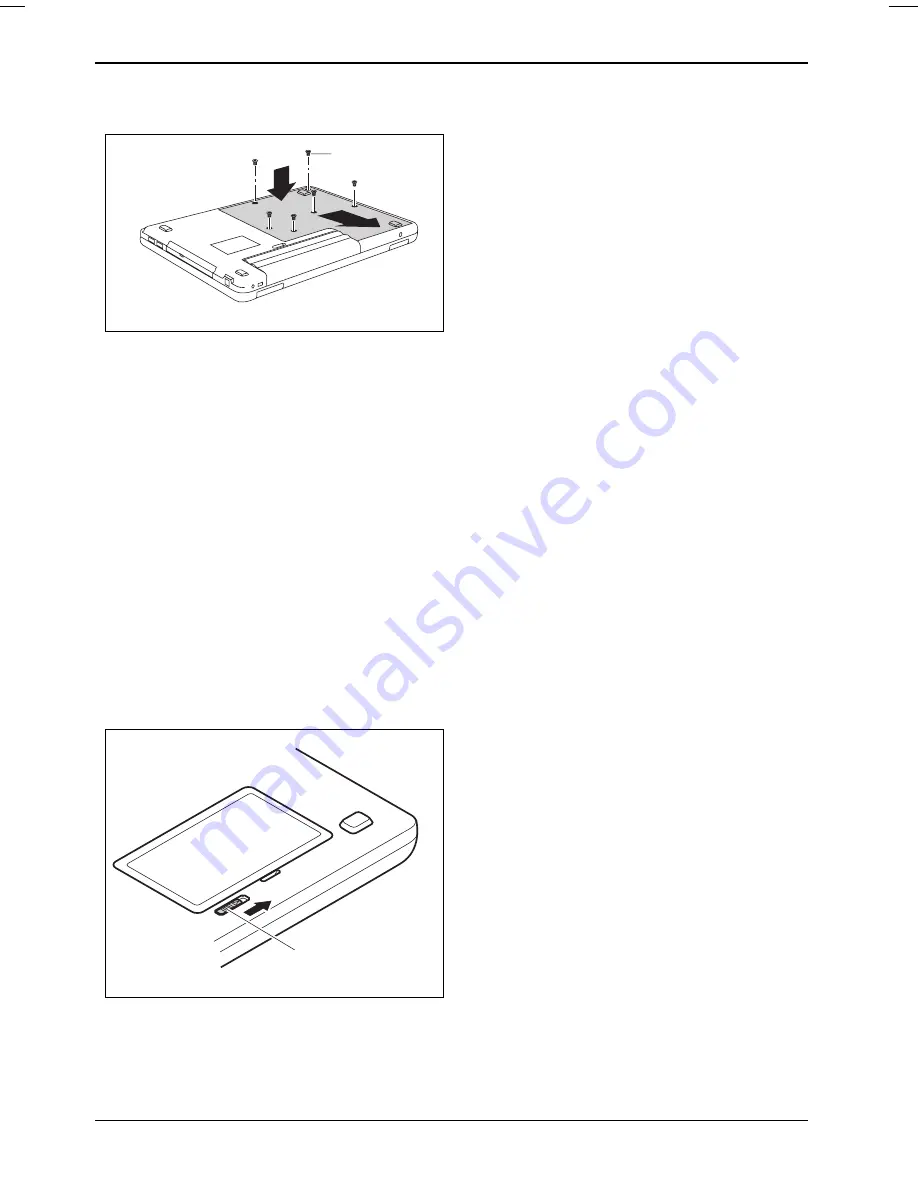
Removing and installing the SIM card
►
Switch your notebook off.
►
Close the LCD screen so that it locks into place.
►
Unplug the mains plug of the mains adapter from the mains socket.
►
Disconnect all cables connected to the notebook.
►
Place the notebook upside down on a flat surface.
►
Remove the battery (see "Removing battery").
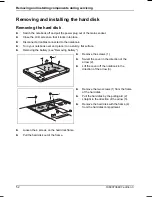
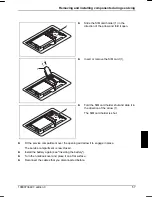
1
►
Slide the service compartment lock (1) in
the direction of the arrow.
The service compartment will spring open.
►
Remove the service compartment.
56
10600736497, edition 3
Содержание AMILO Si 1848
Страница 1: ...Notebook EasyGuide English AMILO Si Series...
Страница 3: ......
Страница 10: ...Contents 10600736497 edition 3...
Страница 14: ...Ports and operating elements 4 10600736497 edition 3...
Страница 22: ...Using your notebook for the first time 12 10600736497 edition 3...
Страница 50: ...Using your notebook 40 10600736497 edition 3...
Страница 68: ...Removing and installing components during servicing 58 10600736497 edition 3...
Страница 78: ......