256
Maintenance
5
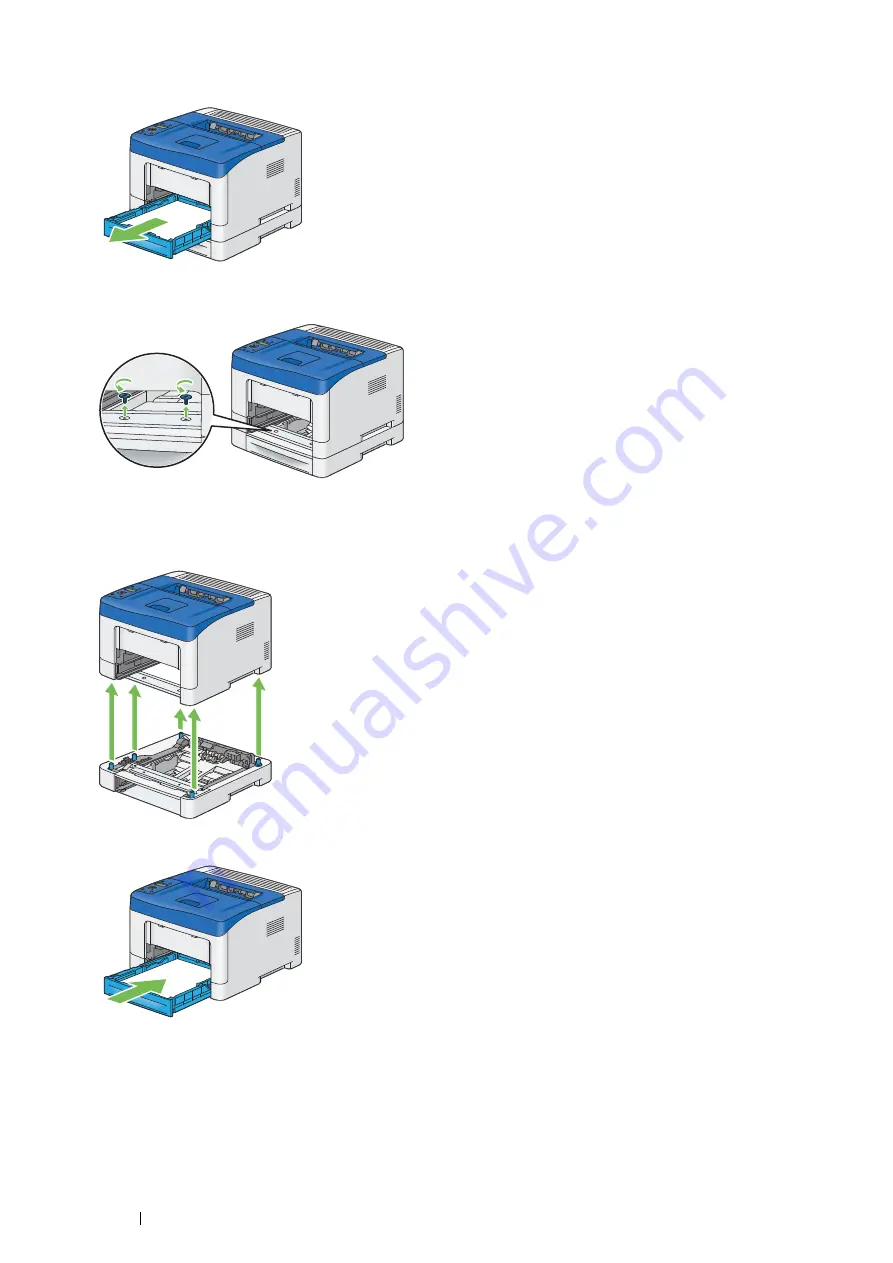
Pull the standard 250 sheet tray out of the printer about 200 mm. Hold the standard 250 sheet tray with both
hands, and remove it from the printer.
6
Remove the two screws joining the printer and the optional 250 sheet feeder by unscrewing them with a coin or
similar object.
NOTE:
•
The screw hole is located in 70 mm recess from the front of the printer.
7
Gently lift the printer off the optional 250 sheet feeder, and place it on a level surface.
8
Insert the standard 250 sheet tray into the printer, and push until it stops.
IMPORTANT:
•
Do not use excessive force on the tray. Doing so could damage the tray or the inside of the printer.
Содержание DocuPrint P355 d
Страница 1: ...DocuPrint P355 d P355 db User Guide ...
Страница 4: ...4 Preface ...
Страница 10: ...10 Contents ...
Страница 49: ...Basic Operation 49 3 Click Wireless Network Kit b g n ...
Страница 58: ...58 Basic Operation ...
Страница 64: ...64 Printer Management Software ...
Страница 102: ...102 Printer Connection and Software Installation 3 Click Wireless Network Kit b g n 4 Click Start wireless settings ...
Страница 103: ...Printer Connection and Software Installation 103 5 Click Wireless Configuration 6 Select Wizard and then click Next ...
Страница 110: ...110 Printer Connection and Software Installation ...
Страница 148: ...148 Printing Basics ...
Страница 184: ...184 Using the Operator Panel Menus ...
Страница 232: ...232 Maintenance 8 Insert the bypass tray into the printer push until it stops and close the cover ...
Страница 264: ...264 Contacting Fuji Xerox ...
Страница 271: ......


