7
CHECKING THE FLUID LEVEL
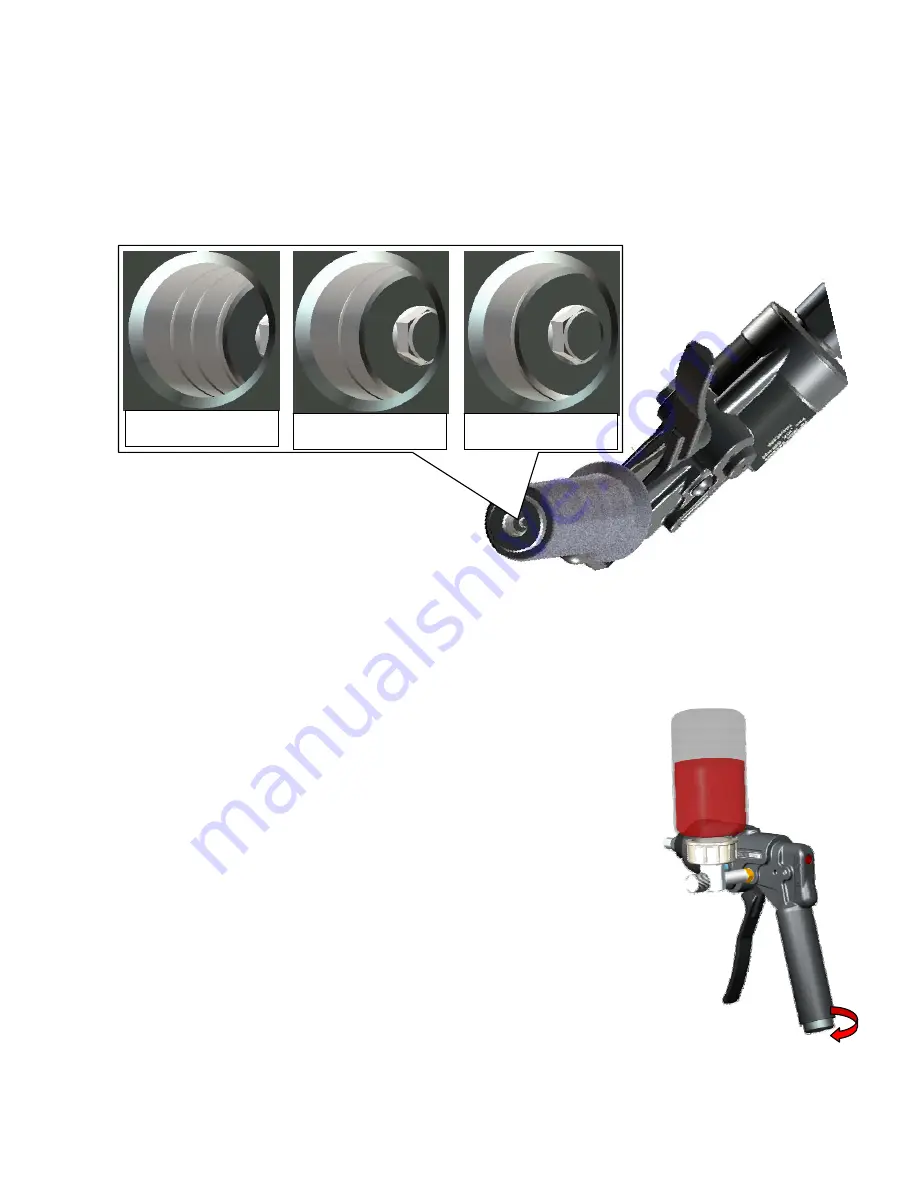
Turn the riveter upside down and observe the position of the indicator with respect to the silver grooves visible inside
the handle.
•
One indicator line is visible
: the tool is full of fluid. The tool was filled and bled properly
•
Two indicator lines are visible
: the fluid level is OK for optimal function
FULL
LEVEL OK
EMPTY
•
Three indicator lines are visible
: the fluid level is dangerously low. Inspect for leaks, service and re-fill as
necessary.
FINAL STEP IN FILLING THE RIVETER
Clean the riveter thoroughly and push the foam insulation (43) all the way over the handle.
This foam insulation is part of the service kit F800KS and we recommend replacing it every time the tool is serviced.
REPLENISHING FLUID
This operation is useful whenever you need to add some fluid in order to restore the fluid level. It cannot be used after
completed disassembly; prime and fill with fluid in that case (see previous page).
Tools needed: 5/32” hex wrench and the 700A77 Bleeder Bottle with F1484 adaptor.
The Bleed Bottle should have at least 2 fl oz. (about 5 mL) of fluid (recommended
fluid on page 7)
•
Remove the side screw, spring and ball (15, 16, 45 & 46) and place them in a
clean place.
•
Attach the bleed bottle to the side hole;
•
With the bottle up-side down (see picture) unthread the reservoir piston (44) until
fully disengaged; do not pull the piston assembly out of the reservoir.
During this process, fluid will be drawn into the reservoir.
•
Remove the bleed bottle and place the ball and spring (15 & 16) back into the
side port, then tighten the screw and seal (45 & 46).
•
Thread-in and tighten the reservoir piston (44); check the fluid level
•
If the fluid level is still low, then tool needs to be primed and filled (see page 6).


